
Azure is a simple and cheap way to have a Database. You can rent your Azure Database of 2 GB per 5 USD per month. That is a very cheap price. You can also administer your Database from your Android or your iPhone, which is very interesting.
It is also possible to create your Windows Application using Visual Studio and connect to SQL Azure. In this new chapter, we are going to create Windows application in C# and connect to a SQL Azure database. We are going to retrieve the information of a table stored in Azure in our Windows application.
Requirements
- An Azure subscription.
- An Azure Database Installed
- The Visual Studio installed. In this example, the Visual Studio 2015 was used.
Getting started
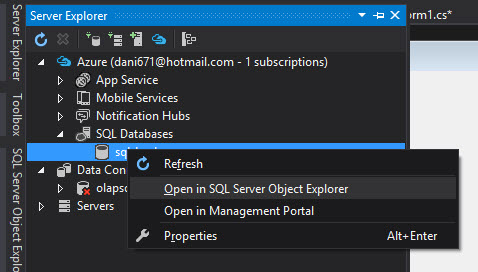
Open the Visual Studio, go to the Server Explorer pane and open the SQL Server Object Explorer for the database created (see the requirements if you do not have a SQL Azure installed):

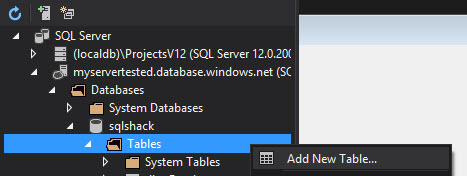
Figure 1. The Server Explorer In the SQL Server Object explorer go to the Server>Databases>the database created>Tables and right click and select the Add New Table option:
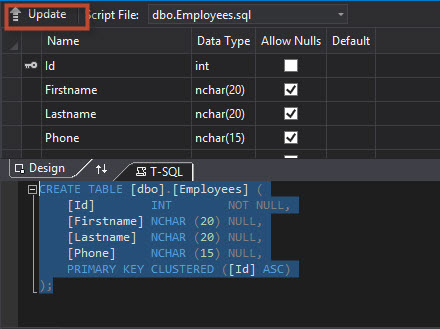
Figure 2. The SQL Server Object Explorer Create a table and press the Update button. In this sample, we will create a table named Employees. There are few steps after pressing the update icon that were already explained in the previous chapter. Also, insert some data in the table:
123456789CREATE TABLE [dbo].[Employees] ([Id] INT NOT NULL,[Firstname] NCHAR (20) NULL,[Lastname] NCHAR (20) NULL,[Phone] NCHAR (15) NULL,PRIMARY KEY CLUSTERED ([Id] ASC));
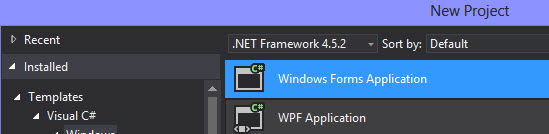
Figure 3. Creating a new table in SQL Azure To create the Project go to File>New>Project and select Windows Forms Application. You can create Console applications, Web applications, WPF applications, etc. In this example, we will create a Windows Application:
Figure 4. Creating a New Project
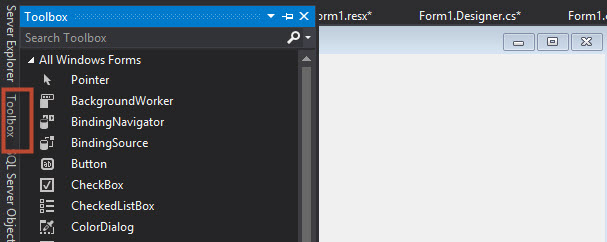
Figure 5. The Windows Forms Application In the Toolbox, drag and drop a Button and a Data Grid View:
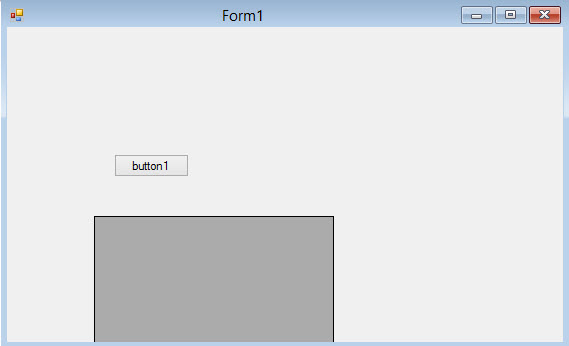
Figure 6. The Toolbox Your application will be similar to the following one:
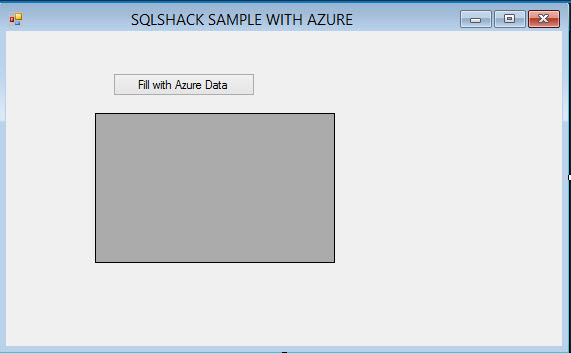
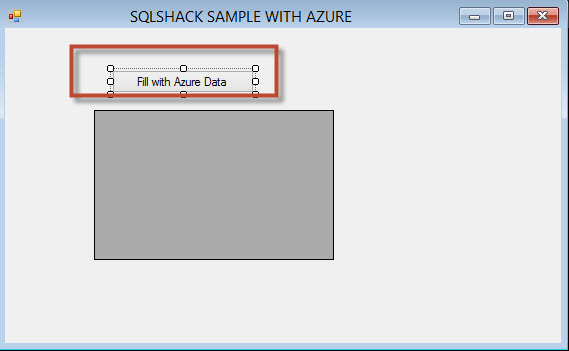
Figure 7. The Windows Form Now, change the text of the Form and the text and also change the DataGridView name:
Form1.Text= SQLSHACK SAMPLE WITH AZURE
Button1.Text= Fill with Azure Data
DataGridView.Name=dgvThe form will now look like as follows:
Figure 8. The Windows Form changed Now, we are going to create the connection information in the App.config file. The App.config file is a XML file used to store configuration. In this example, we will store the connection string. Go to the App.config in the solution explorer and double click it.
Figure 9. The App.config In the App.config, write this code in order to add the SQL Azure connection information:
1234567891011121314<?xml version="1.0" encoding="utf-8" ?><configuration><startup><supportedRuntime version="v4.0" sku=".NETFramework,Version=v4.5" /></startup><connectionStrings><clear /><add name="MyConnection"connectionString="Server=tcp:myservertested.database.windows.net,1433;Database=sqlshack;User ID=daniel@myservertested;Password=ThisIsmyPwd123;Encrypt=True;TrustServerCertificate=False;Connection Timeout=30;" /></connectionStrings></configuration>The most important part of this code is the name specified (add name=”MyConnection”) because we will call this connection using that name.
The rest is the connection string. We are using a TCP connection to a server named myservertested.database.windows.net. The port used is the 1433 and the name of the database is sqlschack. The User used to connect is specified when the azure database was created. In this example, the user name is daniel@myservertested, the password is ThisIsmyPwed123 and the encryption is set to true and the Trust Server Certificate is set to false. The Timeout is 30 seconds.
Now let’s add code to the button. Double click on the button to add some code:
Figure 10. Adding code to the button Write this code in order to fill the datagridview with the SQL Azure information:
1234567891011121314151617181920private void button1_Click(object sender, EventArgs e){//Create a connection calling the App.configstring conn = ConfigurationManager.ConnectionStrings["MyConnection"].ConnectionString;//The query to useSqlConnection connection = new SqlConnection(conn);//Create a Data AdapterSqlDataAdapter dadapter = new SqlDataAdapter(query, connection);//Create the datasetDataSet ds = new DataSet();//Open the connectionconnection.Open();//Fill the DatSet with the adapter information dadapter.Fill(ds, "employees");connection.Close();//Bind the datagridview with the data setdgv.DataSource = ds;dgv.DataMember = "employees";}Let’s analyze the code:
1234string conn =ConfigurationManager.ConnectionStrings["MyConnection"].ConnectionString;This line creates a string with the connection of the app.config file created on step 10. Note that the name MyConnection must match with the name of the app.config file.
123string query = "SELECT * FROM employees";We are storing the query in a string variable.
123SqlConnection connection = new SqlConnection(conn);This line is just creating a connection using the string created before.
123SqlDataAdapter dadapter = new SqlDataAdapter(query, connection);The SqlDataAdapter is the bridge between SQL Server and a DataSet. We need to specify the query and connection for the SqlDataAdapter.
123DataSet ds = new DataSet();We are creating a DataSet here. The dataset is an in-memory cache of data retrieved from a data source
12345connection.Open();dadapter.Fill(ds, "employees");connection.Close();In these 3 lines we are opening the connection and filling the dataset with data of the employees table.
1234dgv.DataSource = ds;dgv.DataMember = "employees";In these two last lines, we are assigning the dataset to the Data Grid view dgv and assigning the employees as the data members
At the top of the code add these lines:
12345678910111213using System;using System.Collections.Generic;using System.ComponentModel;using System.Data;using System.Drawing;using System.Linq;using System.Text;using System.Threading.Tasks;using System.Windows.Forms;using System.Data.SqlClient;using System.Configuration;By default, only these two lines should be missing:
1234using System.Data.SqlClient;using System.Configuration;These lines are used to connect to SQL Server (SQL Azure in this case) and the Configuration is used to retrieve information from the app.config file.
The complete code should be like this:
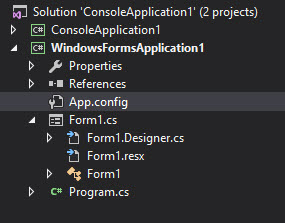
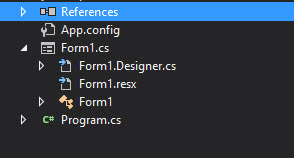
1234567891011121314151617181920212223242526272829303132333435363738394041424344454647using System;using System.Collections.Generic;using System.ComponentModel;using System.Data;using System.Drawing;using System.Linq;using System.Text;using System.Threading.Tasks;using System.Windows.Forms;using System.Data.SqlClient;using System.Configuration;namespace WindowsFormsApplication1{public partial class Form1 : Form{public Form1(){InitializeComponent();}private void button1_Click(object sender, EventArgs e){//Create a connection calling the App.configstring conn = ConfigurationManager.ConnectionStrings["MyConnection"].ConnectionString;//The query to usestring query = "SELECT * FROM employees";SqlConnection connection = new SqlConnection(conn);//Create a Data AdapterSqlDataAdapter dadapter = new SqlDataAdapter(query, connection);//Create the datasetDataSet ds = new DataSet();//Open the connectionconnection.Open();//Fill the Data Adapterdadapter.Fill(ds, "employees");connection.Close();//Bind the datagridview with the data setdgv.DataSource = ds;dgv.DataMember = "employees";}}}Finally, if it was not added the System.Configuration. In the Solution Explorer, go to references:
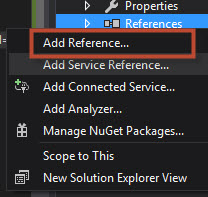
Right click on references and select Add Reference:
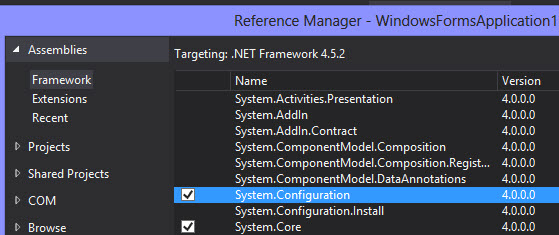
Select the System Configuration. This is necessary to retrieve information from the App.config file:
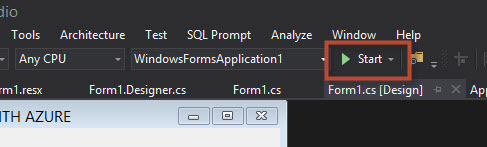
Once you have the code done, you can start the application:
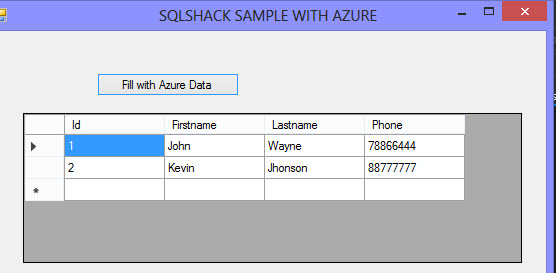
Press the Fill with Azure Data and you will be able to see the SQL Azure Data:

Conclusion
In this new article, we created a Windows Application in a local machine that access to the Azure information. You can create applications in C#, Visual Basic J# or any other language to connect to Azure. The process is very simple once you are familiar the Azure Portal.

He has worked for the government, oil companies, web sites, magazines and universities around the world. Daniel also regularly speaks at SQL Servers conferences and blogs. He writes SQL Server training materials for certification exams.
He also helps with translating SQLShack articles to Spanish
View all posts by Daniel Calbimonte
- PostgreSQL tutorial to create a user - November 12, 2023
- PostgreSQL Tutorial for beginners - April 6, 2023
- PSQL stored procedures overview and examples - February 14, 2023