
Introduction
In this chapter, we will work with Visual Studio to connect to SQL Databases in Azure.
The first part of this chapter will be to create a Database in the Azure Portal and the second part will be to connect in Visual Studio and create some Database Objects.
Requirements
- An Azure subscription.
- A local machine with Windows and Visual Studio installed. In this example, the Visual Studio 2015 was used.
Getting started
Let’s start opening the Azure New Portal
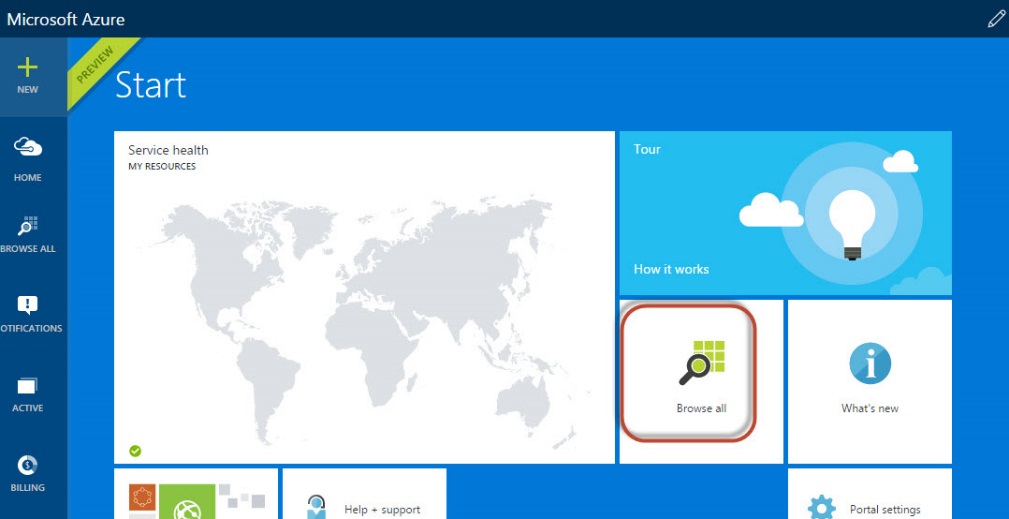
To create a new SQL database, in the new Portal Press Browse All.

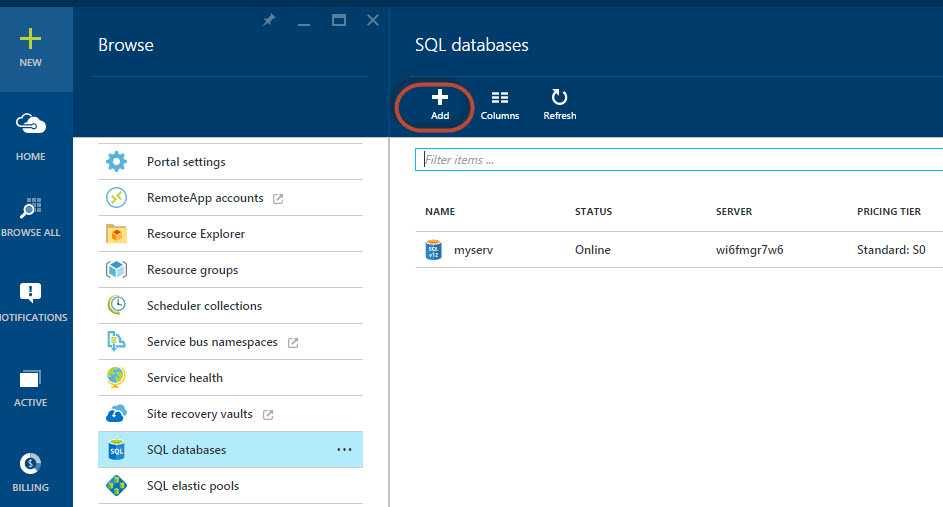
Figure 1. The Azure Portal Go to SQL databases and press the Add icon to add a new SQL database.
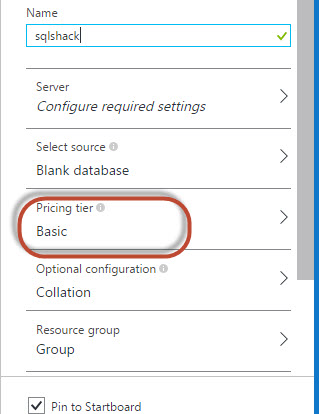
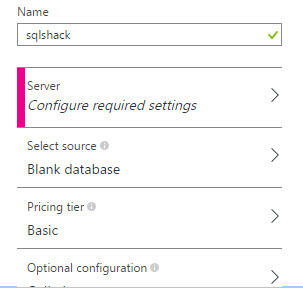
Figure 2. The SQL databases Add a name for the SQL Database and click on the Pricing tier option.
Figure 3. The sql database options If you like your money use a database cheaper. Specially if you are testing like me. The more GB, the more expensive it is. I will use the Basic Pricing. Verify your company needs and the space required for your company in order to chose the best option. The basic are usually the cheapest options, the standard is the intermediate option and the premium the most expensive option.
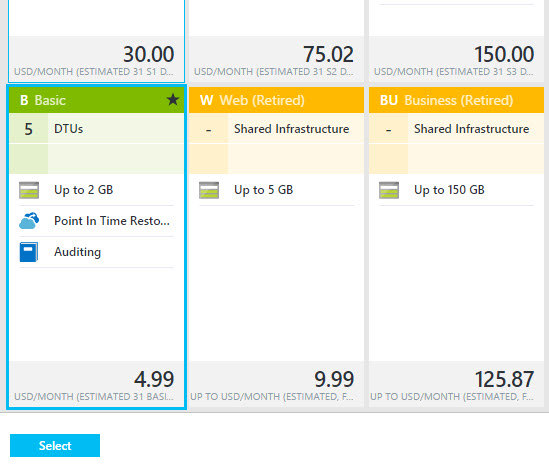
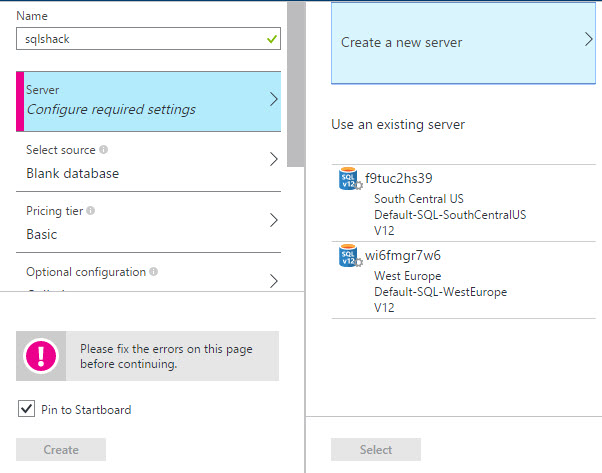
Figure 4. The prices for databases Select the server option to select an existing server or to create a new one. In this example, we will create a new Server.
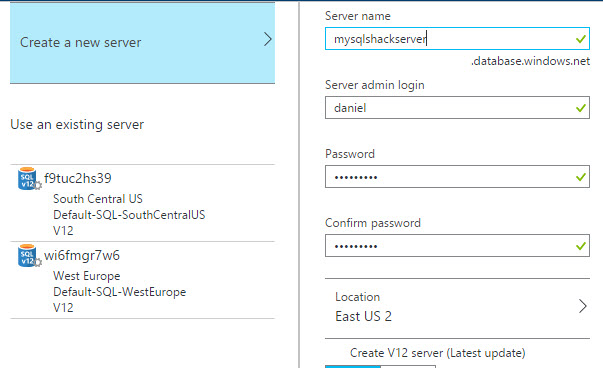
Figure 5. Server options Select the option to create a new server.
Figure 6. New server Specify the server name, the login and password for the server. You will also need to verify the password. The location will allow you to specify where do you want to store the server.
Figure 7. Server admin In the portal, you will see a notification and a message that the database is being created.
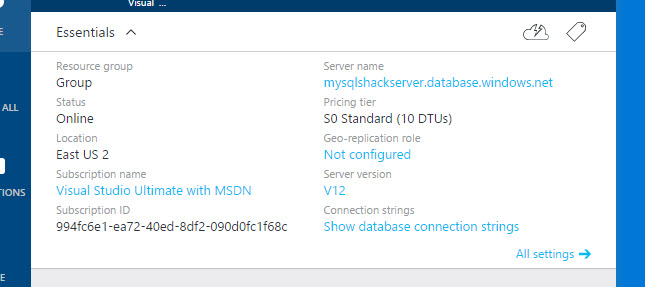
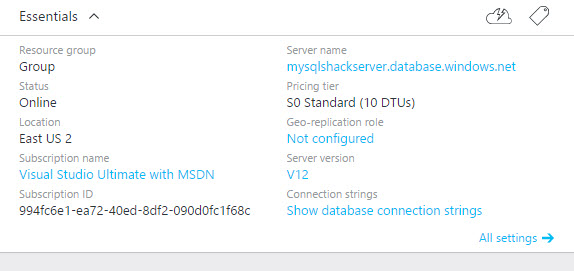
Figure 8. Database Creation If everything is OK, a database will be created. The complete name is the Server Name. You can group the resources and assign your database to a group. The last version of groups is the V12.
You can connect from other application with the information displayed in the Show database connection strings.
Figure 9. The SQL Database characteristics The pricing tier is the Basic S0. The DTU is the Database Throughput Unit. It is used to measure the performance. For example, a machine with 10 DTUs is 10 times more powerful in performance than a machine of 1 DTU.
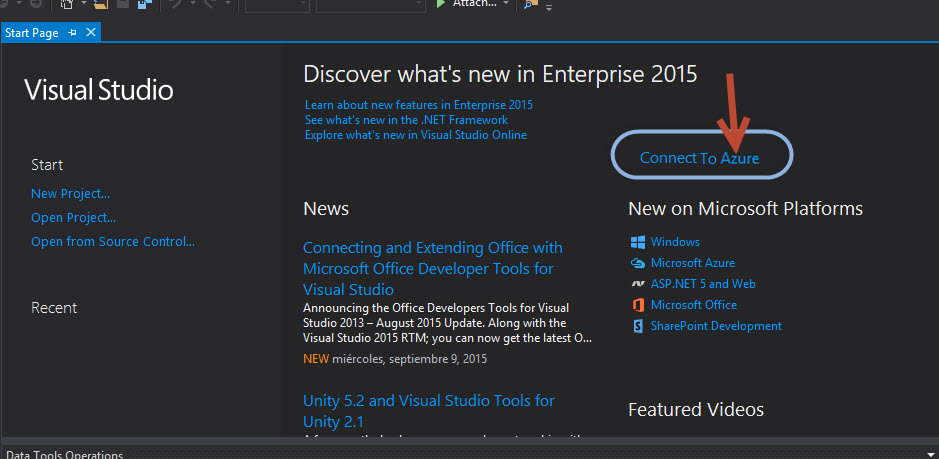
Figure 10. The pricing tier Press the Connect to Azure option.
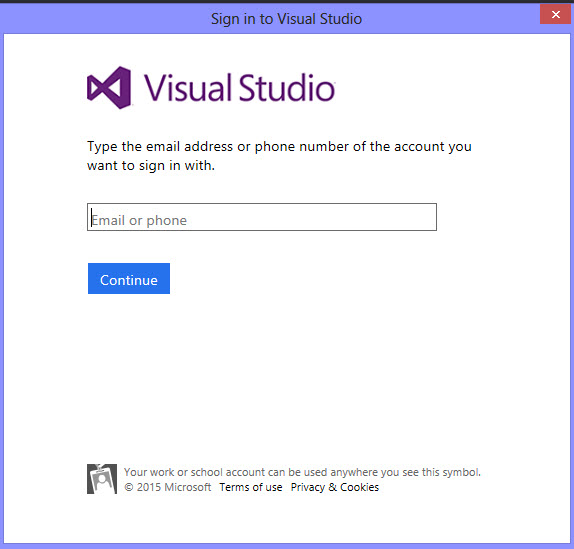
Figure 11. Visual Studio Specify the email address associated with your Azure Subscription and press continue.
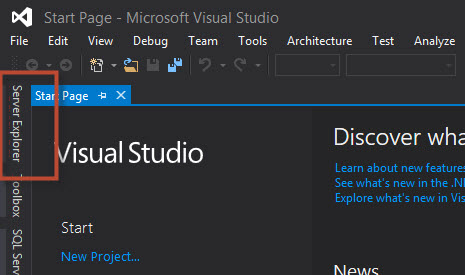
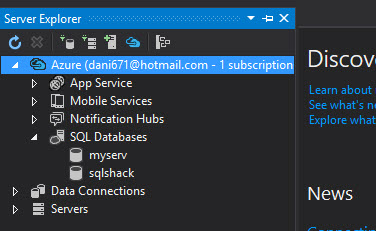
Figure 12. Connection to Visual Studio Click on the Server Explorer to verify the existing Azure objects
Figure 13. The Server Explorer You will be able to see the Azure icon associated with the subscription. Expand it and expand the SQL Databases.
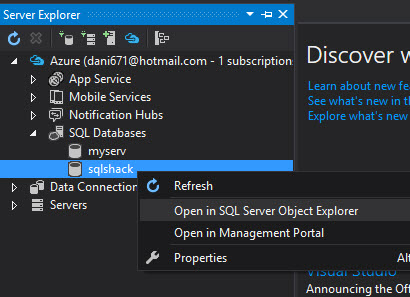
Figure 14. Connection to Azure Right click on the databases created in steps 1 to 10, and select Open in SQL Server Object Explorer. With this option, you will be able to see the database objects in Azure.
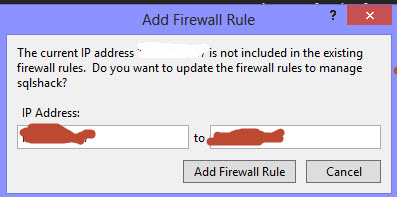
Figure 15. The SQL Server Object Explorer You will receive a request to include the IP address in the firewall rules. With this option you will be able to access to the Azure Database. Press the Add Firewall Rule button. Now your IP Address is enabled.
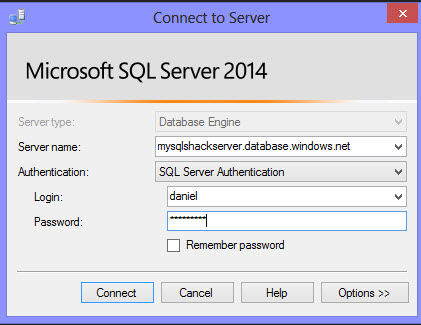
Figure 16. Adding Firewall Rule Now, connect to SQL Server using the credentials specified on step 7.
Figure 17. Database credentials You are now connected to Azure. Expand the database and you will be able to see the Tables, Views, synonyms and the Programmability section to create stored procedures, functions.
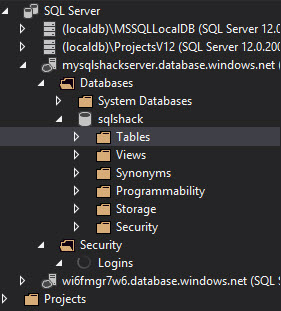
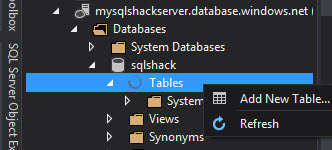
Figure 18. The database objects To create a new table select the tables folder and press the Add New Table option.
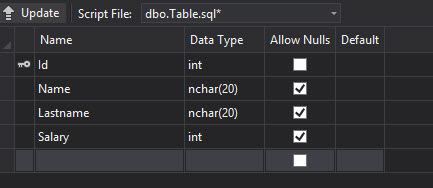
Figure 19. Adding new tables Add some columns and define the datatypes for your table. In this example we are adding a Name a Lastname, the salary and the Id. The name and lastname are characters and the Id and Salary are integers.
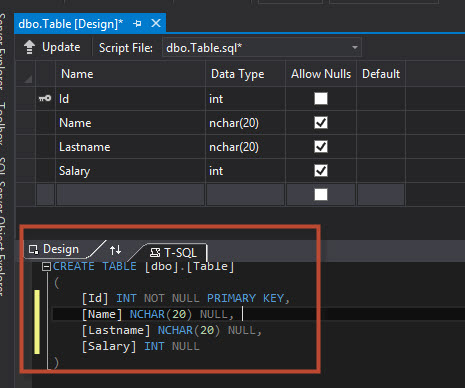
Figure 20. The Table Columns and data types As you can see, you can design the table and see the T-SQL script also. This is very useful if you want to edit the T-SQL directly or if you want to learn T-SQL. Change the table name of the table to employees.
Figure 21. The T-SQL code Press Update to update the table in Azure. The script will be executed in the Azure database to create the new table named dbo.employees.
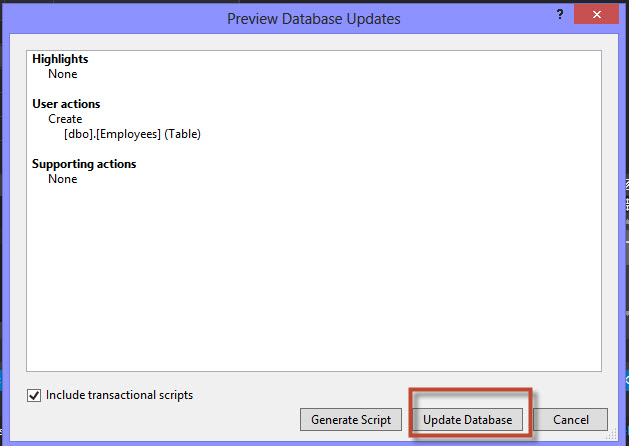
Figure 22. The Update option You will receive a Preview Database Updates to confim the update. Press the Update Database.
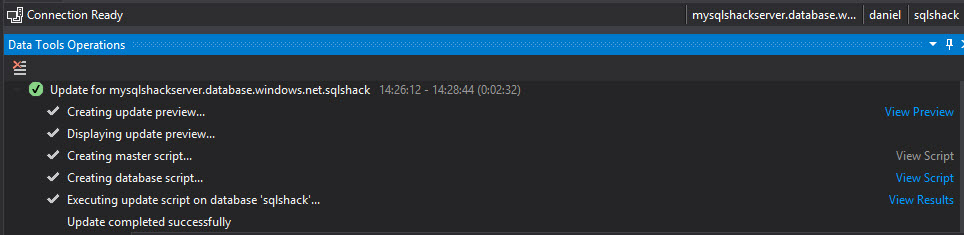
Figure 23. Preview Database Update The details of the execution will be displayed. The script will be created and executed in Azure. If there are failures, the windows below will show where the execution failed.
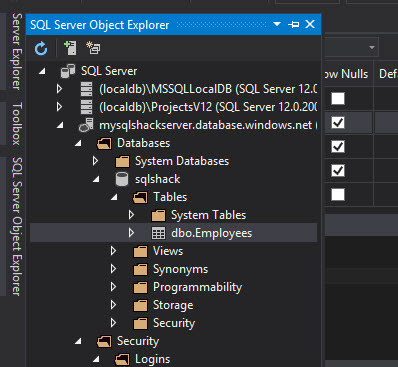
Figure 24.The Data Tools Operations In the SQL Server Object Explorer, you will be able to see the table dbo.employees created.
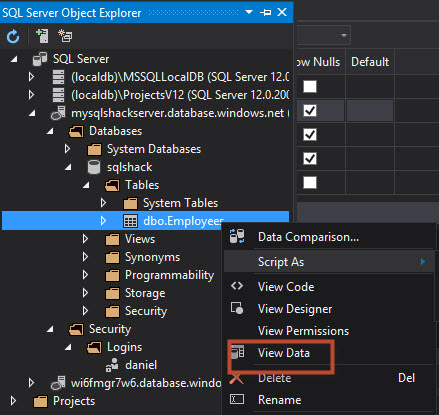
Figure 25. The table created To view the data of the table, right click on the table and select View Data.
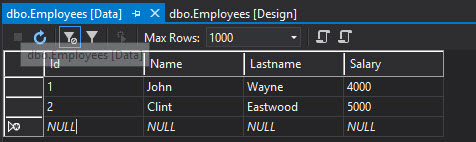
Figure 26. View Data Write names, lastnames, salaries, ids. Try to add data similar to the following picture:
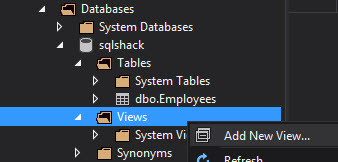
Figure 27. Adding data to the table To create a view related to the table dbo.Employees, right click on the Views and select Add New view.
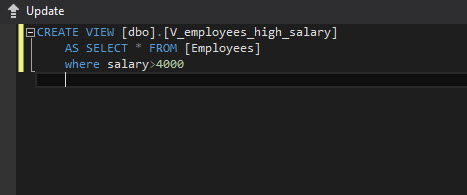
Figure 28. New View We will name the view v_employees_high_salary and the view will show all the employees from the employees table whose salary is higher than 4000.
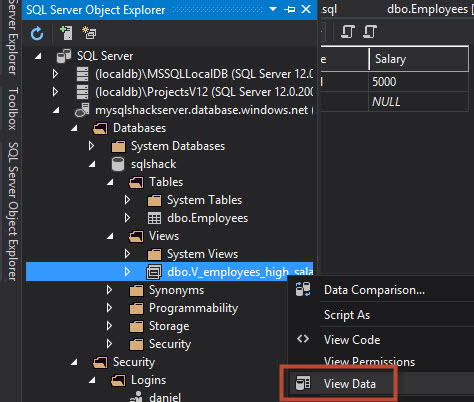
Figure 29. T-SQL code to create a new view Repeat the steps 22 to 24 to update the view in Azure. Once you create the view, go to the SQL Server Explorer, select the database and expland the Views folder to see the new folder created. To verify the data right click on the view and select View data.
- If everything is OK you will see the Clint Eastwood information. Because his salary is higher than 4000 USD. John Wayne salary is lower, then his data is not displayed. As you can see, working with Azure using Visual Studio is a straightforward task.
Figure 31. The View Data filtered from the table

The Visual Studio
We created a SQL Database in Azure, now we will connect with Azure.


Conclusion
In this article, we showed how to create tables in SQL Azure and views using Visual Studio. As you can see, the process is very simple. In later chapters, we will learn more.

He has worked for the government, oil companies, web sites, magazines and universities around the world. Daniel also regularly speaks at SQL Servers conferences and blogs. He writes SQL Server training materials for certification exams.
He also helps with translating SQLShack articles to Spanish
View all posts by Daniel Calbimonte
- PostgreSQL tutorial to create a user - November 12, 2023
- PostgreSQL Tutorial for beginners - April 6, 2023
- PSQL stored procedures overview and examples - February 14, 2023