
SQL Server Data Tools – a free standalone download or and add-in to visual studio comes in different flavors and versions. Although this blog post uses Visual Studio 2012 and SSDT stand-alone the principles are example are also valid on Visual Studio 2013.
Note: To learn more about Database DevOps CI/CD, please read Different Stakeholders, Different Views: Why Database Management Requires a Systematic Approach article.
As you know SSDT is Microsoft developer tools for working with SQL Server databases on premises and in the cloud. It supersedes Management Studio in development functionality adding the powerful Visual Studio IDE to the rescue of developers that – for too many years – were stuck with SQL Server Management Studio.
When SQL Server 2012 was released, SSDT was also released and since then many versions have been released, not necessary following the release pattern of SQL Server.
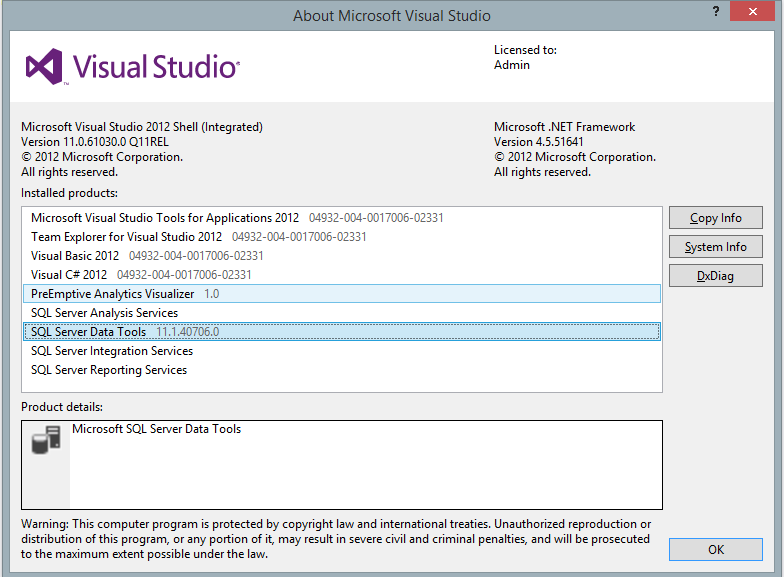 Figure 1 SSDT version number
For each release, some new features are added. Some are still missing but they are probably coming in an upcoming release.
Team Foundation Server on the other hand has been around for quite a while. Team Foundation Server is the collaboration platform at the core of Microsoft’s application lifecycle management (ALM) solution. TFS supports agile development practices, multiple IDEs and platforms locally or in the cloud and gives you the tools you need to effectively manage software development projects throughout the IT lifecycle.
Remember : For SSDT in Visual Studio 2012 you will need TFS Express 2012. If you have SSDT 2013 you will need TFS Express 2013. You can’t mix versions!
In this post, we are going to focus on the interaction between SSDT and TFS. Developing locally and publishing the changes to an on-premises instance of SQL Server. We will look at how we can do continuous integration between development and other environments pushing the schema changes and upgrading the version numbers in a seamless manner upon successful build of the solution.
For more info about TFS, please read following: TFS overview
I am using the free version of TFS called TFS Express that can be installed locally. It is suitable for small projects only and is limited to five concurrent users. Download it here.
For creating a Visual Studio Online solution and more info about Visual Studio Online click here
On and Off-premises
At the time of writing, it is not possible to have Visual Studio Online (VSO) deploying to a local instance of SQL Server as VSO cannot “see” your on-premises SQL Servers. Even with a Hosted Build Controller.
The scenario
I am a database developer and I am working on an existing Azure SQL database that need some changes. I have some simple tables and I need to add a stored procedure to create customers ranking and a table to get hold of the customer ranking. The ranking should be calculated according to how much the customer has bought.
| Rank Name | Description |
| Inactive | No orders |
| Bronze | Orders under $100 |
| Silver | Orders $100 to $999 |
| Gold | Orders $1,000 to $9,999 |
| Platinum | Orders $10,000 and more |
Stored Procedure:
|
1 2 3 4 5 6 7 8 9 10 11 12 13 14 15 16 17 18 19 20 21 22 23 24 25 26 27 28 29 30 31 32 33 |
CREATE PROCEDURE [dbo].[uspRankCustomers] AS DECLARE @CustomerId int DECLARE @OrderTotal money DECLARE @RankingId int DECLARE curCustomer CURSOR FOR SELECT c.CustomerID, ISNULL(SUM(oh.OrderTotal), 0) AS OrderTotal FROM dbo.Customer AS c LEFT OUTER JOIN dbo.OrderHeader AS oh ON c.CustomerID = oh.CustomerID Group BY c.CustomerId OPEN curCustomer FETCH NEXT FROM curCustomer INTO @CustomerId, @OrderTotal WHILE @@FETCH_STATUS = 0 BEGIN IF @OrderTotal = 0 SET @RankingId = 1 ELSE IF @OrderTotal < 100 SET @RankingId = 2 ELSE IF @OrderTotal < 1000 SET @RankingId = 3 ELSE IF @OrderTotal < 10000 SET @RankingId = 4 ELSE SET @RankingId = 5 UPDATE Customer SET RankingId = @RankingId WHERE CustomerId = @CustomerId FETCH NEXT FROM curCustomer INTO @CustomerId, @OrderTotal END CLOSE curCustomer DEALLOCATE curCustomer GO |
Creating the project
Creating a project from an existing database in SSDT is straightforward.
In another blog post I will have a detailed look at the different ways to work with new and existing databases but for now let’s import an existing database in our project.
- Create a new SQL Server Database project
- Right click on the project name -> Import -> Import database
- Create a new connection to the server (or use an existing one, if one exists)
- Choose the database to import
- Leave the other settings as they are.
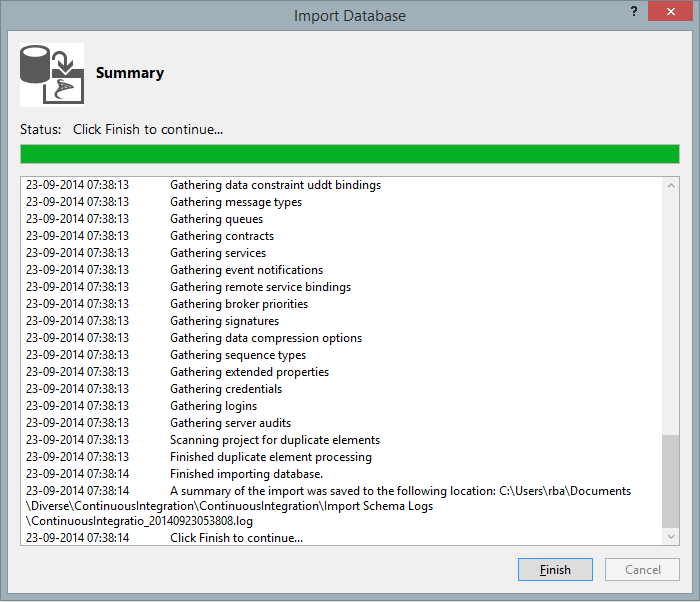
After a few seconds the import should be complete
 Figure 2: Database import complete
The first thing I always do when working on an existing database is taking a baseline for the solution. So I have an initial state of the database I eventually can return to when working on it. This is done by right-clicking on the database and choosing snapshot project. It will generate a dacpac file holding the database schema of the newly imported database. I usually name the file “baseline” and leave the timestamp so I now when it was created.
Adding the solution to Visual Studio Online
Now I need to add the database to the Source Control provider, in this case Visual Studio Online.
- Choose Team -> Connect to Team foundation Server and connect to my Visual Studio online project folder
- Now I can Choose File -> Source Control -> Add to source control
- And all my items should be added (but not checked-in)
- Check in now to save all items in the source control repository.
Implementing the changes
Now that I am done I can implement the changes necessary to database, adding the ranking table, the stored procedure and making changes to the customer table so it references the ranking table.
|
1 |
CONSTRAINT [FK_Customer_customerRanking] FOREIGN KEY (RankingID) REFERENCES [customerRanking]([Id]) |
Listing 2: adding Foreign Key to Customer table
I also add data to the CustomerRanking table as described in the scenario above
There is also another table that I think it is important to add: Deployment. The idea behind this table is to keep track of all the deployments I’ve made, using a post deployment script that is always executed each I perform my continuous integration
|
1 2 3 4 5 6 |
CREATE TABLE [dbo].[Deployment] ( [Id] INT NOT NULL IDENTITY(1,1), [DeploymentDate] DATETIME NOT NULL, CONSTRAINT [PK_Deployment] PRIMARY KEY ([Id]) ) |
Listing 3: Adding Deployment table
Now that I’ve done my changes I can build my project (necessary before taking a snapshot), take a snapshot project of my database, call it “change_complete”, and leave the timestamp as is.
Create a deployment profile
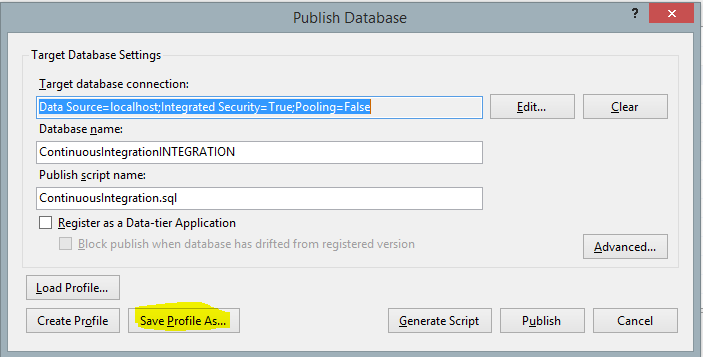
Before I can deploy I need to create a profile telling Visual Studio where to deploy upon successful build
- Right click the project and choose Publish
- Write the server name and the name of the database where it should be deployed to (in my example ContinuousIntegrationINT), but it can also be on Azure or other places
- Don’t publish but save the profile and give it a meaningful name
- Close the dialog without publishing
If you are connecting using a user name and password you need to manually edit the publish profile file afterwards as the password is not saved.
Figure 3: Create a deployment profile
Implementing the continuous integration
The idea is to have the database deployed each time I check the source code in. At the same time I want the deployment table to keep track of the deployments.
To achieve that I start by creating a post-deployment script:
- Right click on the project -> Add -> New item -> Post-deployment script (in the User script category)
Add some SQL to increment the deployment version and also to populate the CustomerRanking table and every other table that needs data.
12345678910insert into Deployment (DeploymentDate) values (getdate())if(select count(*) from CustomerRanking) = 0beginINSERT INTO [dbo].[CustomerRanking] ([Id], [Name], [Description]) VALUES (1, N'Inactive ', N'No orders ')INSERT INTO [dbo].[CustomerRanking] ([Id], [Name], [Description]) VALUES (2, N'Bronze ', N'Orders under $100 ')INSERT INTO [dbo].[CustomerRanking] ([Id], [Name], [Description]) VALUES (3, N'Silver ', N'Orders $100 to $999 ')INSERT INTO [dbo].[CustomerRanking] ([Id], [Name], [Description]) VALUES (4, N'Gold ', N'Orders $1,000 to $9,999 ')INSERT INTO [dbo].[CustomerRanking] ([Id], [Name], [Description]) VALUES (5, N'Platinum ', N'Orders $10,000 and more ')EndListing 4: Post deployment script
For modifying the deployment options go to the Source Control explorer tab and add a new build definition.
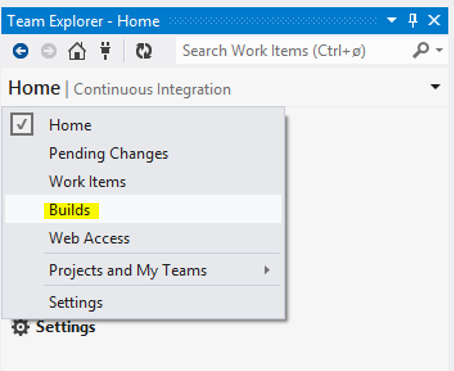
Figure 4: Adding a build definition
This is the page where you can control what happens during a build.
What we want here is to tell Visual Studio to use msbuild to deploy the database on any successful builds. This is done by:
On the Trigger page, choose Continuous Integration
Figure 5: Continuous integration option- On the process page make sure that the project is listed on the item to build property
On the process page I add the necessary build arguments
Figure 6: Process page

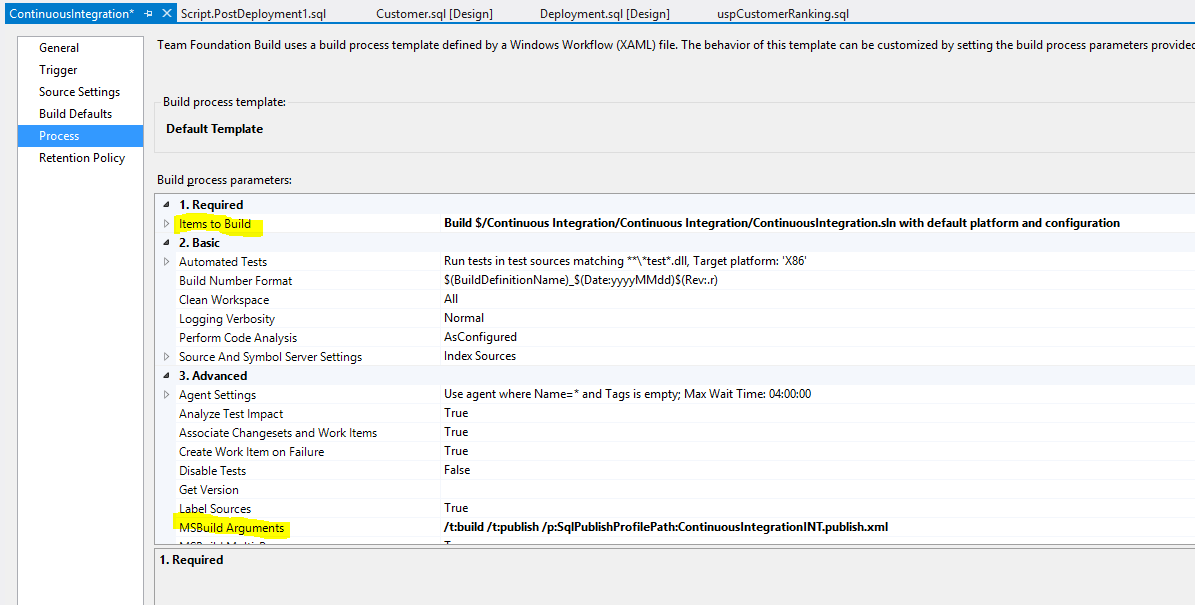
The arguments necessary for the example are:
- /t:build (builds the source code)
- /t:publish (published the code using the publish file)
- /p:SqlPublishProfilePath (the path of the publish file – relative to the project)
So in my case the arguments (separated by space) would be:
/t:build /t:publish /p:SqlPublishProfilePath=ContinuousIntegrationINT.publish.xml
You’re done!
Save the New build configuration. Every future check in should trigger a build and a publish to the database specified in the publish file.
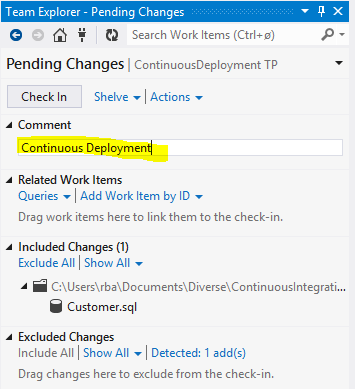
Next time you check in it, your build definition should kick in and build the project:
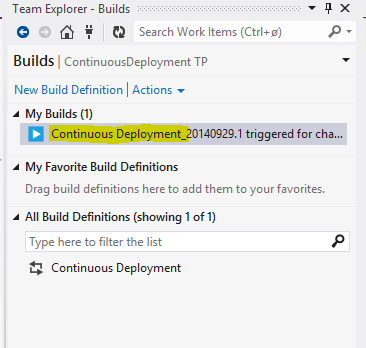
The Build menu of the Team Explorer should show the current build:
And finally the Build log should show the progress and status:
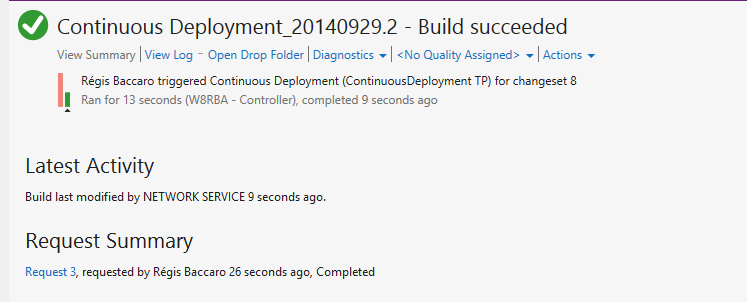
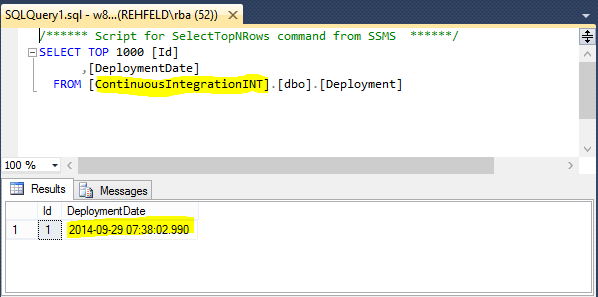
Finally the database specified in your Publish file (ContinuousIntegrationINT) should be created where you specified it and the schema copied and your post deployment script executed so the Deployment table should show the data of the deployment
In the next post I will show you how to do unit testing of your SSDT database project. In the meantime: Happy deploying!

His background and work experience mixes technology and business, providing him a unique edge to contribute to datawarehouse and SharePoint projects, being able to effectively interact with technical and business decision makers.
Régis is a frequent speaker at SQL Server conferences and is a board member of the Danish SQL Server User Group and the founder of the SQL Saturday Denmark community event.
In april 2014 Régis received the MVP award for SQL Server for his involvment in the product and the community.
View all posts by Régis Baccaro
- Continuous Deployment using SQL Server Data Tools and Visual Studio Online - February 2, 2015
- Creating Azure automation to start Azure VMs - February 2, 2015
- Deployment to several databases using SQL Server Data Tools and TFS using a Custom Workflow file - January 16, 2015