
Introduction
In earlier chapters, I show you how to create your Virtual Machine in Azure using Power Shell.
In this new chapter, I will show you how to get information about your VM machine already created. We will use PowerShell cmdlet commands to retrieve the information.
Requirements
I am assuming that you already have a VM in Azure installed.
- An Azure subscription.
- A VM Machine in Azure with SQL Server already installed (check my article about Azure VMs).
- A local machine with Windows installed with PowerShell.
Getting started
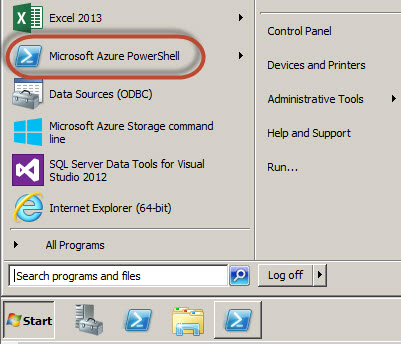
- In order to start, in the local machine open the Microsoft Azure PowerShell:
Get-AzureVM

Figure 1. Starting the Microsoft Azure PowerShell Let’s start with a simple command. The Get-AzureVM:
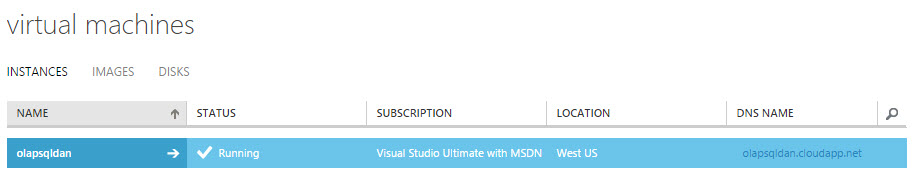
Figure 2. The Get-AzureVM cmdlet. By default, it shows the active VMs, the name and status of Azure VMs. You can verify in the Azure Portal the VM names:
Figure 3. The virtual machines in the Azure Portal Alternatively, you can run this command to get more information about the VM in Azure:
Get-AzureVM | select hostname,instancesize,IpAddress,NetworkInterfaces,OperationStatus, PowerSate, ServiceName,Status
Figure 4. The Get-AzureVM cmdlet The command shows the InstanceSize, the IP Address, The OperationStatus. The PowerState, ServiceName, Status.
The instance size is related to a specific price. You can find more information about prices and instance sized here.
The PowerState and OperationsStatus are very important to check if the VM is OK.
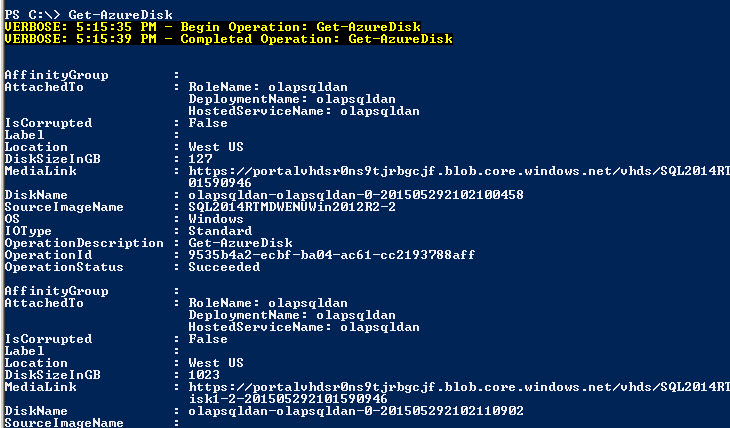
Another useful cmdlet is the Get-AzureDisk:
Figure 5. The Get-AzureDisk cmdlet The Get-AzureDisks shows all the disks, the status of them, their location, DiskSize, name and other useful information about the disk:
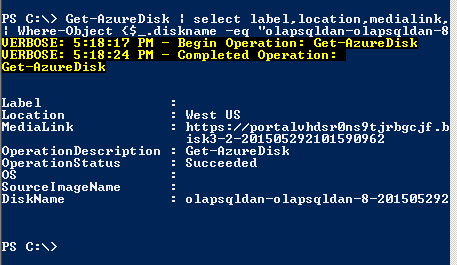
Figure 6. The Azure Disk results. By default, it shows all the disks, but you can specify the information that you want to check and specify the name of the disk:
Get-AzureDisk | select label,location,medialink,operationdescription,operationstatus,OS,sourceimagename,diskname| Where-Object {$_.diskname –eq "olapsqldan-olapsqldan-8-201505292102250296"}
Figure 7. Custom query about the disk information The command shows the Disk information of the disk whose name is olapsqldan-olapsqldan-8-201505292102250296.
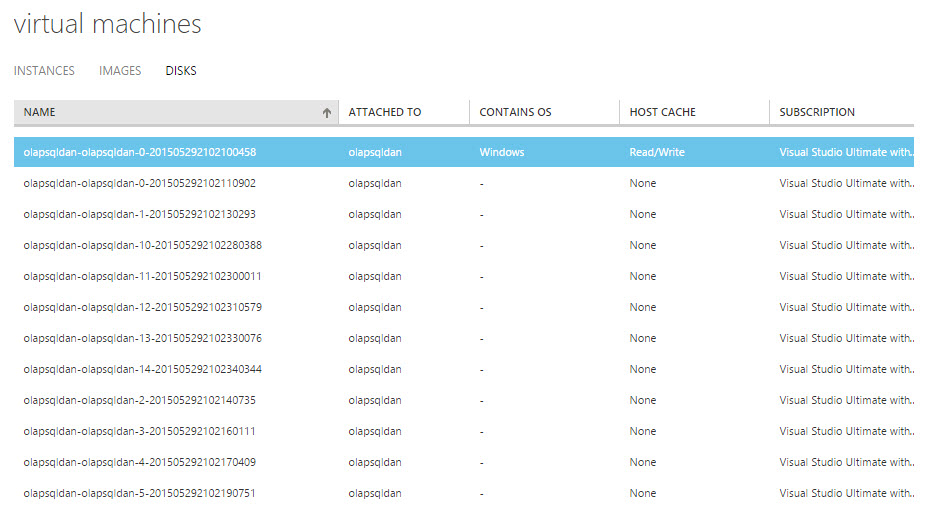
You can verify in the Azure Portal the disk information and compare with the PowerShell results:
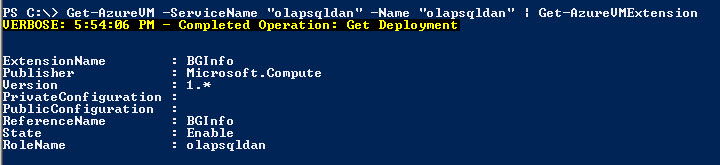
Figure 8. The Azure VM disks Another common command is the Get-AZureVMExtension. You can configure and extend the VM capabilities in Azure using the VM extensions.
Get-AzureVM –ServiceName "olapsqldan" -Name "olapsqldan" | Get-AzureVMExtension
Figure 9. The Get-AzureVM cmdlet You can extend the security features, to support Windows System Center, to automate tasks, display and administer your VM, etc.
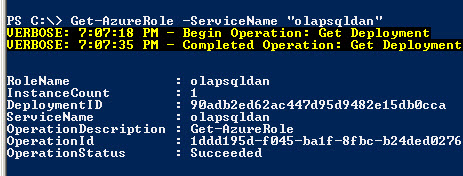
You can also get the Roles of a specific Azure Service. The following example shows the roles of the Service olapsqldan:
Get-AzureRole –ServiceName "olapsqldan"
The results shows the Role name, deployment ID, Operation status, etc.
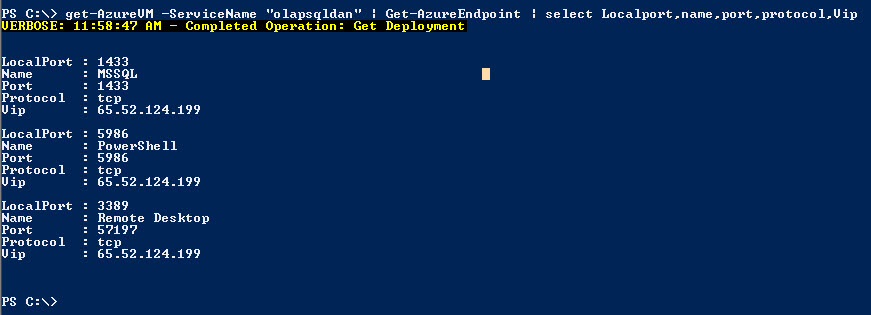
Figure 10. The Get-AzureRole cmdlet The EndPoint information is also useful. You can verify the ports used and enabled, the Vip used and protocols. The following cmd shows the EndPoints of the Service olpasqldan:
get-AzureVM –ServiceName “olapsqldan” | Get-AzureEndpoint | select Localport,name,port,protocol,Vip
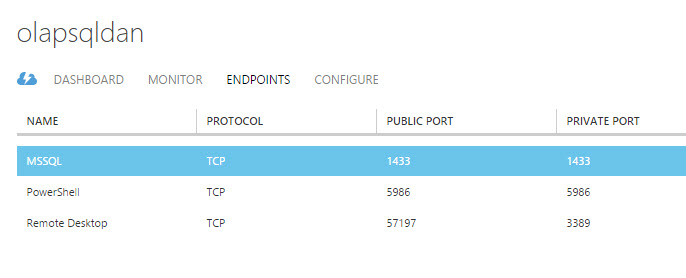
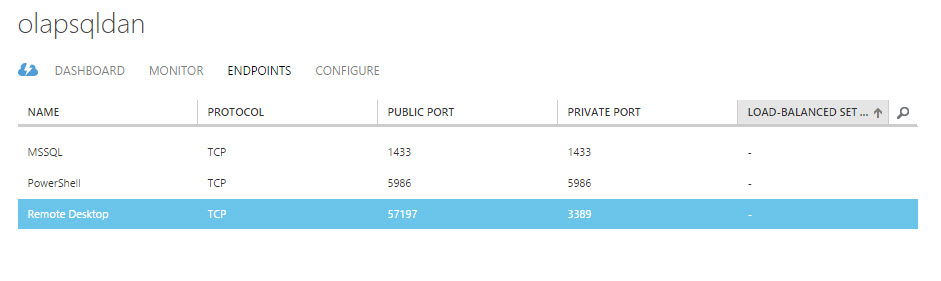
Figure 11. The Get-AzureEndpoint cmdlet You can verify and compare the information of the PowerShell with the Azure Portal:
Figure 12. The list of endpoints. Another important command is the Get-AzureLocation. This cmdlet shows all the locations available where you can store your VM:
Get-AzureLocation | select DisplayName, virtualmachinerolesizes, storageaccounttypes
Figure 13. The Get-AzureLocation cmdlet The command shows the different locations available like US West, East, Japan East, West, the Machine Sizes (explained in step 5), etc.
The next cmdlet is the Get-AzureOSDisk. The command lets you check the OS where the disk is, the disk name with the OS, the media link.
Get-AzureVM –ServiceName “olapsqldan” | Get-AzureOSDisk
Figure 14. The Get-AzureOSDisk command Another useful cmdlet is the Get-AzureOSVersion. It shows all the OSs available in Azure.
Get-AzureOSVersion
Figure 15. The Get-AzureOSVersion cmdlet Now, let’s create some queries to retrieve more specific information. For example, to get the list of OSs version 2008, you can use the following query:
Get-AzureOSVersion | select FamilyLabel | Where-Object {$_.FamilyLabel -like "*2008*"}
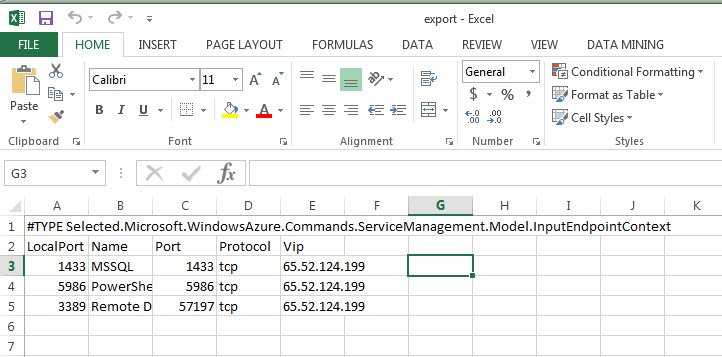
You can export your results to a csv file to open the results in an Excel file. The following sample exports the results of a PowerShell query in a file name export.csv:
get-AzureVM –ServiceName “olapsqldan” | Get-AzureEndpoint | select Localport,name,port,protocol,Vip| Export-Csv c:\scripts\export.csv
If everything is OK, you will be able to open and check the Endpoints information in Excel:
Figure 16. The PowerShell results in MS Excel Let’s check if the port 1433 is used by the EndPoints. You can use the following PowerShell Command:
get-AzureVM –ServiceName “olapsqldan” | Get-AzureEndpoint | select Localport,name,port,protocol | Where-Object {$_.LocalPort –eq "1433"}
You will have a result similar to this one:
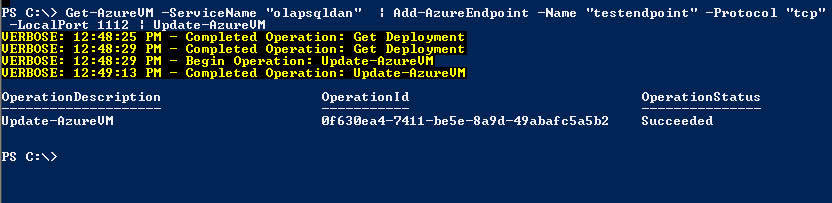
Figure 17. Verifying port used in EndPoints. The following example will create an EndPoint named testendpoint in the Virtual Machine olapsqldan with the port 1112 and the protocol TCP-IP:
Get-AzureVM –ServiceName "olapsqldan" | Add-AzureEndpoint -Name "testendpoint" -Protocol "tcp" –PublicPort 1112 –LocalPort 1112 | Update-AzureVM
The result displayed is the following:
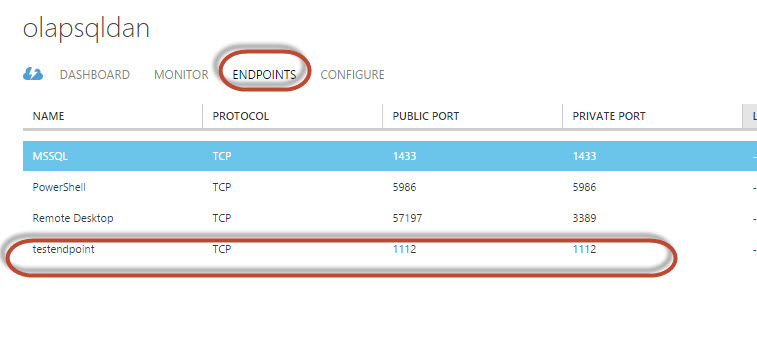
Figure 18. The results of the EndPoint Creaton with PowerShell If everything is OK, you will be able to see the EndPoint in the VM section in the EndPoint Tab:
Figure 19. The EndPoint created in the Azure Portal Now, let’s say that I do not want the port 1112 to be enabled. Lets say that I want to erase the endpoint automatically if it uses this port. To do that, we need to store the EndPoint information in a variable named Object using the following commands:
$Object=get-AzureVM –ServiceName “olapsqldan” | Get-AzureEndpoint | select Localport,name,port,protocol | Where-Object {$_.LocalPort –eq "1112"}
The result displayed will be similar to this one:
Figure 20. The results of a query stored in a PowerShell variable To retrieve the value of a property. In this case the Port number, we can use the following command:
$Object.port
The result displayed will be the following:
Figure 21. The variable properties Now, if we want to automatically erase an EndPoint according if a specified port is used, we can use this script:
$Object=get-AzureVM –ServiceName “olapsqldan” | Get-AzureEndpoint | select Localport,name,port,protocol | Where-Object {$_.LocalPort –eq
"1112"}If($Object.port –eq "1112")
{
Get-AzureVM –ServiceName "olapsqldan" | Remove-AzureEndpoint –Name "testendpoint" | Update-AzureVM
}- The scripts verify if the port 1112 is used. If that is the case, the EndPoint is removed. In order to run a script save the commands of the step 29 in a script named powershell.ps1
Once saved, navigate to the path where the script is stored.
Cd c:\scripts
You can finally execute the file
.\powershell.ps1
You will receive a message similar to this one. The succeeded operation should be displayed.
Figure 22. The PowerShell script executed You can verify the results using the Azure Portal and verify that the EndPoint created on step 24, was removed by the PowerShell Script.


PowerShell is a very powerful tool to monitor and verify information from your VM or VMs. In this chapter, we learned how to retrieve information about this tool related to IPs, VM, Services, Roles, Endpoints, Ports, etc.

He has worked for the government, oil companies, web sites, magazines and universities around the world. Daniel also regularly speaks at SQL Servers conferences and blogs. He writes SQL Server training materials for certification exams.
He also helps with translating SQLShack articles to Spanish
View all posts by Daniel Calbimonte
- PostgreSQL tutorial to create a user - November 12, 2023
- PostgreSQL Tutorial for beginners - April 6, 2023
- PSQL stored procedures overview and examples - February 14, 2023