
Introduction
The elastic database is a new feature offered for SQL Azure Databases. Elastic databases are useful when you have several databases and you want to monitor and manage all the databases at the same time. To do this, a pool is required. The pool allows handling several databases at the same time.
In this chapter, we will learn how to create the pool and add SQL Azure Databases to it.
There are some databases that consume significant resources and others consume little resources. It is very hard when you have several databases to determine the tier for each database. With elastic databases, you can have a specific price for all the databases at the same time. The elastic pool gets statistics of the performance used by each database and recommends an effective cost per pool and you do not have to worry about each database. This saves you a lot of time.
Requirements
- An Azure Account.
- 3 Azure SQL Databases created (check our article to create an Azure SQL Database).
Getting started
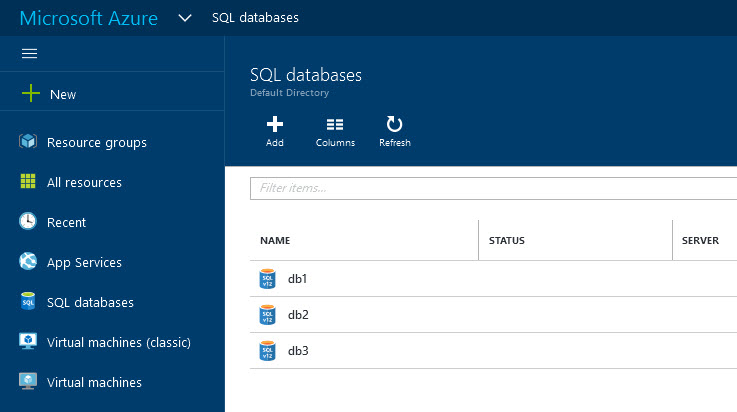
In the Microsoft Azure Portal, we created 3 Azure SQL databases. You can try with 2. These 3 databases were created on the same SQL server:

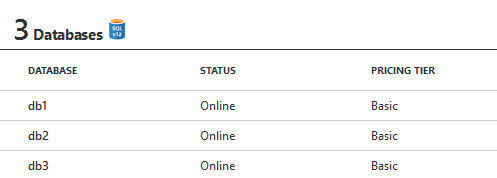
Figure 1. 3 Azure Databases In the Azure Portal, click all resources and select the SQL Server used to store the 3 databases:
Figure 2. The Server Properties The SQL Server will show the name, status and the price of the databases:
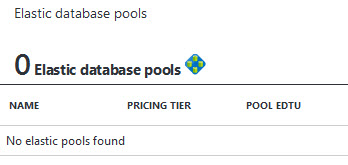
Figure 3. The Azure databases and the status You will notice in the properties that there are 0 Elastic database pools. The pools are required for the Elastic databases. We will create the pool for this SQL Server:
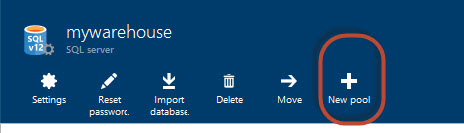
Figure 4. The elastic pool information To create a new pool, click the New Pool icon in the SQL Server:
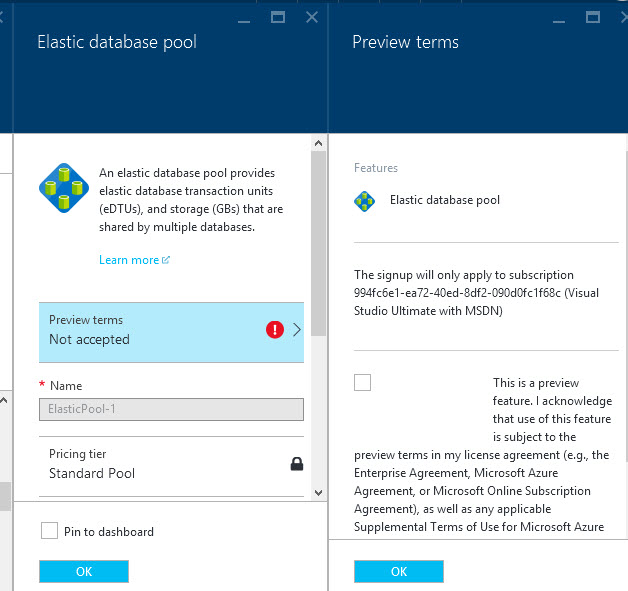
Figure 5. The New pool icon As I said before, the elastic database pool is a new feature in Preview version. You will be required to accept the terms for a Preview Feature. These terms will be removed in the future. If you do not accept you will not be able to create a new pool.
There are 3 main options for the Elastic Database Pool:
Figure 6. The Elastic Pool Preview terms The Basic Pool, which costs 150 USD approx. per month. This option supports 2 GB per database and up to 5 eDTUs per database. eDTU stands for the elastic Data Throughput Unit. It is a unit used to measure several counters like CPU, Memory, disk read, writes and other similar counters related to performance. With eDTUs, you can measure the performance offered by the different options. The more eDTUs, the better performance you get.
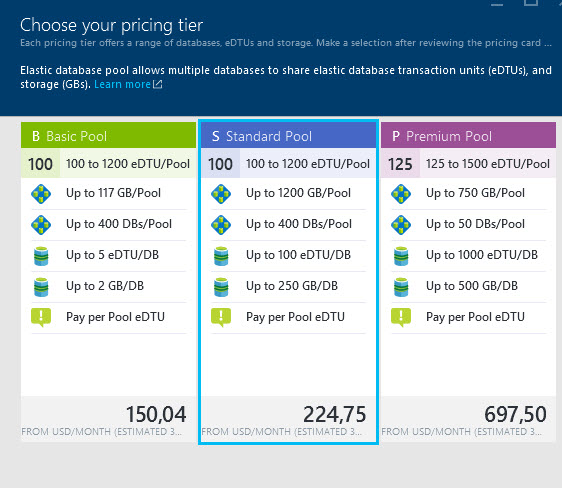
The Standard Pool offers 1200 GB per pool, 100 eDTUs per database and up to 250 GB per database. This is recommended for medium sized companies. The price is just 74 dollars more expensive than the Basic Pool.
The Premium option supports fewer databases (50 per pool), it supports fewer GB per pool, but it supports faster databases (1000 eDTUs per database). This option is recommended for bigger databases with many users connected). This option is 473 USD more expensive than the Standard Pool. Note that it only supports 50 databases while Basic Pool option supports 400. This is because the Premium option supports more eDTUs. In addition, you can use a Basic Pool in non-peak hours and switch to the Standard or Premium Pool at peak hours. That will allow you to save money.
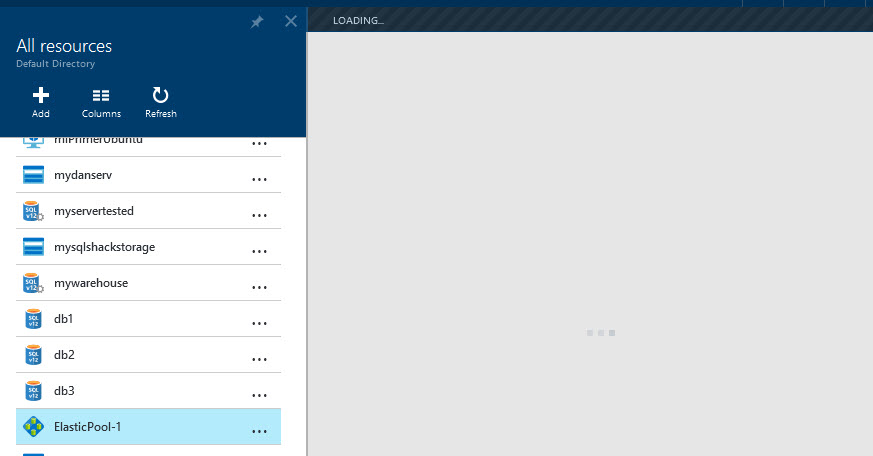
Figure 7. The elastic Pool prices and features per month Once created, you will be able to see it in the All resources section of the Azure Portal:
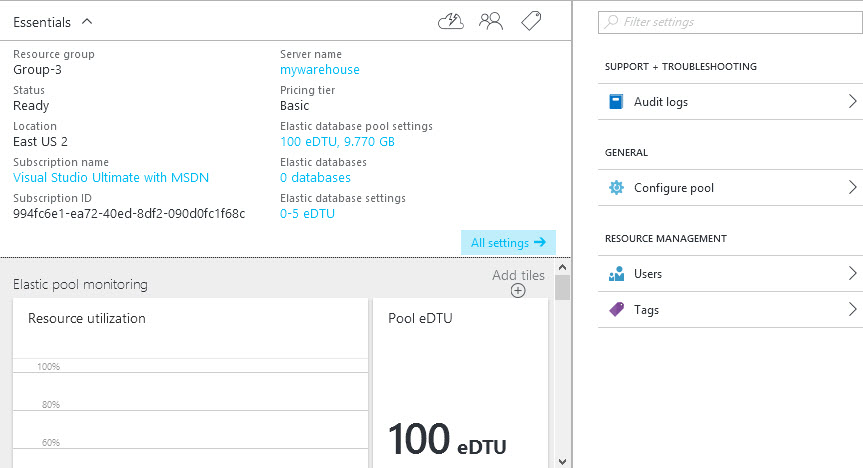
Figure 8. The Elastic Pool created in the Azure Portal You will be able to see the price tier, the SQL Server name where it was created, the location, status and the number of eDTUs supported. You can monitor the resource utilization and check the audit log or create users with different privileges on the pool. You can also see that there are 0 databases in the pool, we will add some databases to the pool:
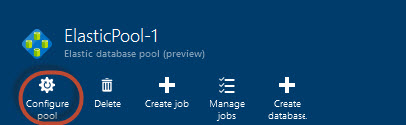
Figure 9. The elastic pool properties To add databases, press the Configure pool icon:
Figure 10. The Configure pool option In the configure pool you can see the eDTU usage during 14 days, you can see statistics like the maximum and minimum number of eDTUs used.
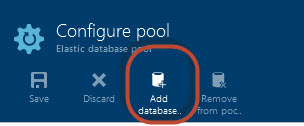
Figure 11. The Configure pool Window To add more databases, press the Add database icon:
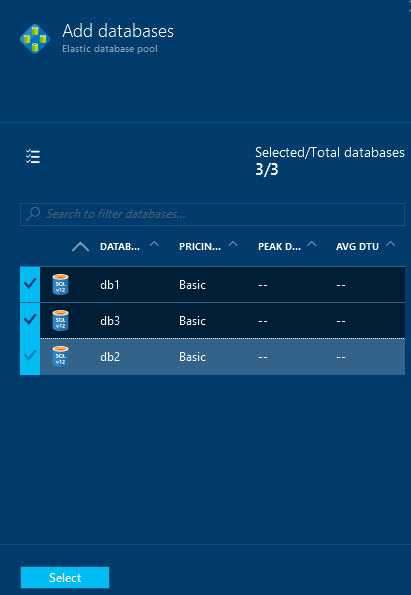
Figure 12. The Add database icon The SQL Server Databases will be available. You can select all the databases that you want to add to the Elastic pool. You can check the price per database the peak DTUs and the average DTUs. You can group all the databases no matter the type of tier.
Figure 13. The Databases to add in the elastic pool Once the databases are selected, there is an option to create the job for all the databases.
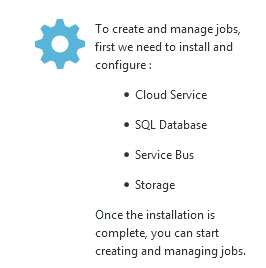
Figure 14. The create job icon You will receive a message that it is required to configure the Cloud Service, SQL Database, Service Bus and the storage. This is out of the scope of this article, but we promise to teach you in future articles:
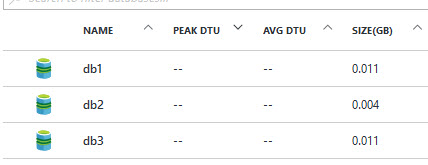
Figure 15. The job creation message Once you’ve added your databases to the pool, you can check the size, peak DTU, Average DTU per database.
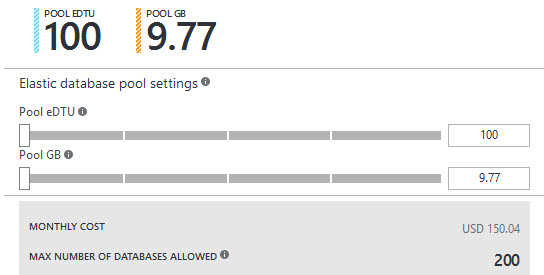
Figure 16. The database properties You will be able to see the Elastic Data Throughput Units and the GB configured by the Pool. You can also check the price per month of your current settings and the number of databases allowed. You can detect the EDTU and GBs used and adjust your EDTUs and GB required in few seconds!
Figure 17. The pool settings You can manage all the databases in the pool with the Azure Portal, PowerShell, C# or any other tool of your preference. With the pool, it is easier to have an affordable environment.


Conclusion
As you can see, it is not hard to create elastic databases. Basically, you need to create a pool and add the databases to that pool afterwards. Once you have the databases added to the pool, it is easier to change the price tier and manage all the databases at the same time.

He has worked for the government, oil companies, web sites, magazines and universities around the world. Daniel also regularly speaks at SQL Servers conferences and blogs. He writes SQL Server training materials for certification exams.
He also helps with translating SQLShack articles to Spanish
View all posts by Daniel Calbimonte
- PostgreSQL tutorial to create a user - November 12, 2023
- PostgreSQL Tutorial for beginners - April 6, 2023
- PSQL stored procedures overview and examples - February 14, 2023