
This article explores the SSIS Multicast Transformation for creating different logical copies of source data.
Introduction
In the article, SSIS Conditional Split Transformation overview, we explored the Conditional Split Transformation task to split the incoming data into multiple destinations depending upon the specified condition. We use SSIS Multicast Transformation to create multiple copies of input data. Suppose we require multiple copies of the input data in TXT, CSV and SQL table format. We can use these multiple copies of the data for different transformations.
Suppose you receive stock transactions for your clients in a CSV format. You upload the data in the database and do the calculations for your clients depending upon multiple scenarios. You can use SSIS Multicast Transformation to prepare similar copies of data using SSIS. We do not need any programming or development experience to do this task.
Let’s create an SSIS package to use the SSIS Multicast Transformation.
Environment Details
- We use the WideWorldImporters database in this article. If you do not have this database, download a copy of it from the Github
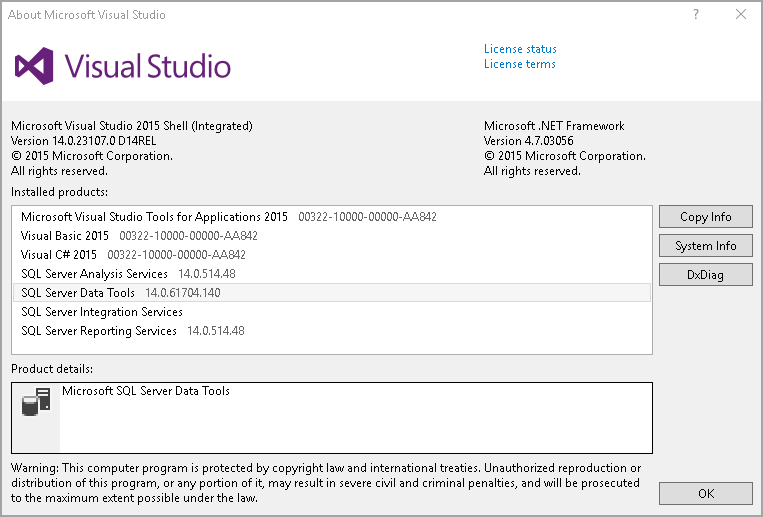
- Install SQL Server Data Tools for Visual Studio for creating SSIS packages. If you do not have it, go to Download and install SQL Server Data Tools (SSDT) for Visual Studio and install it
In the following image, you can see the configured SQL Server Data Tools for my system.
Create an SSIS package for SSIS Multicast Transformation
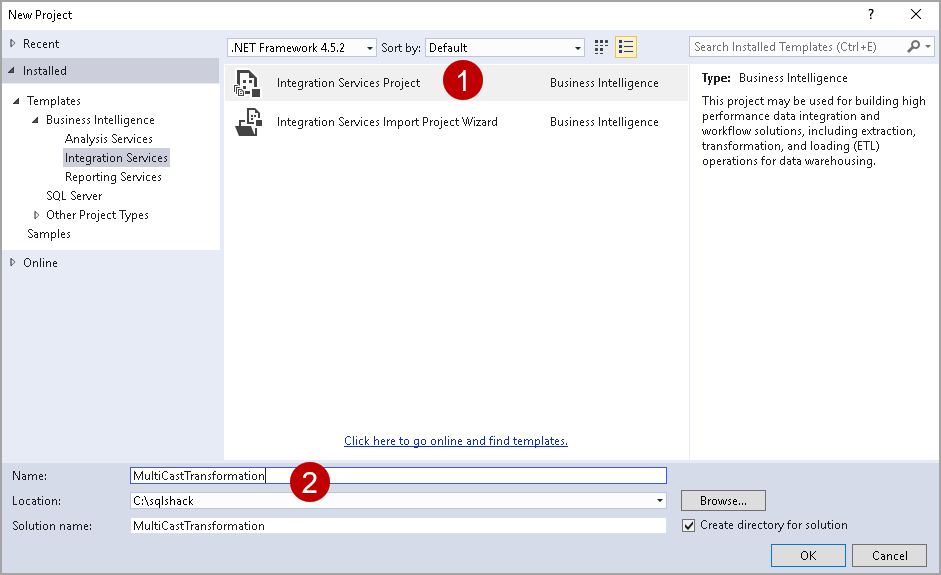
Launch SQL Server Data Tool to create an Integration project. Provide the Integration project name and specify the location to save the project.
Add an OLE DB Source in the Connection Manager
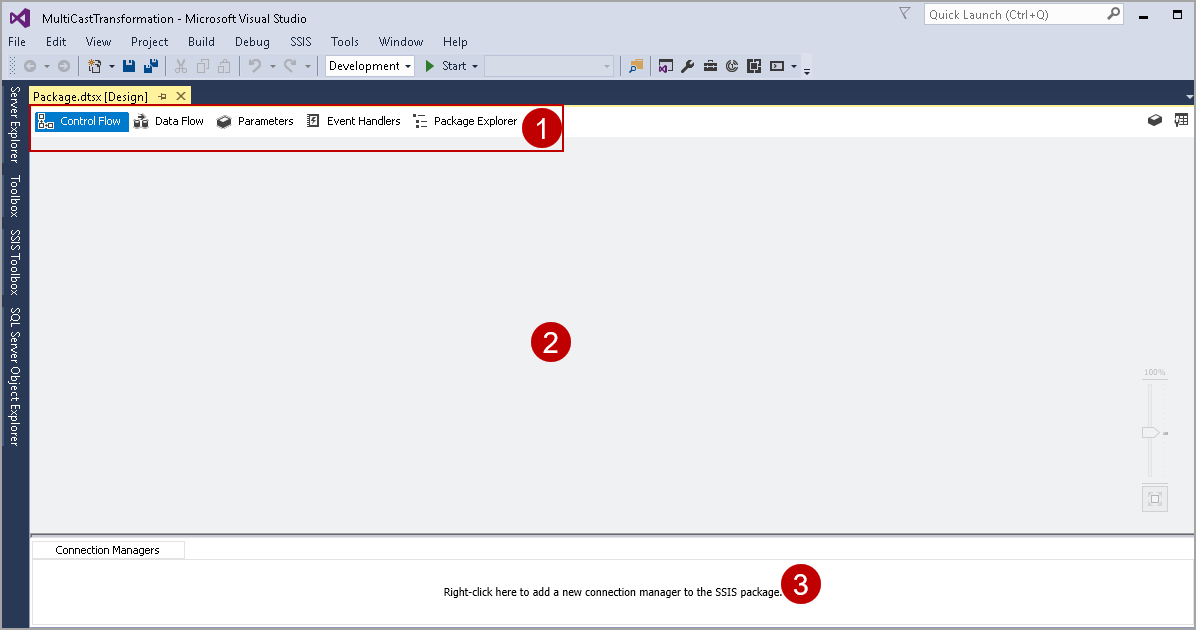
In the SSIS project window, we have the following areas.
- Control Flow, Data Flow, Event Handlers and Package Explorer area
-
We add different SSIS components in this area

- In the Connection Managers area, we can configure the different source and destination connections. You can also view all the connections in the package in this area
Let’s add an OLE DB Source connection to point the WideWorldImporters database in my local instance. Right-click on the Connection Managers, click on New OLE DB Connection.
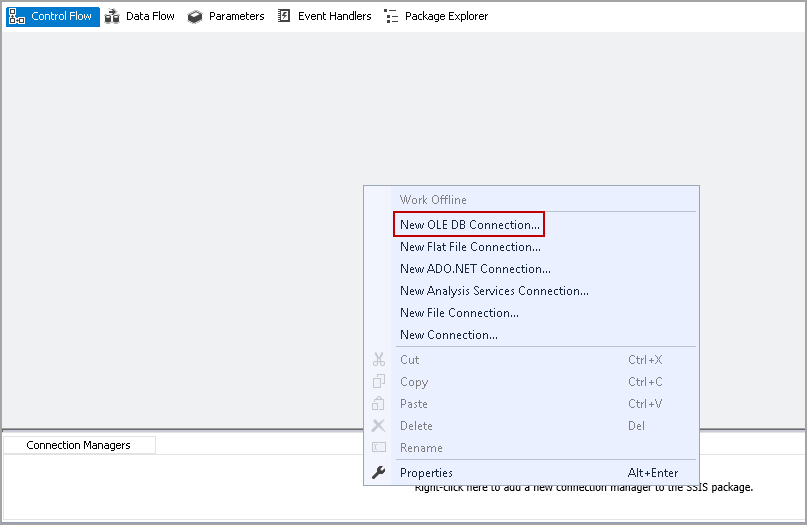
It opens the OLE DB Connection Manager. Provide the details such as SQL Instance name, Authentication method (Windows or SQL authentication) and select the database name from the drop-down list.

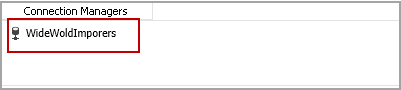
You can test the connection and click Ok. You can see the configured connection in the Connection Managers area.

For a better understanding, right-click on this connection and rename it with an appropriate name.
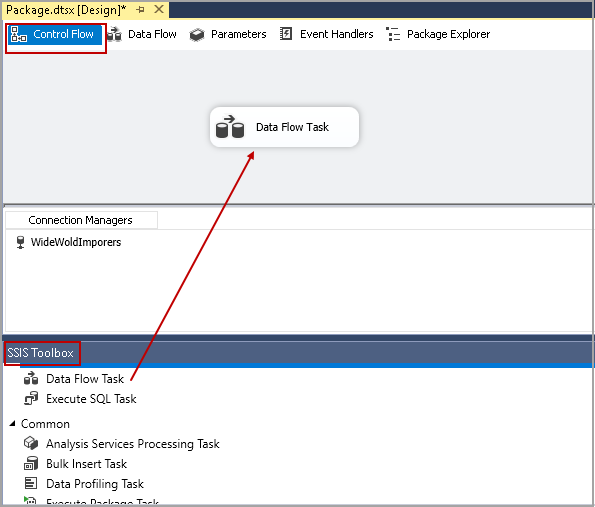
Drag the Data Flow Task in the Control Flow area.
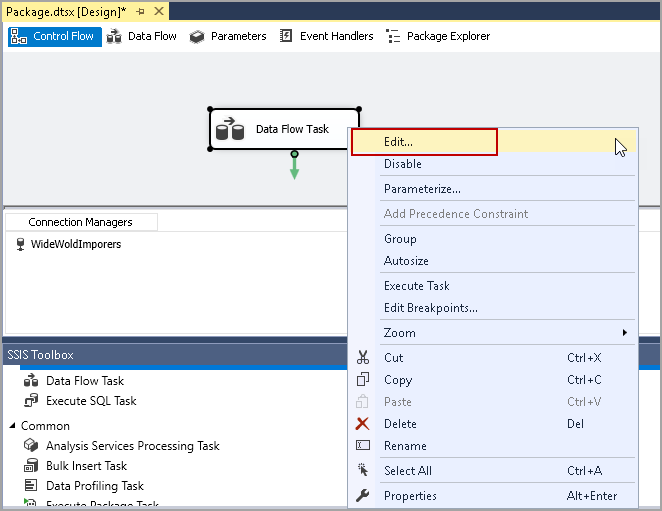
Right-click on the Data Flow Task and click on Edit.
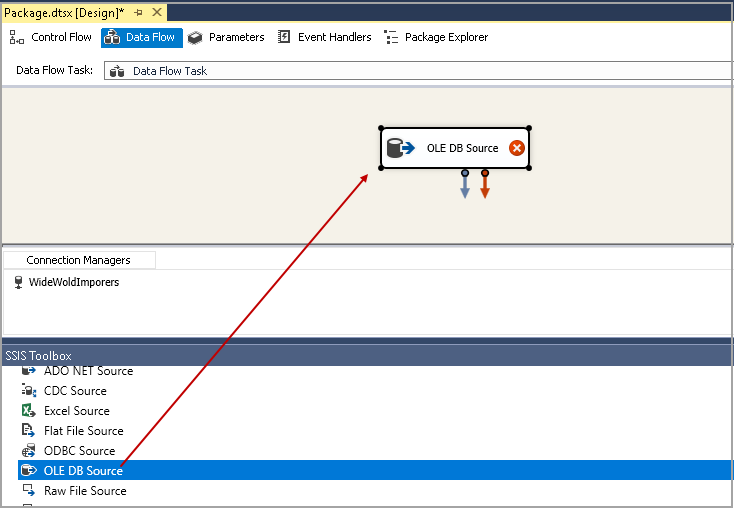
It moves to the data Flow page. In the Data Flow page, add an OLE DB Source similar to the following image.
Double click on this to open the OLE DB Source editor. It automatically shows the connection we created earlier. If we want a separate connection, you can click on New and configure it. In the Data access mode, select the Table or View because my source data is in the SQL table.
Select the table that contains the data. I selected Sales.Orders table from the WideWorldImporters database.
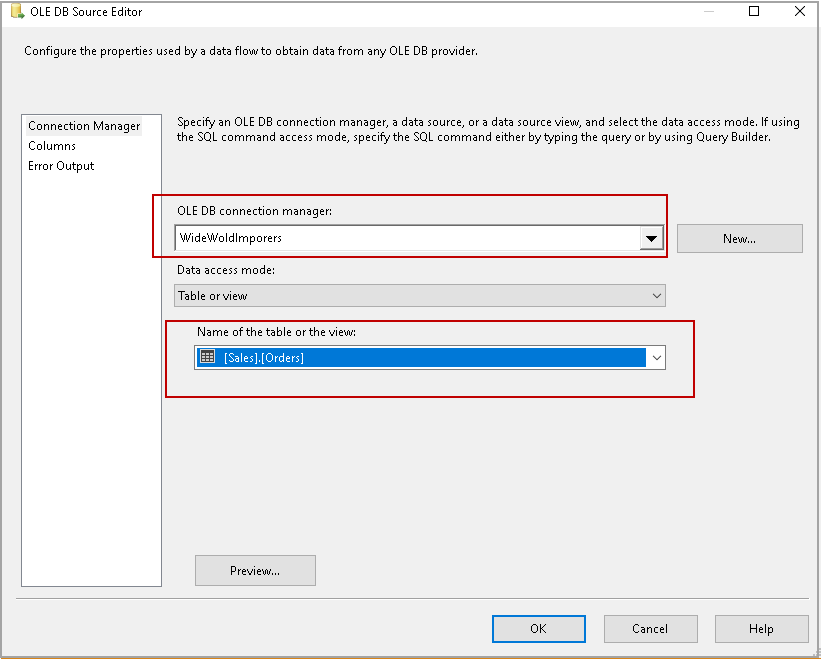
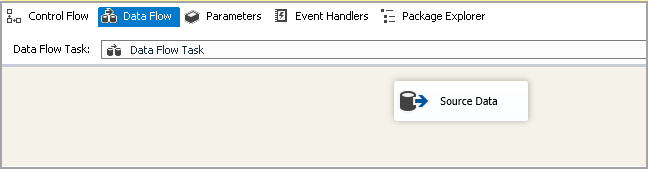
Click Ok and rename the OLE DB Source to Source Data.
Add SSIS Multicast Transformation to configure multiple destinations
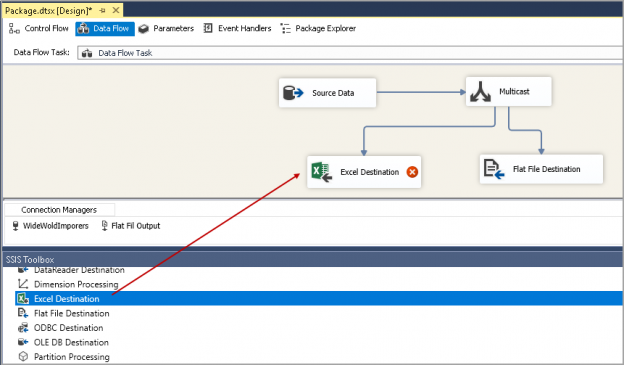
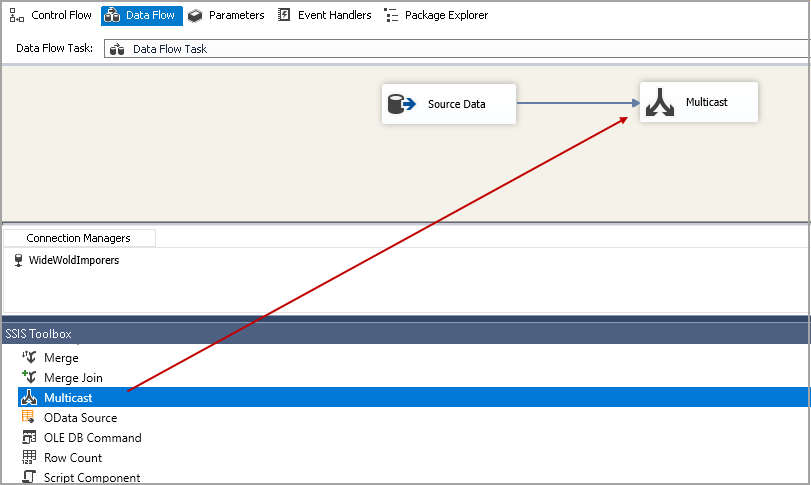
Drag the Multicast transformation to the data flow tab and join the green line from Source Data to Multicast.
Now we want to add three destinations.
- Flat File output
- Excel file output
- SQL Database table
Add a FLAT file output in the SSIS Multicast Transformation
We use Flat File Destination for the TXT or CSV file formats. Drag the Flat File Destination from the SSIS Toolbox to Data Flow task and join it with the Multicast operator.
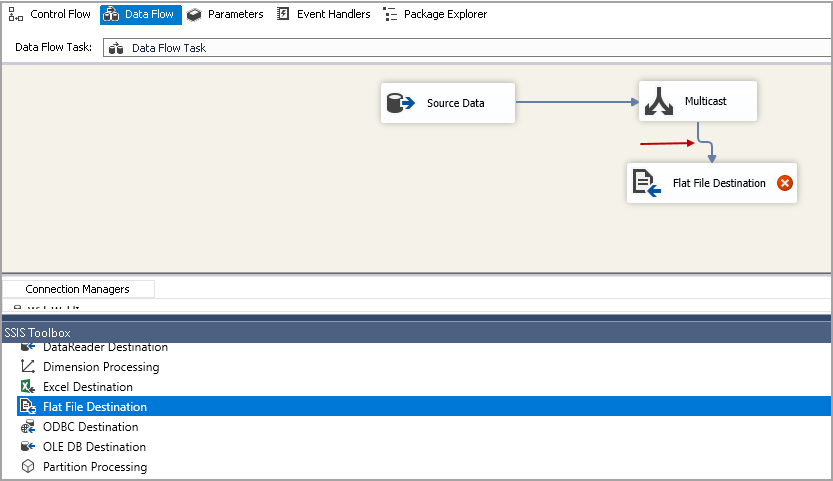
It shows the Red Cross icon on Flat File Destination because we did not configure the destination. Double click on it, and it launches the Flat File Destination Editor.
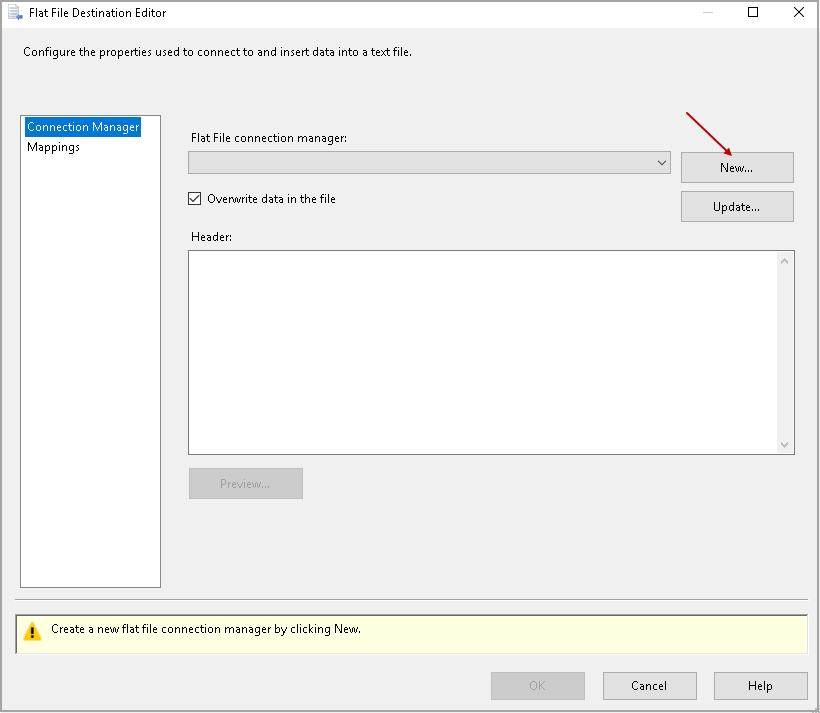
Click on New, and it asks for the flat-file format. We can choose the formats below.
- Delimited
- Fixed Width
- Fix Width with row delimiters
- Ragged Right
Let’s go with the default format Delimited. In this format, the commas delimit the columns in the text file.

Click Ok, and it opens the Flat File Destination editor. Specify the connection name and the file path. It automatically gives the format specifications such as Header Row delimiter, Text qualifier. We will go with the default values.
In the Advanced page, we view the source columns and their properties for the destination flat file.

Click on Mapping to view the mapping of input and output columns. By default, it does the mapping; however, we can change it if required.
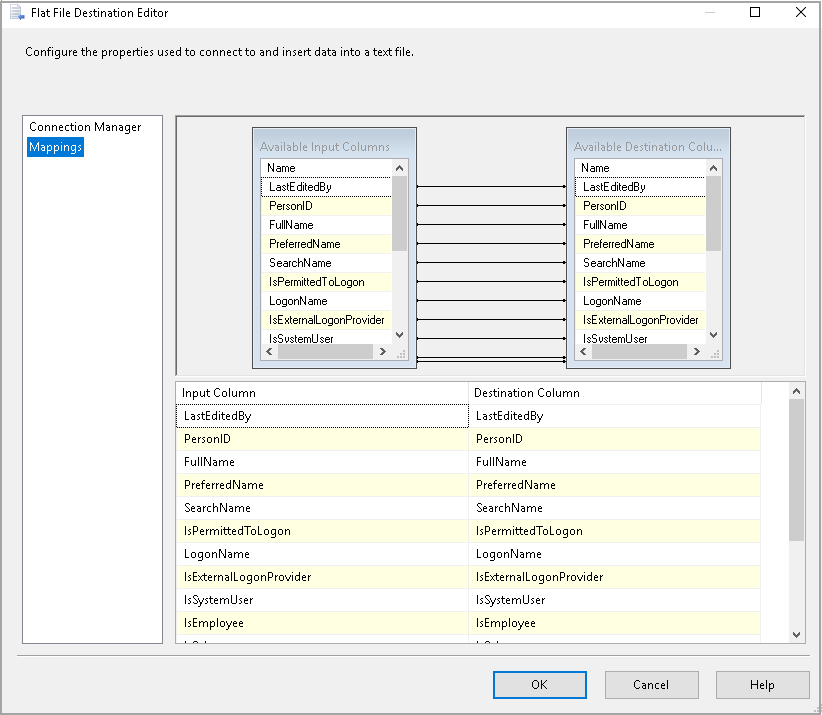
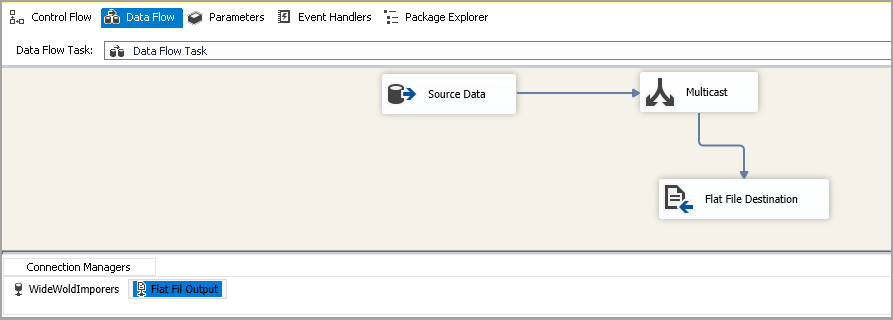
Click Ok, and we can see the Red Cross icon is not present now on Flat File Destination.
Add an Excel file output in the SSIS Multicast Transformation
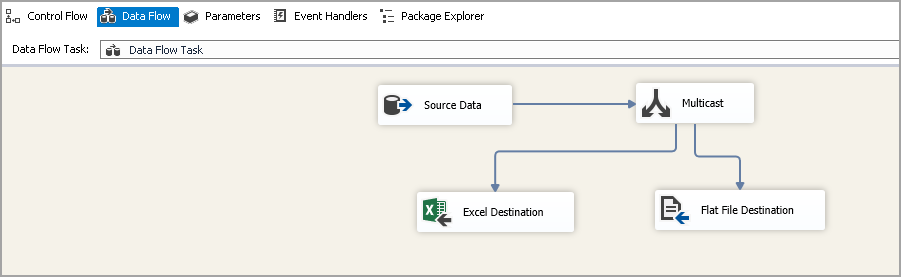
Let’s add an Excel file destination from the SSIS toolbox and join it with the Multicast Transformation.
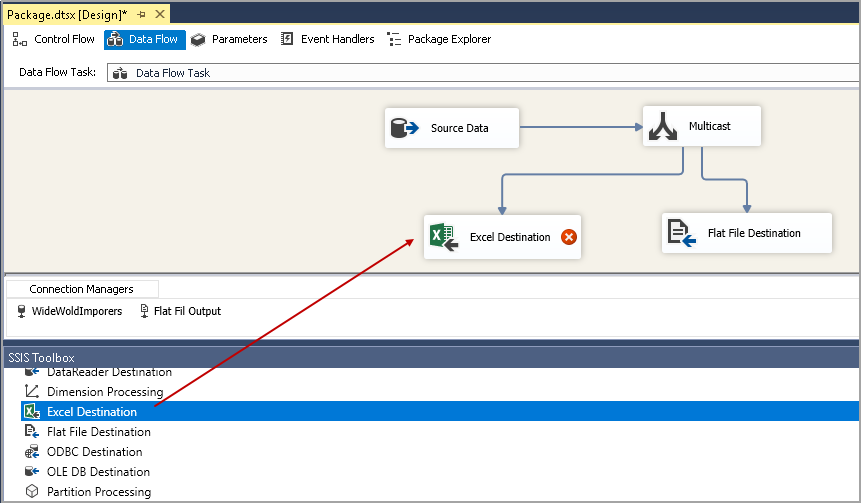
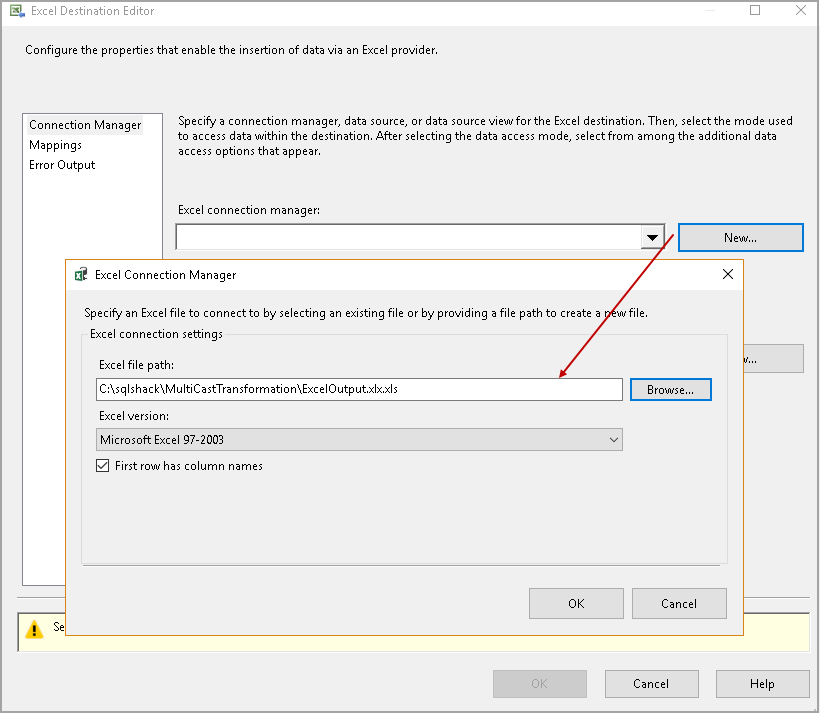
Double click on Excel destination to configure it. In the Excel Destination Editor, click on New and specify the file path and name.
Click Ok, and it goes to excel destination editor. Click on New to create the required columns in the excel sheet.
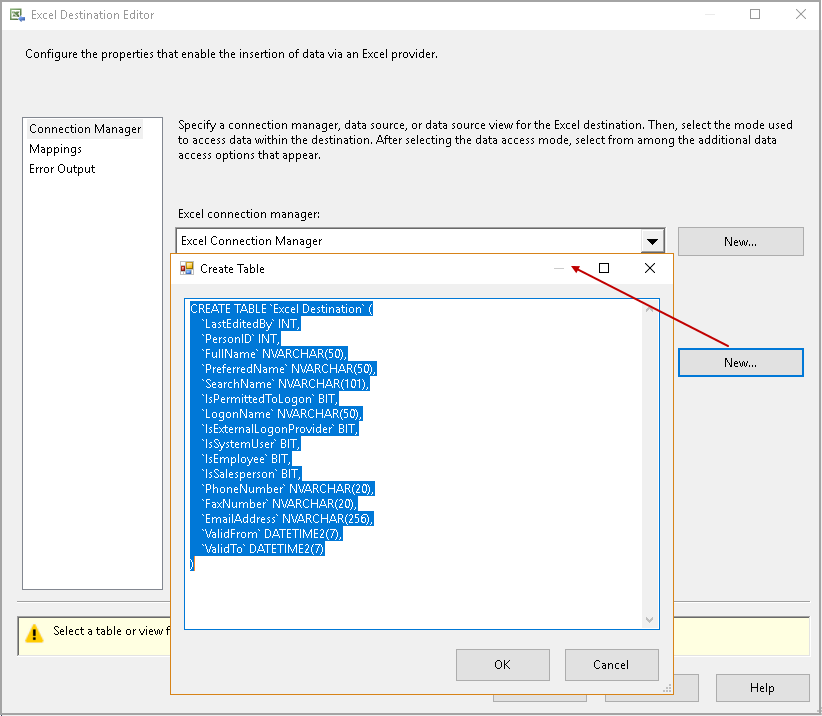
Click Ok, and you get the syntax error message.
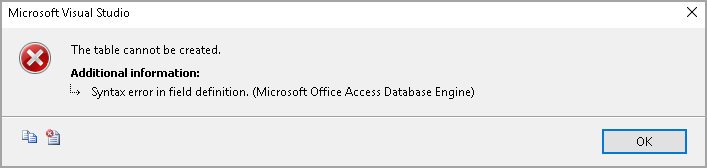
Remove the quotes, and you can create the excel sheet with the required columns.
Click OK and go to Mapping to review mapping between source data and destination excel sheet.
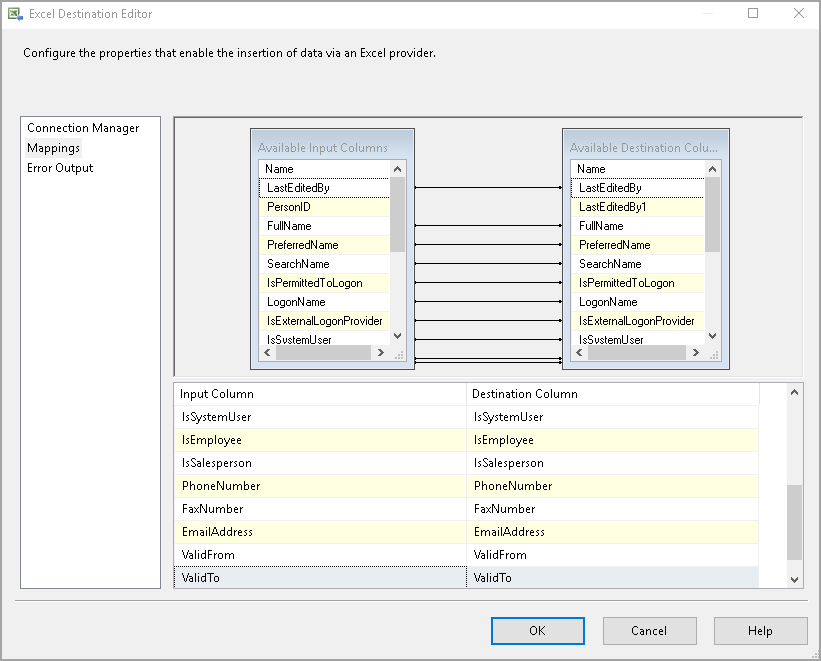
Click Ok, and we are ready with the Excel destination configuration.
Add an SQL Server Destination
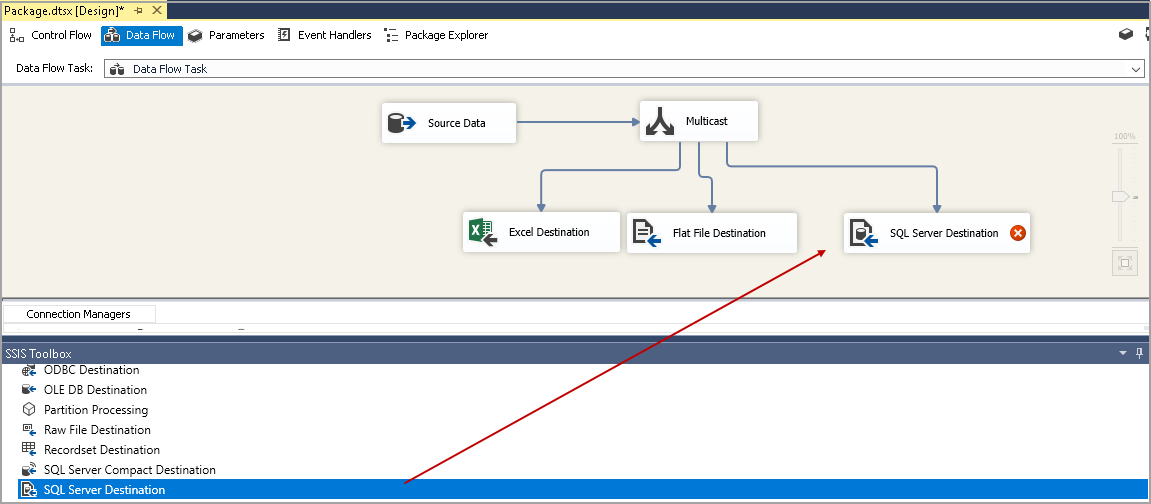
We require a SQL Server destination to get a copy of the source data. We can use OLE DB destination or SQL Server destination for this.
Drag an OLE DB destination and join with SSIS Multicast Transformation.
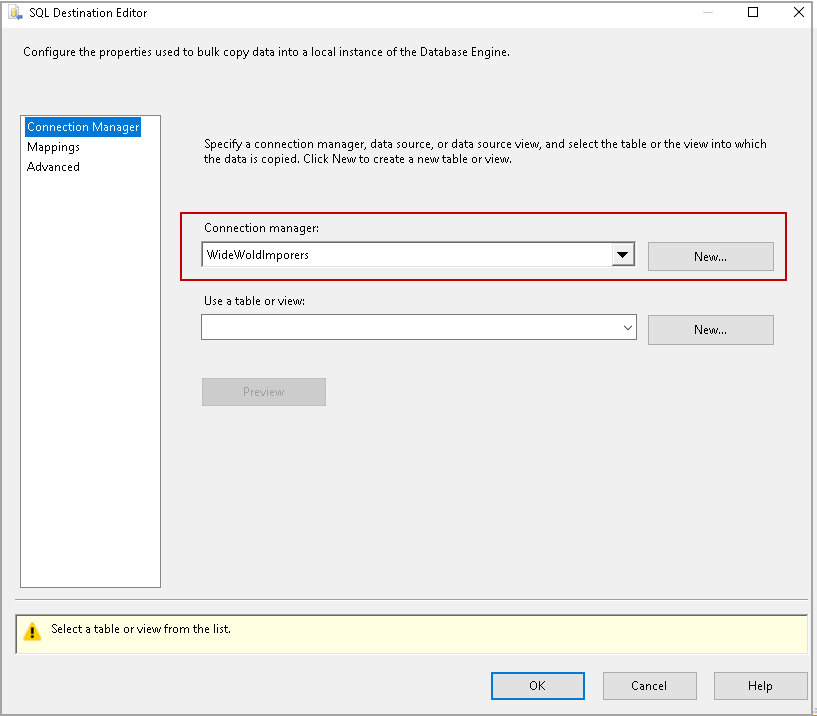
Double click on this SQL Server Destination to configure it. It opens the SQL Destination Editor, and we can see the existing connection WideWorldImporters in this. Let’s use the same connection for the destination as well.
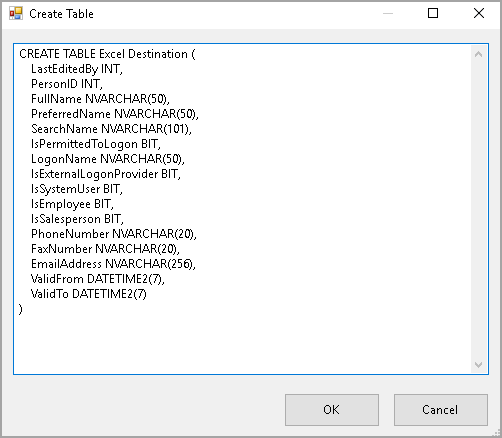
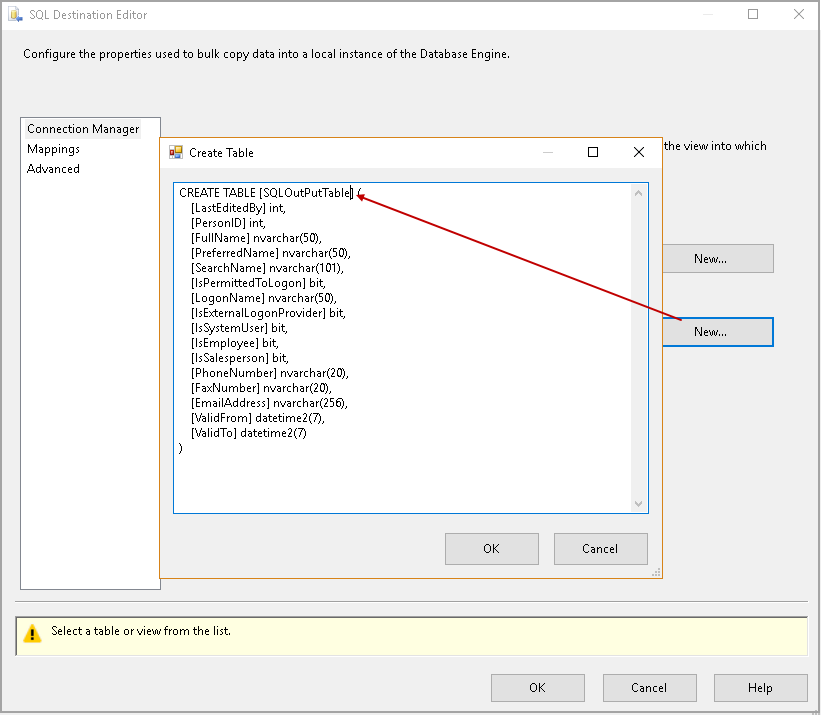
We want to create a new table, therefore, click on the New in front of Use a table or view. It opens the script for the CREATE TABLE statement. Give an appropriate name for the table and click Ok.
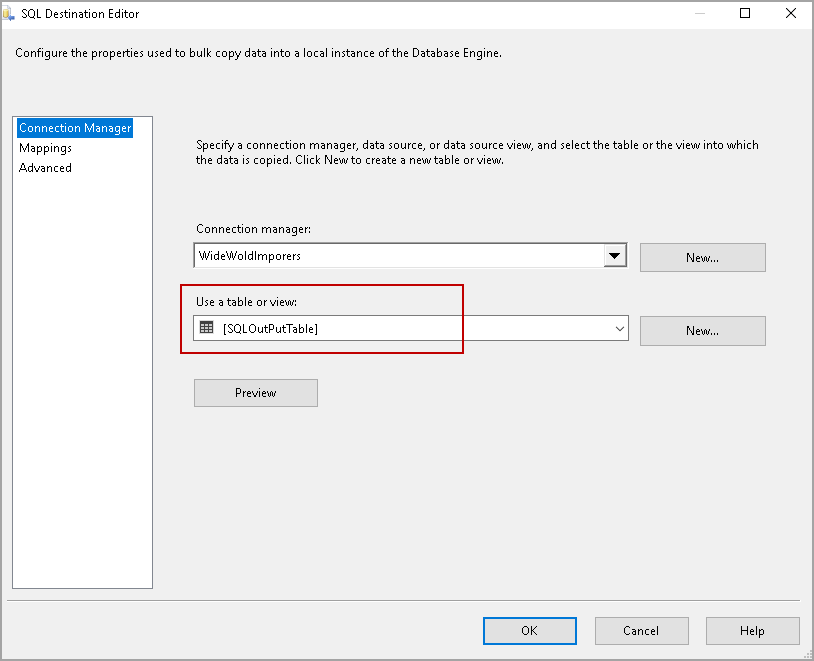
You can see the table name in the screenshot below.
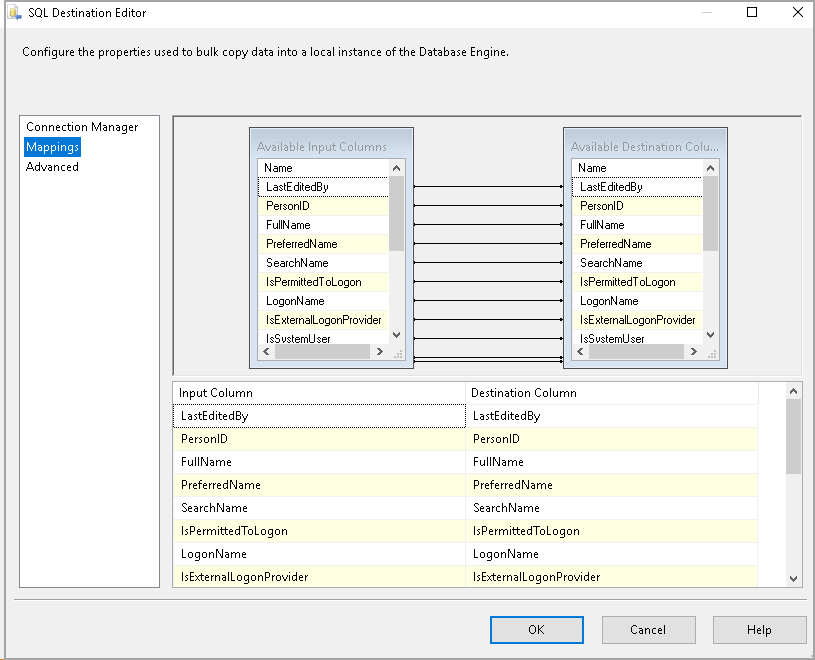
Verify the mapping between the source data and destination table and click OK.
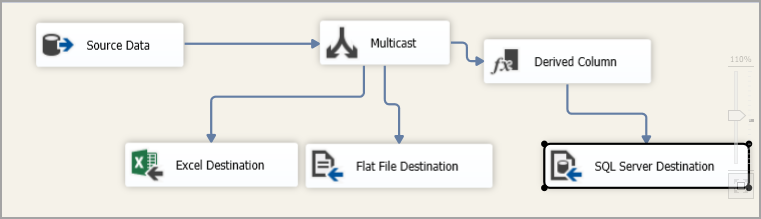
Click Ok, and it returns to the Control flow tab of the SSIS package. We configured three destinations as per our requirement.
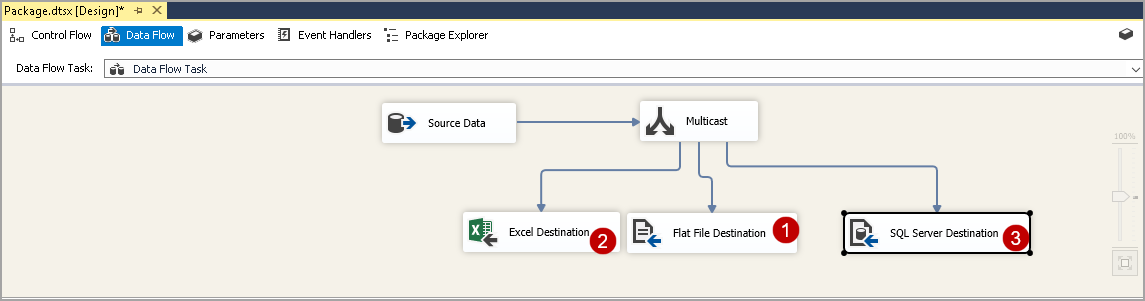
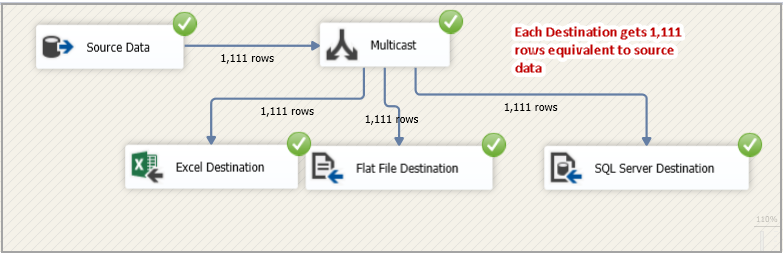
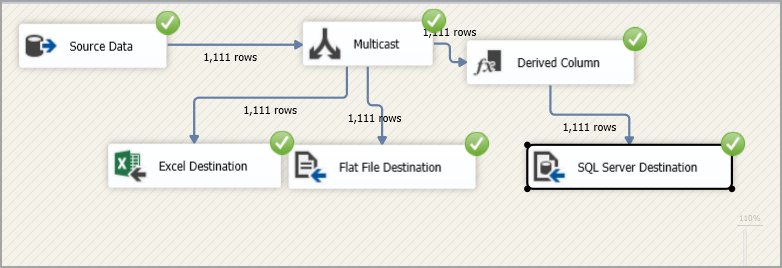
Press F5 or click on the Start button to execute the package. The green tick mark on each component shows the package executed successfully.
In the following screenshot, we can verify that SSIS Multicast Transformation sends the same copy of data to each destination. We have source row count 1,111 and each destination row count is 1,111.
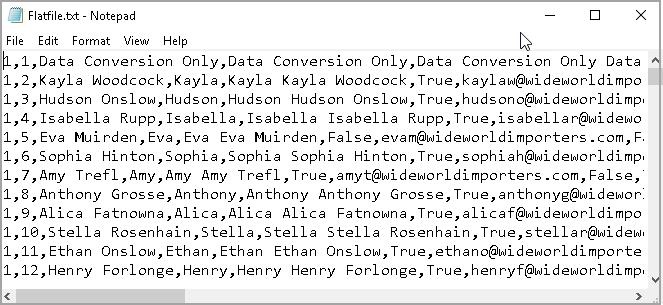
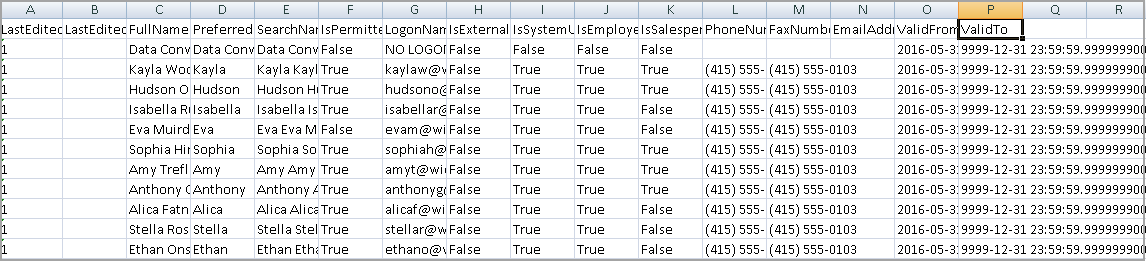
Let’s verify data in the destination files.
-
Flat File Data
-
Excel Sheet Data
-
SQL Server Data

Derived column and SSIS Multicast Transformation
In the previous example, we use SSIS Multicast Transformation to copy the data from the source to the destination such as flat files, excel sheet and SQL tables. The use case of a multicast operator is that we can apply different transformations, aggregations, calculations on logical copies of data.
Suppose we want a new derived column in the SQL Server destination. We do not want derived columns in other destinations.
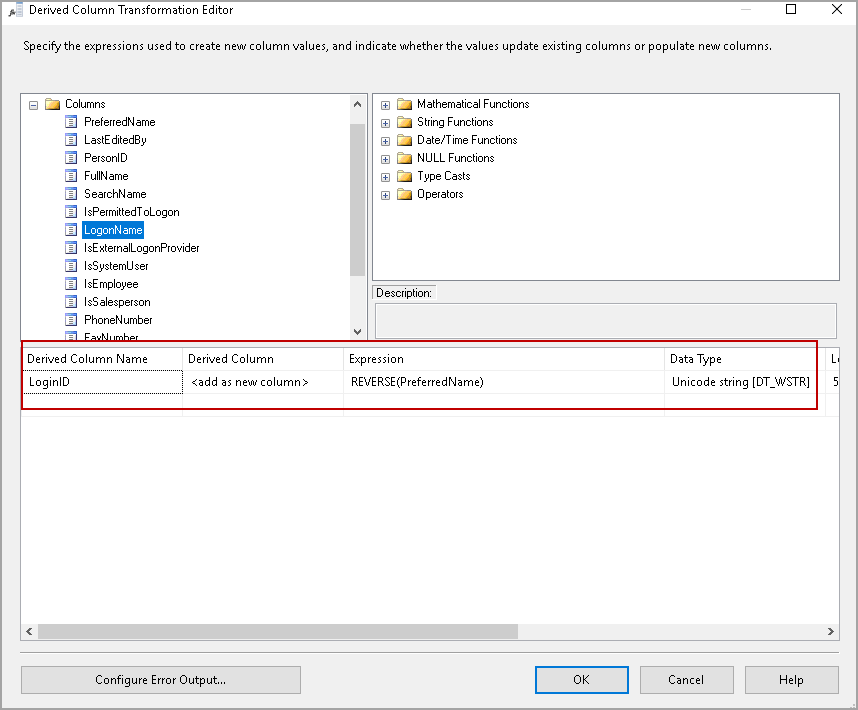
Drag a derived column from the SSIS Toolbox.

We want to add a new column LoginID, and it should be the reverse of the PreferredName column. In the expression, we use the SQL REVERSE string function.
In the SQL Server Destination, create a new table that contains new column Loginname. Drag the green arrow from the derived column to the SQL Server destination.
Execute the package, and it shows successful.
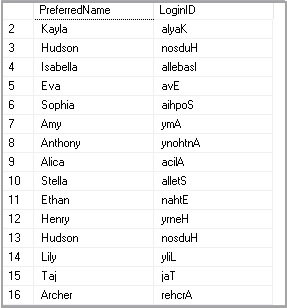
Let’s check the SQL Server Destination table and see the data in the new column. You can see that the LoginID column contains data reverse to data in the PreferredName column.
|
1 2 3 |
SELECT [PreferredName], [LoginID] FROM [WideWorldImporters].[dbo].[SQLDerivedTable]; |
Conclusion
In this article, we explored the SSIS Multicast Transformation to copy the source data into multiple destinations such as flat files, excel files and the SQL Server tables. Try exploring this SSIS component to perform tasks efficiently without any complicated programming code.

I am the author of the book "DP-300 Administering Relational Database on Microsoft Azure". I published more than 650 technical articles on MSSQLTips, SQLShack, Quest, CodingSight, and SeveralNines.
I am the creator of one of the biggest free online collections of articles on a single topic, with his 50-part series on SQL Server Always On Availability Groups.
Based on my contribution to the SQL Server community, I have been recognized as the prestigious Best Author of the Year continuously in 2019, 2020, and 2021 (2nd Rank) at SQLShack and the MSSQLTIPS champions award in 2020.
Personal Blog: https://www.dbblogger.com
I am always interested in new challenges so if you need consulting help, reach me at rajendra.gupta16@gmail.com
View all posts by Rajendra Gupta
- How to install PostgreSQL on Ubuntu - July 13, 2023
- How to use the CROSSTAB function in PostgreSQL - February 17, 2023
- Learn the PostgreSQL COALESCE command - January 19, 2023