
Introduction
As in often the case in life, things that sound simple are not always the easiest things to do. In computer science this is even more often the case. In fact, one of the most challenging things about information technology work is often the communication with bosses that know little about technology and require justification for time spent on seemingly simple tasks. However, by the same token, tasks that seem impossible to the untrained eye are often fairly straightforward and quick to implement and can earn you easy respect.Expanding fact tables
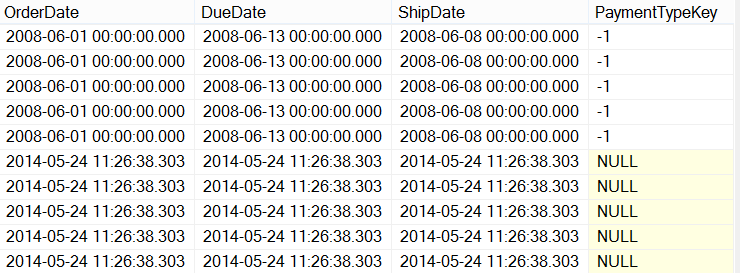
Adding a column to an existing fact table seems like a fairly simple task. It is also often a legitimate business requirement. For example, if an organization wants to investigate the utility of installing new and more expensive credit card facilities, decision makers would probably need to be able to analyze payment types on their sales fact. To do so, provided the information exists in the OnLine Transaction Processing (OLTP / Production) database one would simply need to add a “payment type” dimension and a “PaymentTypeKey” column to the fact table (in a traditional star schema model).
This schema change is fairly simple but if, as is that case in many systems, your data warehouse and OLTP database are not on the same server/instance or your solution needs to be deployable you will not be able to update the table and fill the new column with data directly from your OLTP source in one T-SQL statement. Likewise, due to the differential nature of ETL updates even once you have added a new look up and fed the new column only the newest rows will have this column filled.
It is also very often unacceptable to entirely truncate a fact table and ETL log (causing it to rerun entirely) because fact tables can be huge and this would clog up the server.
The following method provides a solution that can be tacked on to an existing fact ETL flow. To learn how to create a basic fact ETL flow you can check out an earlier article on the matter here.
Assuming you have already set up views on your OLTP database which reflect the tables in your data warehouse the basic steps are as follows:
- Alter your view on the OLTP database or change the query in the OLE DB Source of your original SSIS dataflow to include the ID of reference table (in our case PaymentTypeID)
- Add a new view on your previously excluded reference table and create the table along with its own ETL in the data warehouse. Or, if you are not using the OLTP view method you can just create a new ETL package and write this query in the OLE DB Source instead of selecting from your view.
- Alter the original data flow task for your fact table to include the new column (I did an extra lookup too because it’s better practice to include the data warehouse’s surrogate key instead of the OLTP ID)
- Create a conditional test that checks if the new column has been updated in the past and either reverts to the old dataflow or first updates the existing data.
The first three points are out of scope for this article but the 4th is covered in detail below.
Creating the conditional ETL path
It is worth noting that these steps can be used in any conditional split setup and can come in handy in many situations, it is basically the equivalent logic of an IF statement but in ETL format.
The following figure shows the new module tacked on to the old existing fact table ETL:
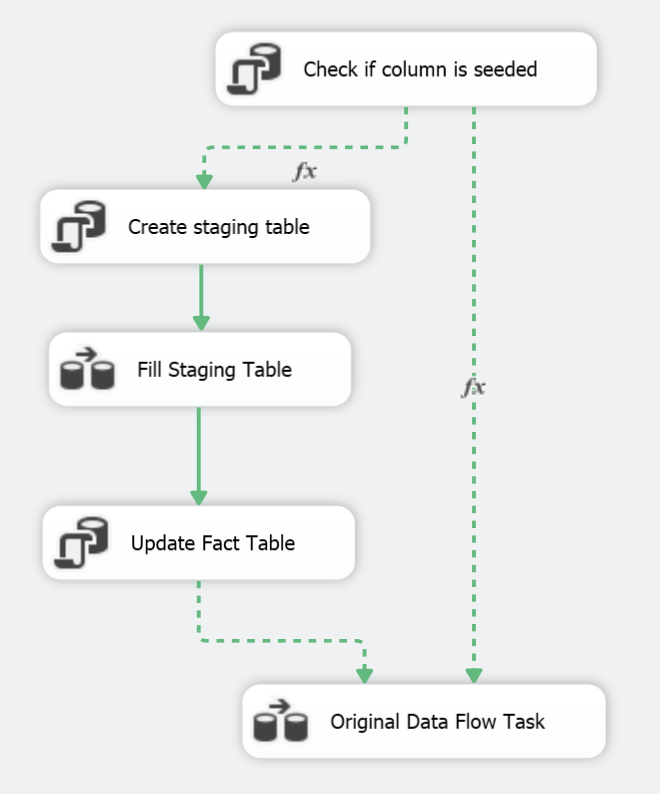
What it does is:
- Check if the new column has any value but -1 (undefined).
- Create a staging table in the data warehouse existing of the fact table key along with the new PaymentTypeKey.
- Select the fact table data from the OLTP view and insert the necessary data in the staging table in the data warehouse.
- Update the fact table to feed the new column using the staging table as a reference.
- Move on to the old data flow.
Steps 2 to 4 are never run if the column is already fed.
To set up this type of solution follow the steps below:
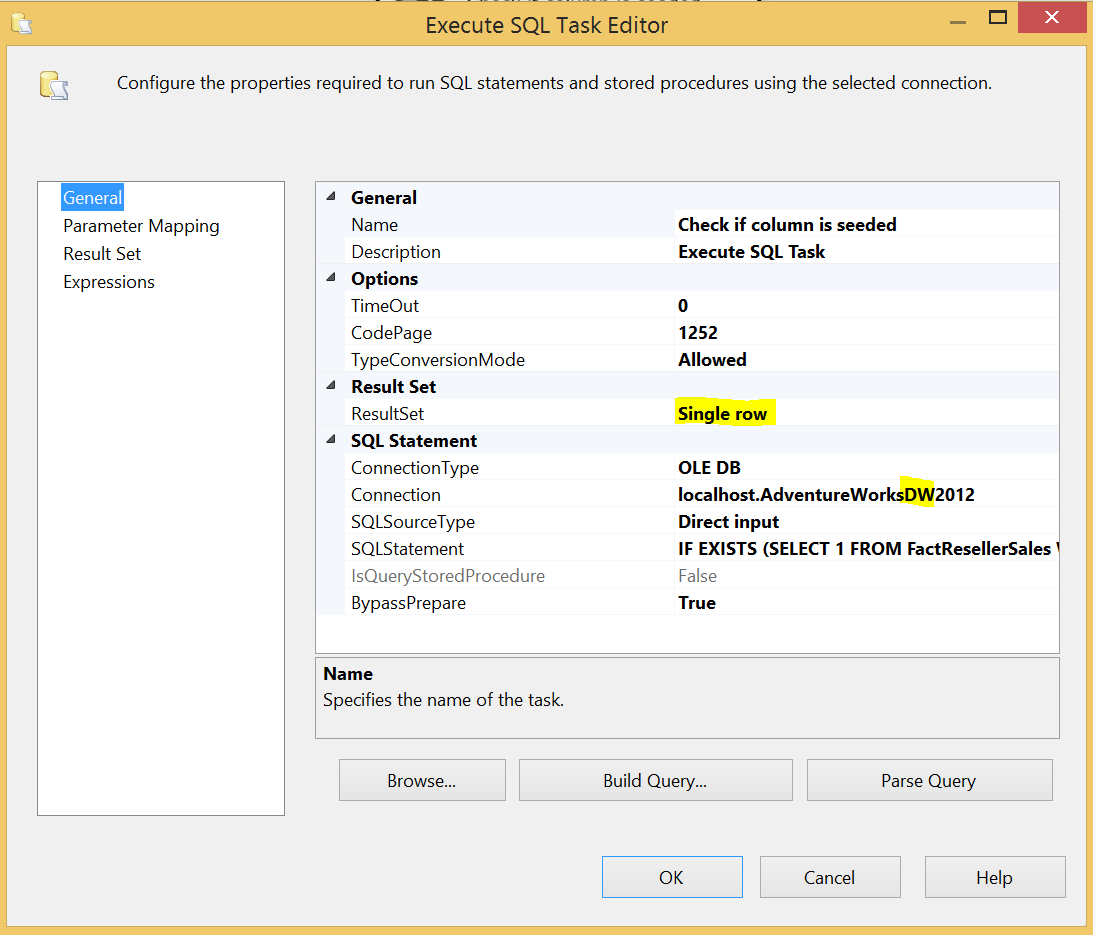
Create the Execute SQL task for the test.

This task should run a check query like this:
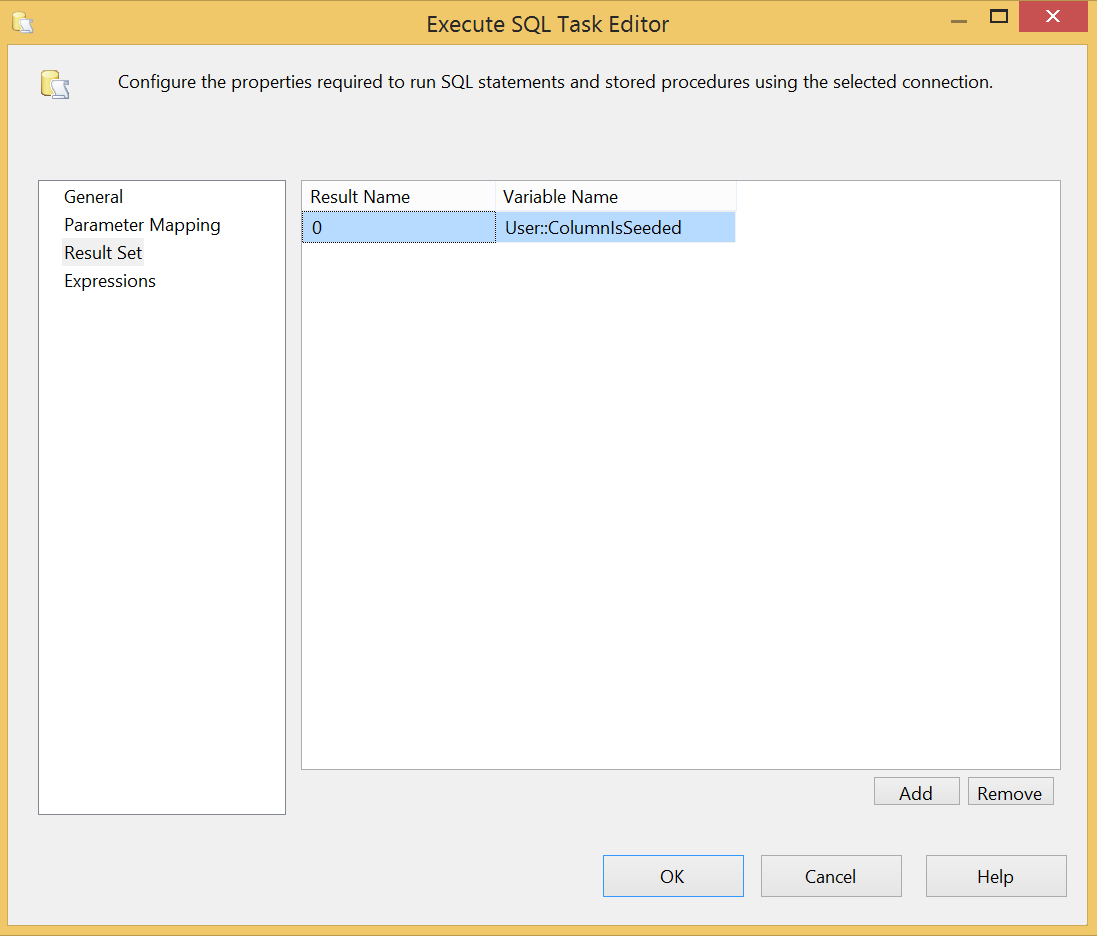
1234567891011IF EXISTS (SELECT1FROM FactResellerSalesWHERE PaymentTypeKey <> '-1')SELECT1 AS ColumnIsPopulatedELSESELECT0 AS ColumnIsPopulatedThis gives you a Boolean value which you can assign to a package variable on which you can direct the flow of the package. The result set is set up as follows:
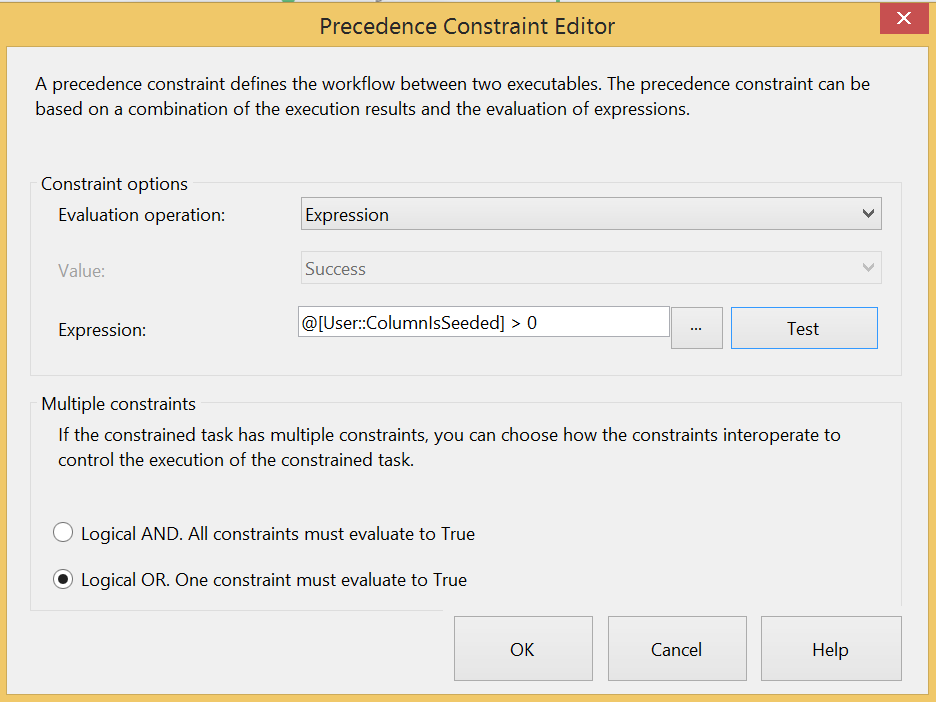
Once you are done, drag in another Execute SQL task that will be used for the creation of the staging table. However before you start that, drag an output to the new task and double click on the arrow to open its properties. From here you can change the “Evaluation operation” from “Constraint” to “Expression” and use the following expression (don’t forget to change the “Multiple constraints” value to a “Logical OR” which implies the ETL will take either this output or the other):
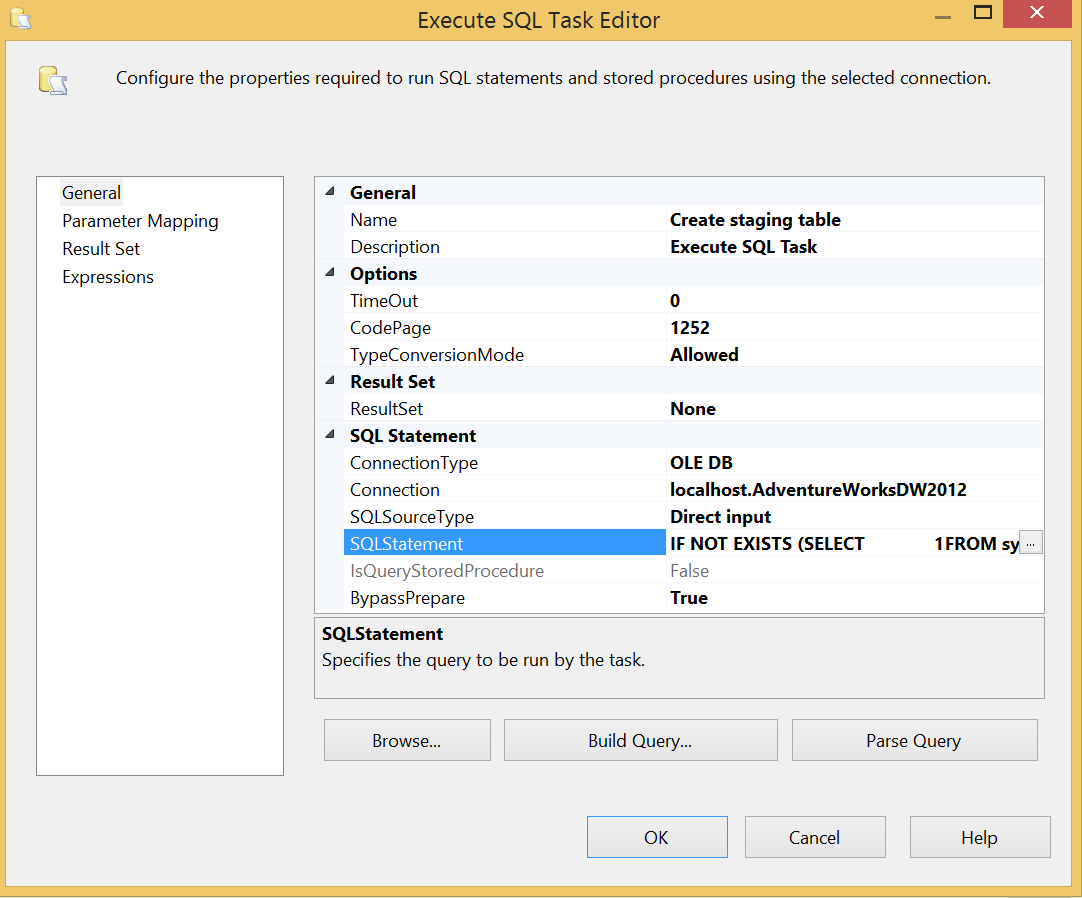
You can now configure the Execute SQL task to create the staging table:
I like to use an IF NOT EXISTS statement to ensure the script is only run if the table does not exist. This is just to ensure the ETL can be stopped more easily at any moment and rerun without errors. Here is the script:
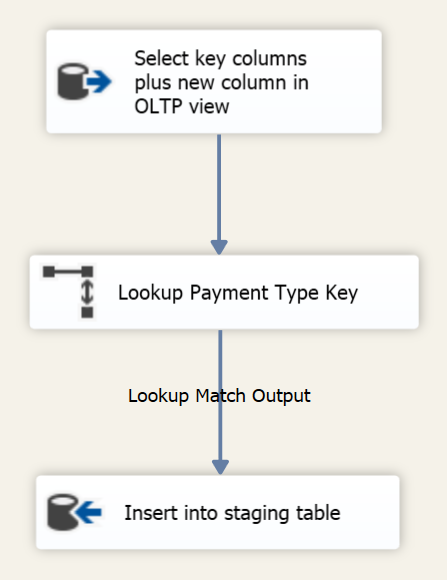
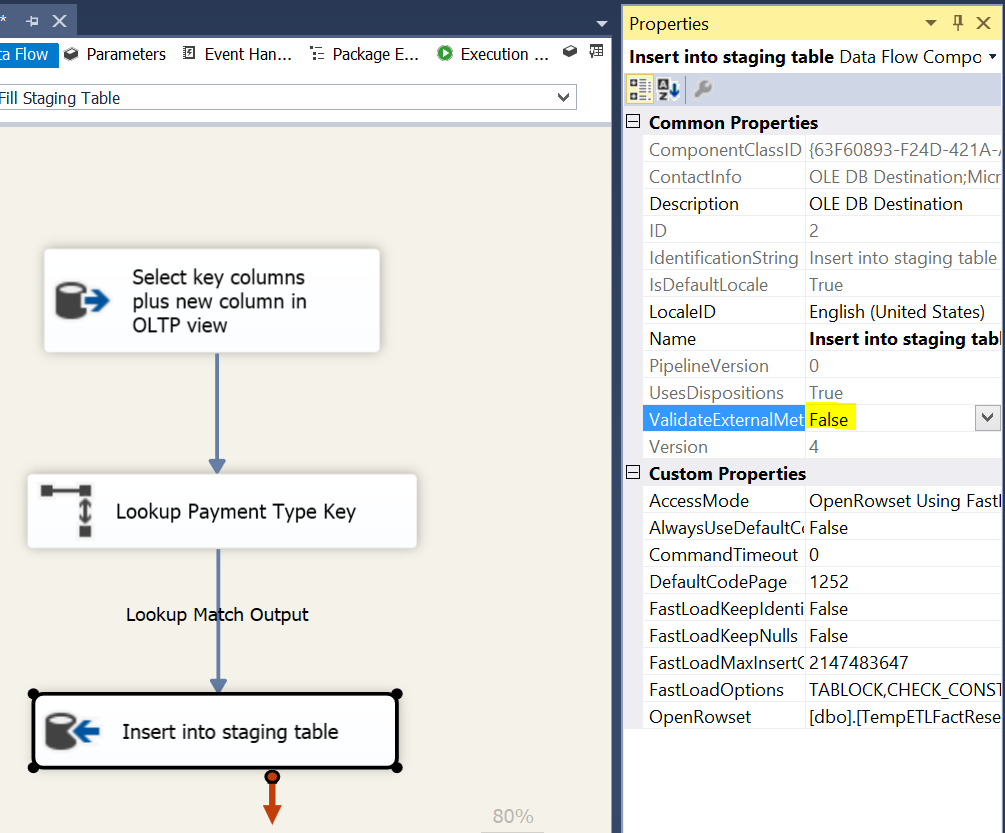
1234567IF NOT EXISTS (SELECT1FROM sys.tablesWHERE name = 'TempETLFactResellerSales')CREATE TABLE TempETLFactResellerSales(SalesOrderNumber varchar(20), SalesOrderLineNumber tinyint, PaymentTypeKey int)The next task is a Data Flow Task. The source selects only the key fact primary key and the new column key from a view on the OLTP database:
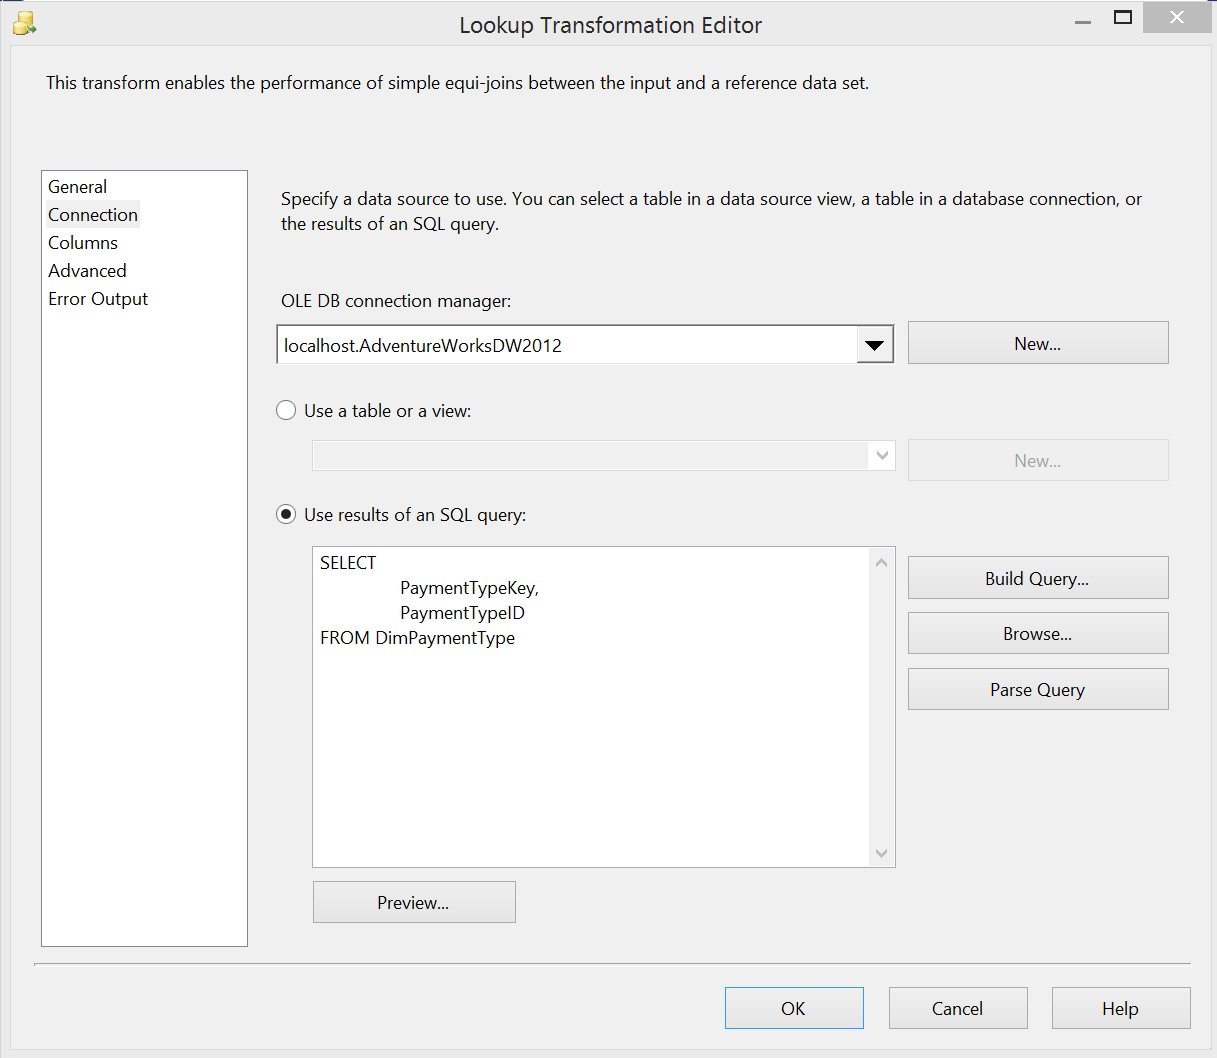
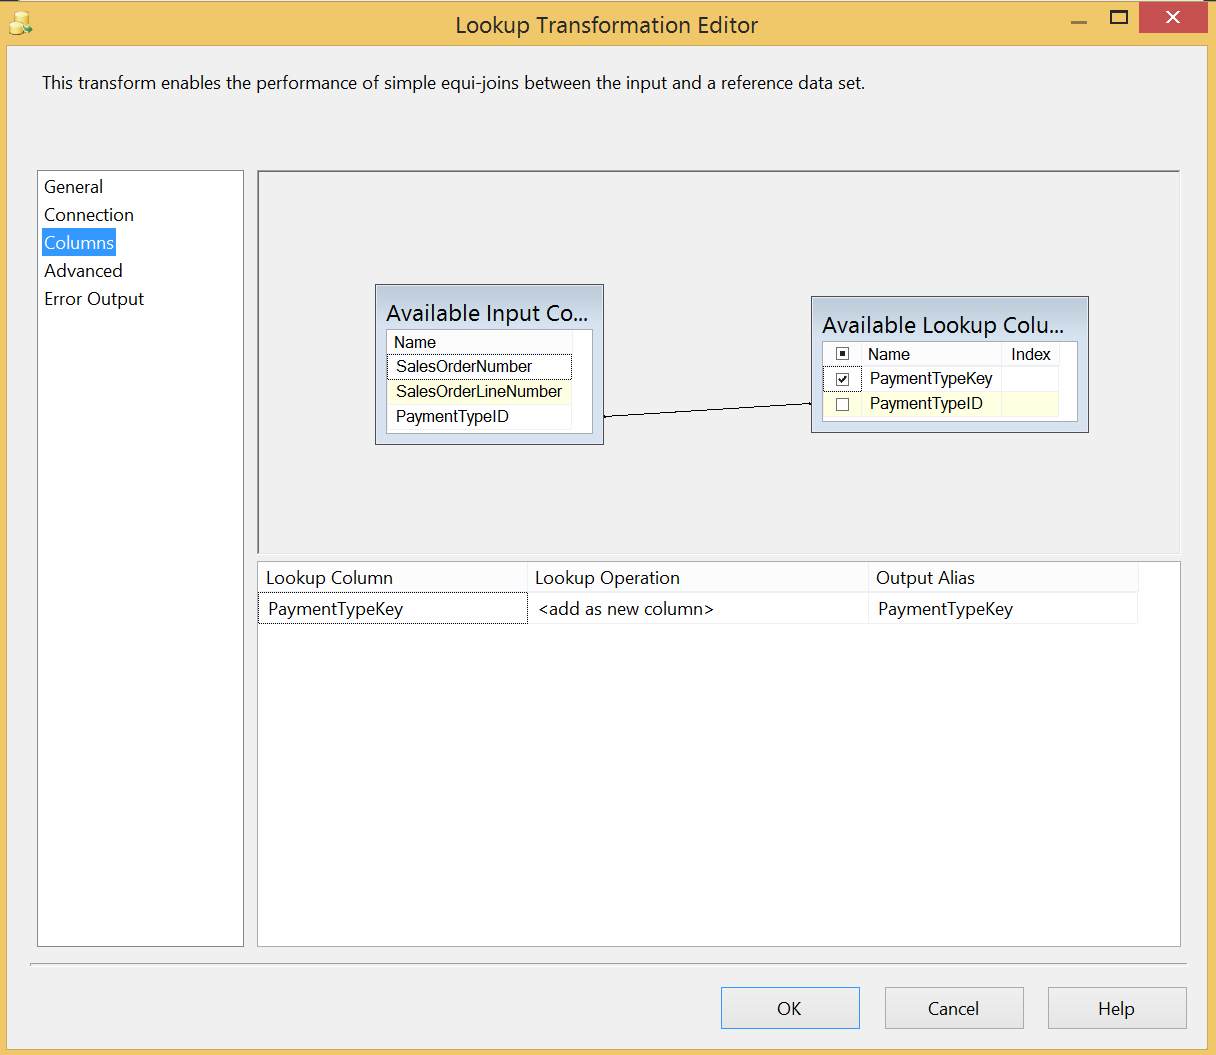
12345678SELECTSalesOrderNumber,SalesOrderLineNumber,PaymentTypeIDFROM ViewFactResellerSalesWHERE PaymentTypeID IS NOT NULLThe lookup task find the PaymentTypeKey from the PaymentTypeID (these are not always the same as surrogate keys are often preferred in denormalized data warehouses). The Lookup task is setup to select the PaymentTypeKey and PaymentTypeID from DimPaymentType in the “Connection” screen and join on PaymentTypeID on the “Columns” screen as follows:
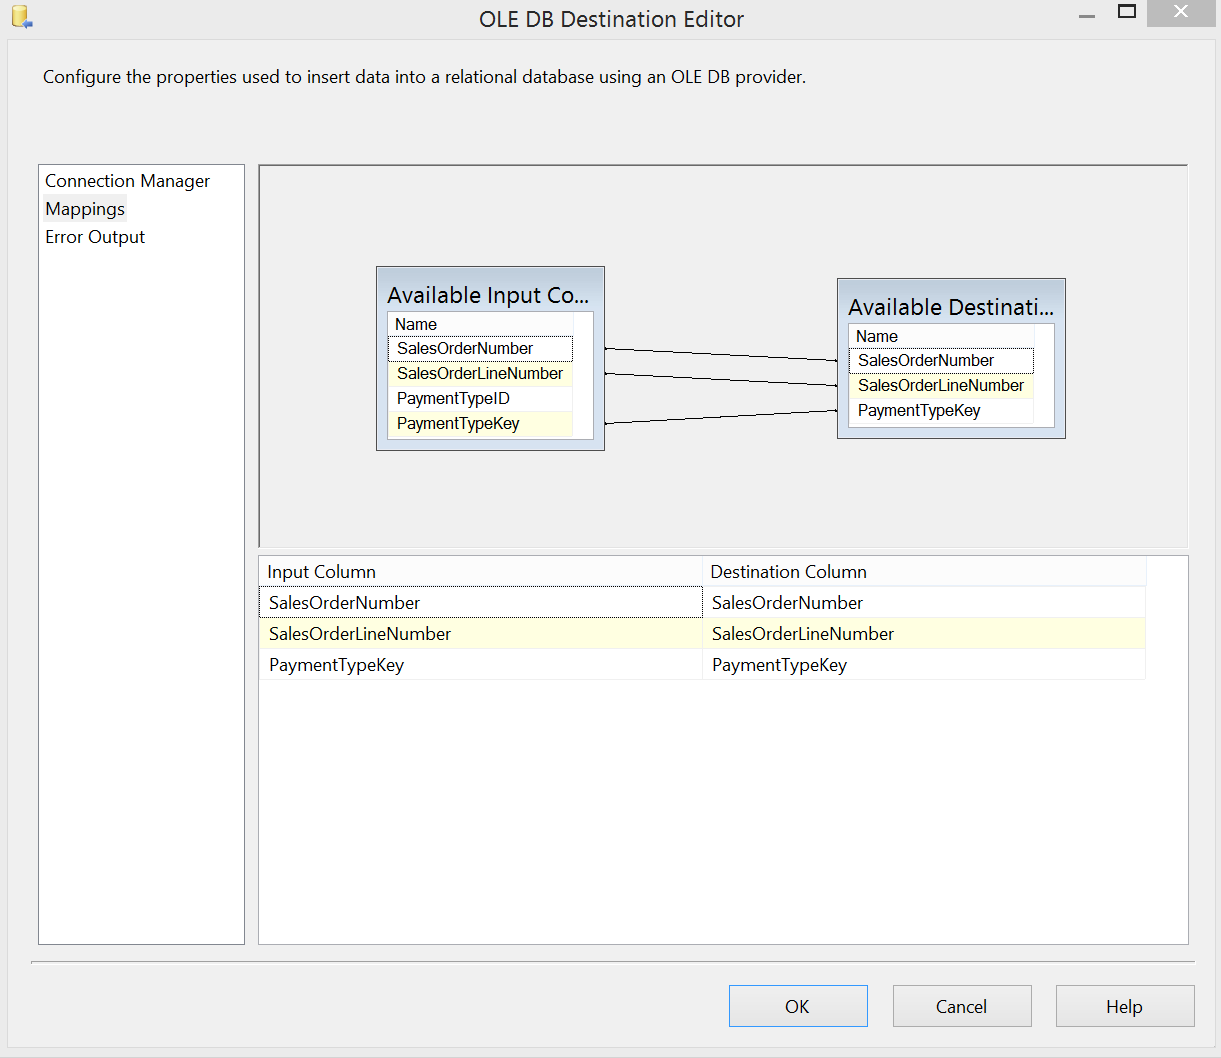
The last step is an OLE DB Source that inserts that lookup output into the staging output with the following mapping:
N.B. You must first run the CREATE script of the temporary staging table to be able to set up this mapping in the UI. Also, in order to run the package it is important to change the “ValidateExternalMetadata” value of the OLE DB Source task to “False”. This allows the package to run even when the table does not yet exists (this is normal as it is created in the previous step)
The final task to create is another Execute SQL task that will run the update of the fact table using the staging table as a reference. It is a simple Execute SQL task on the data warehouse that runs the following query:
123456789101112UPDATE FactSET Fact.PaymentTypeKey = Staging.PaymentTypeKeyFROM FactResellerSales AS FactJOIN TempETLFactResellerSales AS StagingON Fact.SalesOrderNumber = Staging.SalesOrderNumberAND Fact.SalesOrderLineNumber = Staging.SalesOrderLineNumberGODROP TABLE TempETLFactResellerSalesGOAfter this query runs your fact table should have its new column you should now have a dataflow that looks something similar to the screenshot to the left. You will have to join up to the old Data Flow Task to finish up.
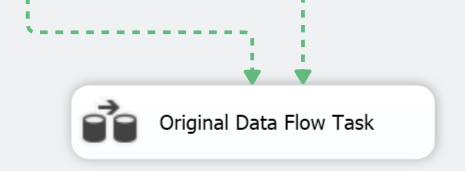
To do so, drag the output of the “Update Fact Table” task to the “Original Data Flow Task”.
Next you need to click on the conditional “Check if column is seeded” task and drag a second output directly to the “Original Data Flow Task” and edit the properties to test the “ColumnIsSeeded” variable and direct to the old Data Flow Task when it’s value is greater than zero as below.
If you do this correctly the outputs of both tasks above the “Original Data Flow Task” should become dotted, this signifies that the flow of the package will follow either one path or the other.
Note, if your old package has multiple starting tasks you can envelope them in a “Sequence Container” to kick off the entire sequence instead of merely the “Original Data Flow Task”


Conclusion
This solution provides a way of safely updating a new column that has been added to an existing fact table. The conditional check allows the flow of the package to update column where there is existing data or just move to the old data flow task if the data has already been populated. With that in mind, the new branch of data flow will logically only run once. Once you have successfully run the ETL you can delete or disable the steps and just run the “Original Data Flow Task” as you did before.
Useful resources:
Designing Star Schema
Data Warehousing Fundamentals: A Comprehensive Guide for IT Professionals
Extending the Data Warehouse Database

View all posts by Evan Barke
- SQL Server Commands – Dynamic SQL - July 4, 2014
- SQL Server cursor performance problems - June 18, 2014
- SQL Server cursor tutorial - June 4, 2014