
This article will cover the SQL SELECT INTO statement including syntax, parameters and use with multiple tables, filegroups and a WHERE condition
We regularly insert data into SQL Server tables either from an application or directly in SSMS. We can insert data using the INSERT INTO statement. To do this, we should have a table already in place to insert data into it as we cannot create a table using Insert into the statement.
We need to do the following tasks using INSERT INTO statement.
- Create a table structure with appropriate data types
- Insert data into it
But the good news is that we can do both the task together, elegantly, using the SQL SELECT INTO statement. It creates a table structure for the columns returned by Select statement.
Suppose we want to update many records in a table. We can use the SELECT INTO statement to create a backup table with the existing structure as of source table. Let us explore the SELECT INTO in this article.
SELECT INTO statement syntax
|
1 2 3 4 |
SELECT column1,column2...ColumnN INTO New_table FROM tables [Where conditions]; |
Parameters in the SELECT INTO Statement
- Columns list: We need to specify column we want to retrieve and insert into a new table
- New_table: We can specify the new table name here. SQL Server creates a new table with columns mentioned in columns list. We cannot replace an existing table using this. Table name should be unique
- Tables: It contains a table from where we want to get records. We can have multiple tables defined here as well with proper Join clause
- WHERE conditions: We can filter records using Where clause. It is an optional clause
Let us explore the SQL SELECT INTO statement using examples.
Environment:
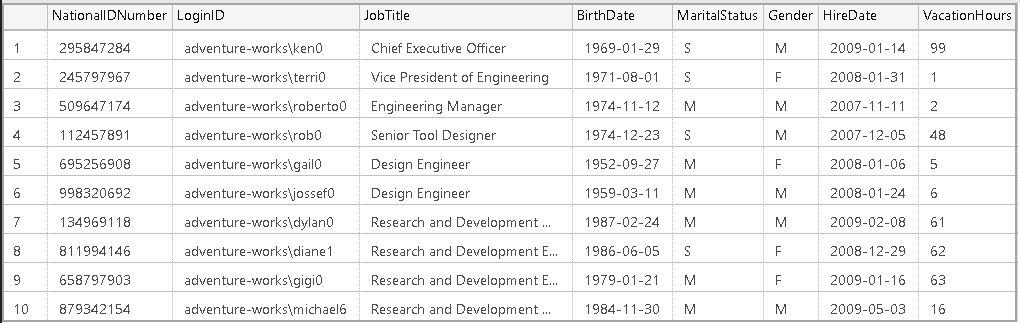
In this example, we are using sample database AdventureWorks2017. Suppose we want to select records from [Employee] table and creates new table [Employee_Demo] using the SELECT INTO statement. We do want selected columns only in the new table. Let us run a select statement on Employee table with the columns we want to have.
|
1 2 3 4 5 6 7 8 9 10 |
SELECT TOP (10) [NationalIDNumber] ,[LoginID] ,[JobTitle] ,[BirthDate] ,[MaritalStatus] ,[Gender] ,[HireDate] ,[VacationHours] FROM [AdventureWorks2017].[HumanResources].[Employee] |

Before we execute the SQL SELECT INTO statement, we can verify that Employee_Demo table does not exist in AdventureWorks2017 database using sp_help command.
|
1 |
sp_help '[AdventureWorks2017].[HumanResources].[Employee_Demo]' |
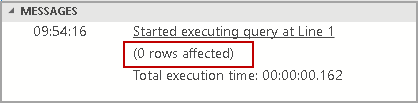
In the following screenshot, we can see that Employee_Demo table does not exist in my database.

Execute the following query to create new table [Employee_Demo] using the SELECT INTO statement.
|
1 2 3 4 5 6 7 8 9 10 |
SELECT TOP (10) [NationalIDNumber] ,[LoginID] ,[JobTitle] ,[BirthDate] ,[MaritalStatus] ,[Gender] ,[HireDate] , [VacationHours] INTO [AdventureWorks2017].[HumanResources].[Employee_Demo] FROM [AdventureWorks2017].[HumanResources].[Employee] |
We get the following output message in Azure Data Studio. You can note that the number of rows affected is 10. In the query, we selected top 10 records from an Employee table.

We can access data from newly created table Employee_Demo and verify that it contains same records as of our earlier select statement.
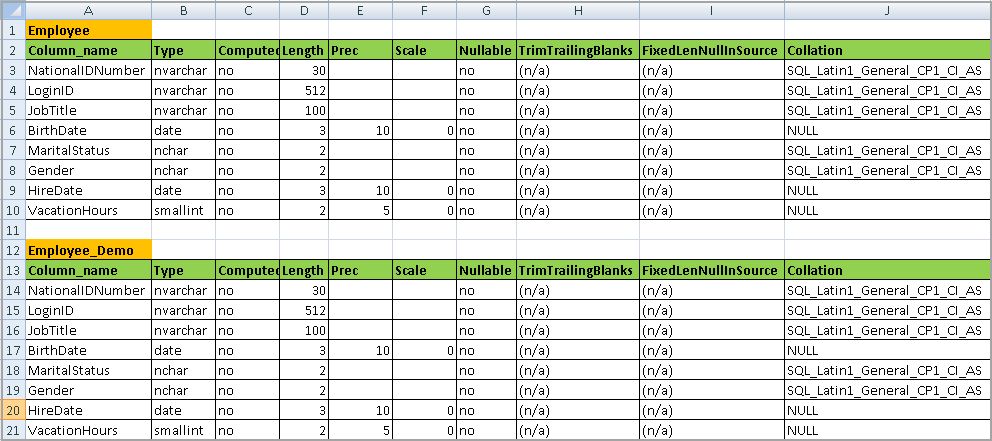
We did not specify any column properties in the SQL SELECT INTO statement. Let us compare the source and destination table columns and their properties.
We can run sp_help ‘tablename’ command on both Employee and Employee_Demo table. I copied the output of both tables in excel ( for selected columns). In the following screenshot, you can see that column datatype and their properties are similar.
In the previous SQL SELECT INTO statement, we prepared a destination table (Employee_Demo) from a few columns in the source table (Employee).
Let us create another table with all columns in an Employee table with the following query.
|
1 2 |
SELECT * INTO [AdventureWorks2017].[HumanResources].[Employee_All] from [AdventureWorks2017].[HumanResources].[Employee] |
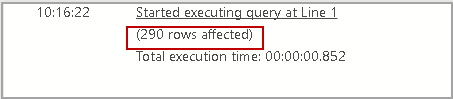
In the output, we can see it inserted 290 rows in Employee_All table.

We have verified that the SELECT INTO statement creates a new table with columns specified in the column list. It creates a similar data type as well in the destination table.
Suppose we have primary and foreign keys in the source table. Does it create a primary key and foreign key as well similar to the source table? No, the SQL SELECT INTO statement does not create any keys in the destination table. If we want, we can define keys on the destination table. Let us verify this in the following section.
In my earlier example, Employee table contains primary and foreign key defined on it. We can get a list of existing keys using the INFORMATION_SCHEMA view. Execute the following code, and it returns existing Primary and Foreign keys in Employee table.
|
1 2 3 4 5 6 7 8 |
SELECT DISTINCT Constraint_Name AS [Constraint], Table_Schema AS [Schema], Table_Name AS [TableName] FROM INFORMATION_SCHEMA.KEY_COLUMN_USAGE where Table_Name='Employee' GO |
We can see, Employee table contains primary and foreign keys.

We copied all columns in Employee_All from Employee table. We need to check Primary and Foreign key on destination table now.
|
1 2 3 4 5 6 7 8 |
SELECT DISTINCT Constraint_Name AS [Constraint], Table_Schema AS [Schema], Table_Name AS [TableName] FROM INFORMATION_SCHEMA.KEY_COLUMN_USAGE where Table_Name='Employee_All' GO |
We can see that it does not contain any key in destination table. It gives us flexibility to define keys on the destination table.
SQL SELECT INTO – Insert Data from Multiple Tables
In previous examples, we created a table using the SELECT INTO statement from a single table Employee. We can also join multiple tables and use the SELECT INTO statement to create a new table with data as well. In this section, we want to join multiple tables together. In the following query, we joined the following tables together in AdventureWorks2017.
- [HumanResources].[Employee]
- [Person].[Person]
- [Person].[BusinessEntityAddress]
- [Person].[Address]
- [Person].[StateProvince]
- [Person].[CountryRegion]
- [Person].[PersonPhone]
- [Person].[PhoneNumberType]
- [Person].[EmailAddress]
Execute the following query. It gives results from multiple tables based on join condition and columns mentioned.
|
1 2 3 4 5 6 7 8 9 10 11 12 13 14 15 16 17 18 19 20 21 22 23 24 25 26 27 28 29 30 31 32 33 34 35 36 37 |
SELECT e.[BusinessEntityID] ,p.[Title] ,p.[FirstName] ,p.[MiddleName] ,p.[LastName] ,p.[Suffix] ,e.[JobTitle] ,pp.[PhoneNumber] ,pnt.[Name] AS [PhoneNumberType] ,ea.[EmailAddress] ,p.[EmailPromotion] ,a.[AddressLine1] ,a.[AddressLine2] ,a.[City] ,sp.[Name] AS [StateProvinceName] ,a.[PostalCode] ,cr.[Name] AS [CountryRegionName] ,p.[AdditionalContactInfo] FROM [HumanResources].[Employee] e INNER JOIN [Person].[Person] p ON p.[BusinessEntityID] = e.[BusinessEntityID] INNER JOIN [Person].[BusinessEntityAddress] bea ON bea.[BusinessEntityID] = e.[BusinessEntityID] INNER JOIN [Person].[Address] a ON a.[AddressID] = bea.[AddressID] INNER JOIN [Person].[StateProvince] sp ON sp.[StateProvinceID] = a.[StateProvinceID] INNER JOIN [Person].[CountryRegion] cr ON cr.[CountryRegionCode] = sp.[CountryRegionCode] LEFT OUTER JOIN [Person].[PersonPhone] pp ON pp.BusinessEntityID = p.[BusinessEntityID] LEFT OUTER JOIN [Person].[PhoneNumberType] pnt ON pp.[PhoneNumberTypeID] = pnt.[PhoneNumberTypeID] LEFT OUTER JOIN [Person].[EmailAddress] ea ON p.[BusinessEntityID] = ea.[BusinessEntityID]; GO |
Execute a query, and we get following the output of the SQL SELECT INTO statement.
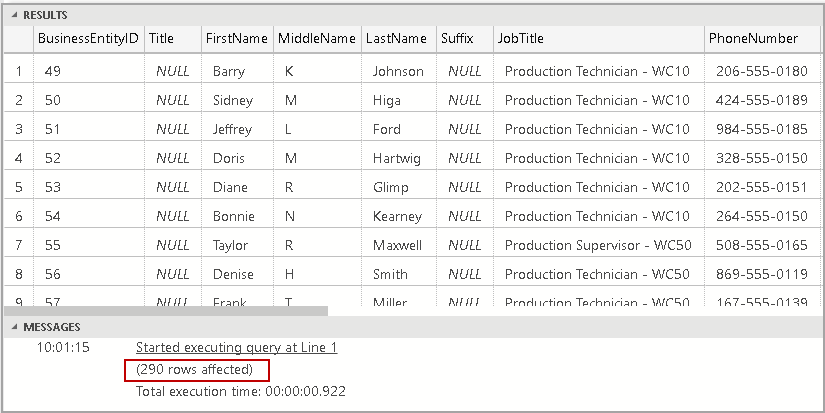
We want to create a table with data returned using the above table. Let’s execute the SQL SELECT INTO statement.
|
1 2 3 4 5 6 7 8 9 10 11 12 13 14 15 16 17 18 19 20 21 22 23 24 25 26 27 28 29 30 31 32 33 34 35 36 37 38 |
SELECT e.[BusinessEntityID] ,p.[Title] ,p.[FirstName] ,p.[MiddleName] ,p.[LastName] ,p.[Suffix] ,e.[JobTitle] ,pp.[PhoneNumber] ,pnt.[Name] AS [PhoneNumberType] ,ea.[EmailAddress] ,p.[EmailPromotion] ,a.[AddressLine1] ,a.[AddressLine2] ,a.[City] ,sp.[Name] AS [StateProvinceName] ,a.[PostalCode] ,cr.[Name] AS [CountryRegionName] ,p.[AdditionalContactInfo] INTO [HumanResources].[Employee_JoinTables] FROM [HumanResources].[Employee] e INNER JOIN [Person].[Person] p ON p.[BusinessEntityID] = e.[BusinessEntityID] INNER JOIN [Person].[BusinessEntityAddress] bea ON bea.[BusinessEntityID] = e.[BusinessEntityID] INNER JOIN [Person].[Address] a ON a.[AddressID] = bea.[AddressID] INNER JOIN [Person].[StateProvince] sp ON sp.[StateProvinceID] = a.[StateProvinceID] INNER JOIN [Person].[CountryRegion] cr ON cr.[CountryRegionCode] = sp.[CountryRegionCode] LEFT OUTER JOIN [Person].[PersonPhone] pp ON pp.BusinessEntityID = p.[BusinessEntityID] LEFT OUTER JOIN [Person].[PhoneNumberType] pnt ON pp.[PhoneNumberTypeID] = pnt.[PhoneNumberTypeID] LEFT OUTER JOIN [Person].[EmailAddress] ea ON p.[BusinessEntityID] = ea.[BusinessEntityID]; GO |
It creates [HumanResources].[Employee_JoinTables] table and insert data into it. We can verify records in this table by the select statement.
We can see you can join multiple tables together and creates output table using the SELECT INTO statement.
We do not need to take care of defining data types for destination table. If we want to create a table manually, we need to look at data type of each column and define datatype accordingly. If there is a mismatch between data types, you can get an error message like following.
Error 1: Due to a mismatch in data types
Msg 245, Level 16, State 1, Line 1
Conversion failed when converting the varchar value ‘GG’ to data type int.
Error 2: Msg 8152, Level 16, State 30, Line 2
String or binary data would be truncated.
We do not get these errors while inserting data using the SQL SELECT INTO statement. However, we cannot insert data into existing tables using this method.
SELECT INTO – Specify Filegroup
In previous sections, we explored that we can create a new table and insert data into it using the SQL SELECT INTO statement from existing tables. It creates a table in default Filegroup only. We cannot specify a particular Filegroup until SQL Server 2016. In SQL Server 2017, we can specify a particular Filegroup in which a new table should be created. SQL Server creates a new table in that particular Verify table Filegroup. If we do not specify any Filegroups in SQL Server 2017 and above, it creates a table in default Filegroup.
Note: We cannot specify Filegroups in the SQL SELECT INTO for SQL Server 2016 and before.
Let us add a new Filegroup in AdventureWorks2017 database. Right click on the database and go to Filegroups.
In this Filegroup page, click on Add FileGroup and specify a name for Filegroup.
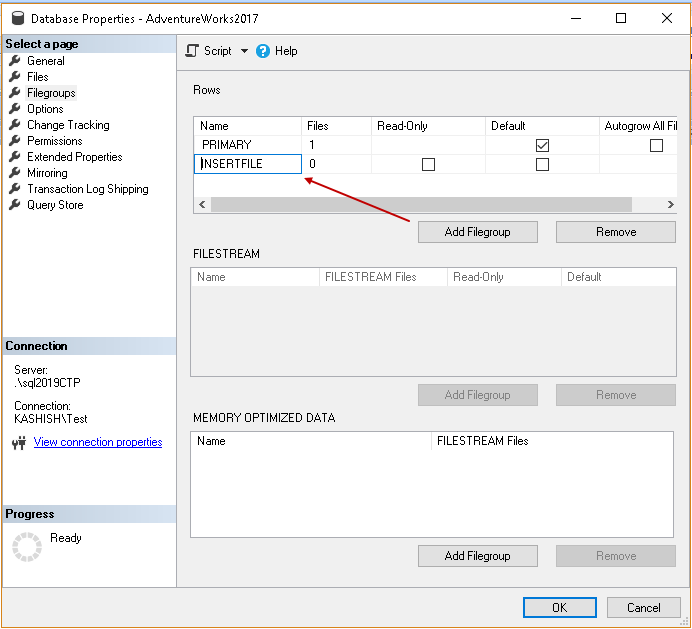
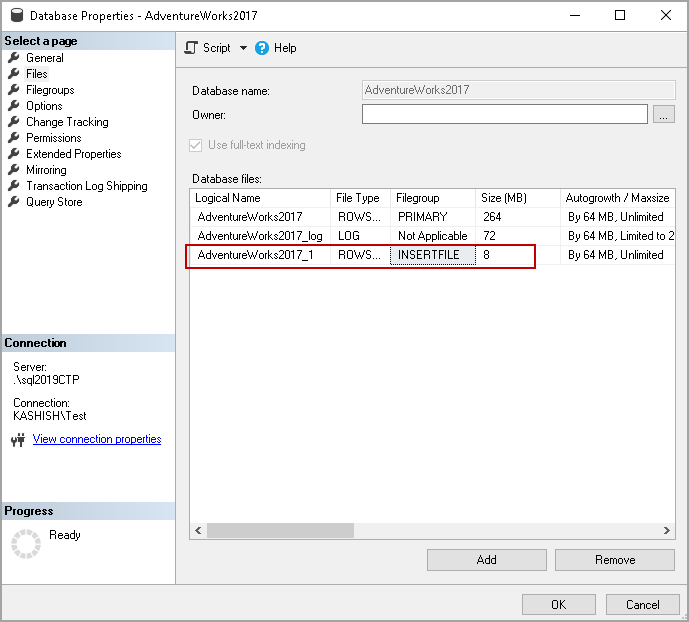
Now, click on Files and it lists out existing database files(data and log file), in this page, add a new datafile and specify FileGroup from the drop-down list. It should be FileGroup we created just now.
We want to create a SQL table in INSERTFILE Filegroup. We have not set this filegroup as default filegroup.
In the following query, you can see we specified filegroup name using ON clause. It works similar to a regular SQL SELECT INTO statement with a difference in a filegroup.
|
1 2 3 |
select * into person.person_temp ON INSERTFILE --FILEGROUP NAME from person.person |
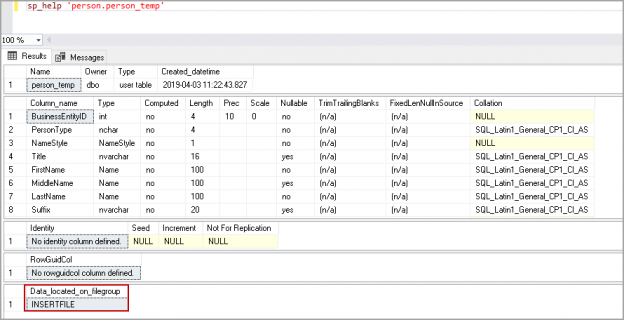
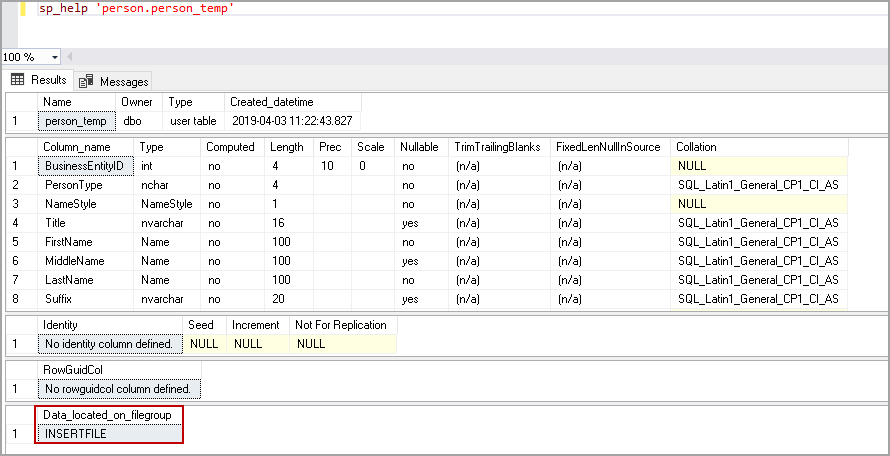
Once the table is created, execute a sp_help command on this newly created table. In the following screenshot, we can verify that the table is located on INSERTFILE FileGroup. It is the FileGroup we created earlier.
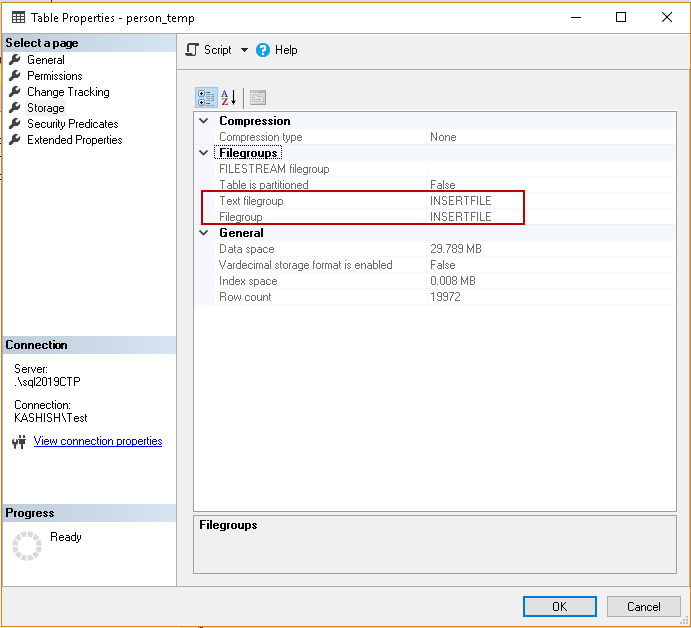
We can also verify this from table properties. Right-click on a table in SSMS. In the Storage section, we can see the desired FileGroup.
SELECT INTO with a Where condition
Suppose we want to create a table with a SQL SELECT INTO statement with few records in it. We can use a Where clause similar to a select statement. In the following query, we want to create a person.person_WC table for the person having last name is like %Duf%.
|
1 2 3 4 |
select * into person.person_WC ON INSERTFILE -- Verify table Filegroup from person.person where Lastname like '%Duf%' |
Conclusion
In this article, we explored the SQL SELECT INTO statement and its usage scenarios. It is a useful command to create a copy of a table without specifying data types.

I am the author of the book "DP-300 Administering Relational Database on Microsoft Azure". I published more than 650 technical articles on MSSQLTips, SQLShack, Quest, CodingSight, and SeveralNines.
I am the creator of one of the biggest free online collections of articles on a single topic, with his 50-part series on SQL Server Always On Availability Groups.
Based on my contribution to the SQL Server community, I have been recognized as the prestigious Best Author of the Year continuously in 2019, 2020, and 2021 (2nd Rank) at SQLShack and the MSSQLTIPS champions award in 2020.
Personal Blog: https://www.dbblogger.com
I am always interested in new challenges so if you need consulting help, reach me at rajendra.gupta16@gmail.com
View all posts by Rajendra Gupta
- How to install PostgreSQL on Ubuntu - July 13, 2023
- How to use the CROSSTAB function in PostgreSQL - February 17, 2023
- Learn the PostgreSQL COALESCE command - January 19, 2023