
In this series of articles, we are going to learn about the basics of the MySQL database server. In this article, I am going to explain how we can query the data from the MySQFL server using the SELECT statement.
For the demonstration, I have installed MySQL 8.0 and MySQL Workbench on my workstation and also restored a demo database named sakila. This article helps you to install the MySQL server on Windows 10. You can download the sakila database from here, and the installation steps are provided in this article.
Now to understand the schema architecture of the tables of the sakila, we will generate a schema diagram by reverse-engineering the database.
Generate schema diagram
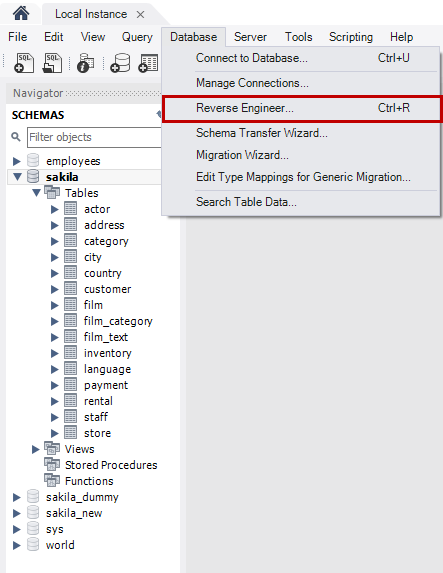
To generate the schema diagram, Open MySQL workbench -> Connect to MySQL database engine -> From the menu bar, click on the database -> Select Reverse Engineer. See the following image:
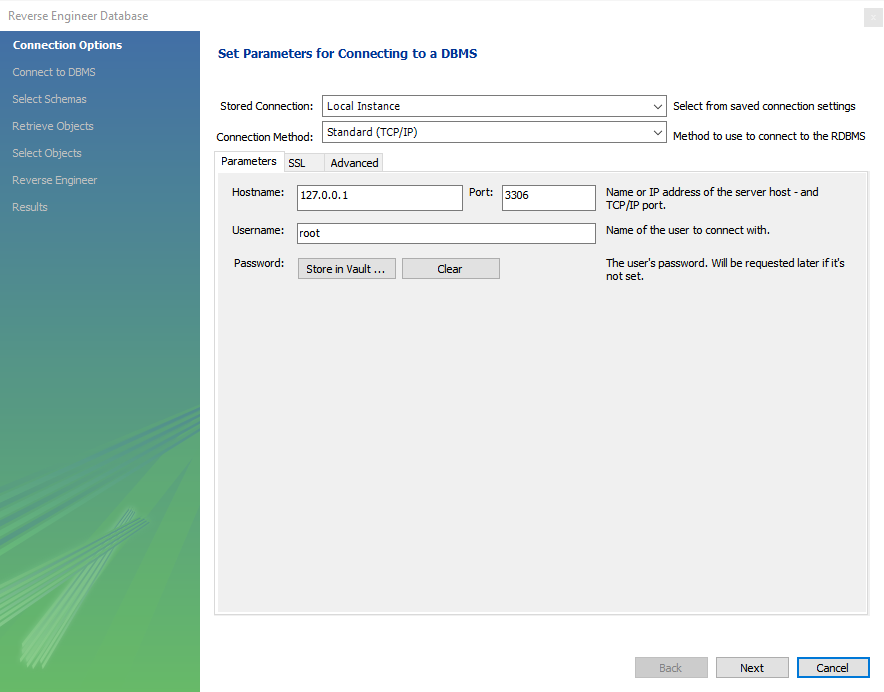
On the Reverse Engineer Database screen, choose the connection name from the Stored Connection drop-down box, choose the appropriate connection method (TCP/IP OR Named Pipe) from Connection Method drop-down box. Enter hostname or IP Address in the Hostname text box. Enter the appropriate port number in Port Number text box. And finally, enter the appropriate user name in the Username text box and click on Next. See the following image:
Now, MySQL database server tries to establish the connection between the reverse engineering wizard and server and fetch the information of the database hosted on the server. If it fails, then the error will be shown on Connect to DBMS and fetch the information screen. The connection is established successfully. See the following image. Click on Next.

On the Select Schemas to Reverse Engineer screen, you can choose the database. The wizard will generate the schema diagram of the selected database. We want to generate the schema of the sakila database; hence, click on sakila and click on Next. See the following image:

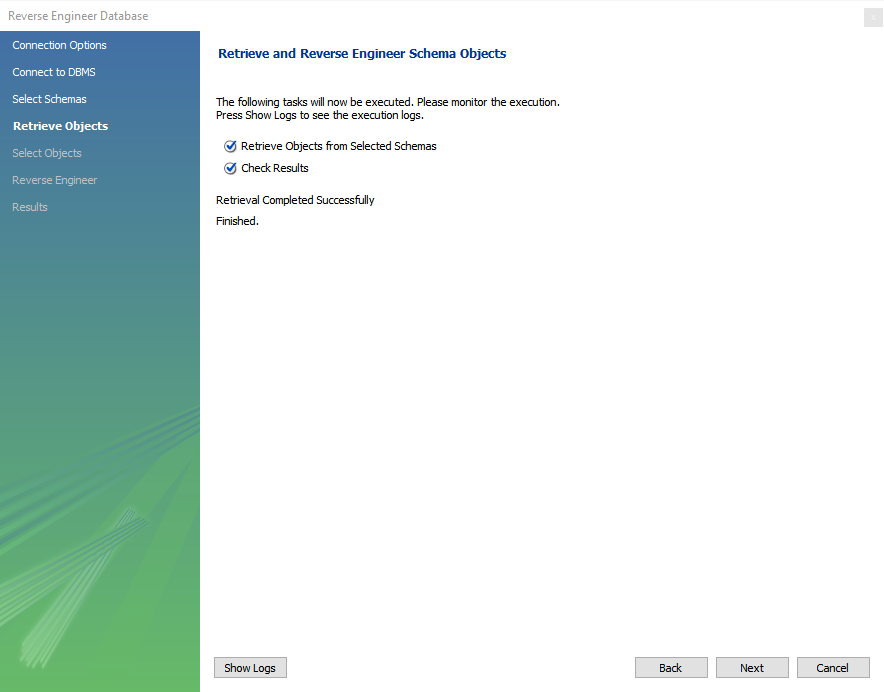
On retrieve and reverse engineer schema object screen, the wizard populates the schema object to the sakila database. If any occurs, which fetching the object, it displays on the screen. The schema is fetched successfully. Click on Next. See the following image:
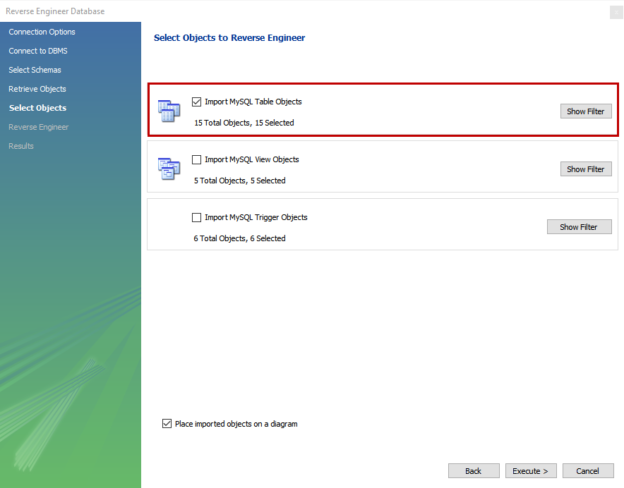
On Select objects to Reverse Engineer screen, you can choose the objects which you want to reverse engineer. We want to generate the diagram of the tables hence select Import MySQL table object and click on Execute. See the following image:

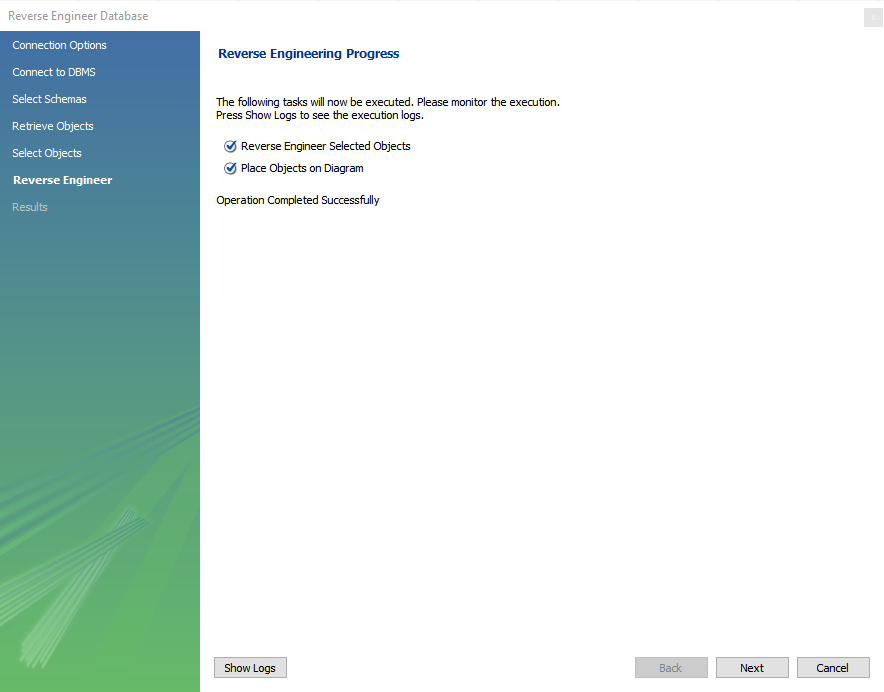
The reverse engineering process on the database starts. If it encounters any error, it will be displayed on the Reverse engineering process screen. The process was completed successfully. Click on Next. See the following image:
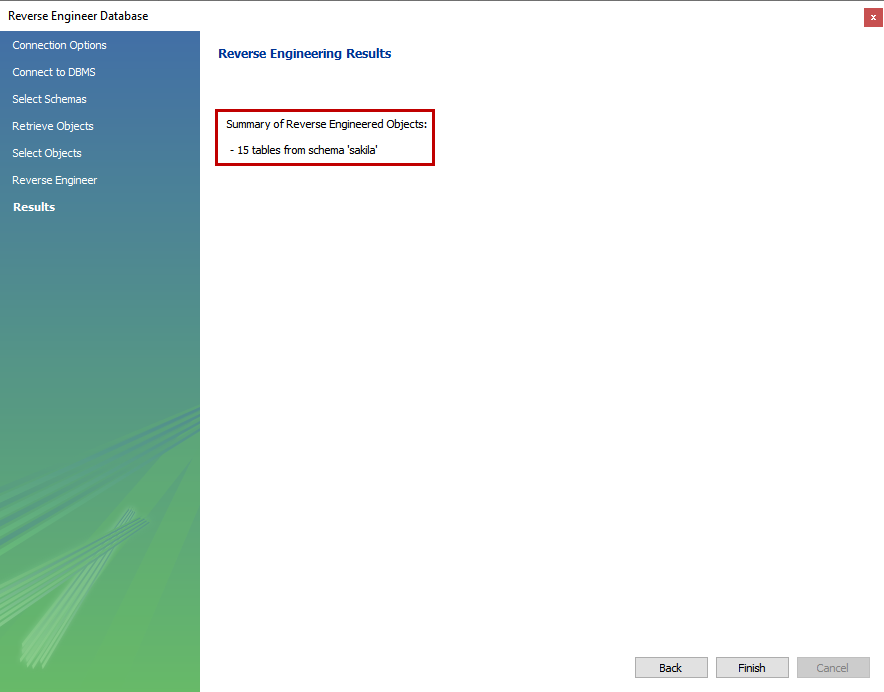
On the Reverse Engineering Result screen, you can see the details of the reverse-engineered objects. Click on Finish to close the dialog box. See the following image:
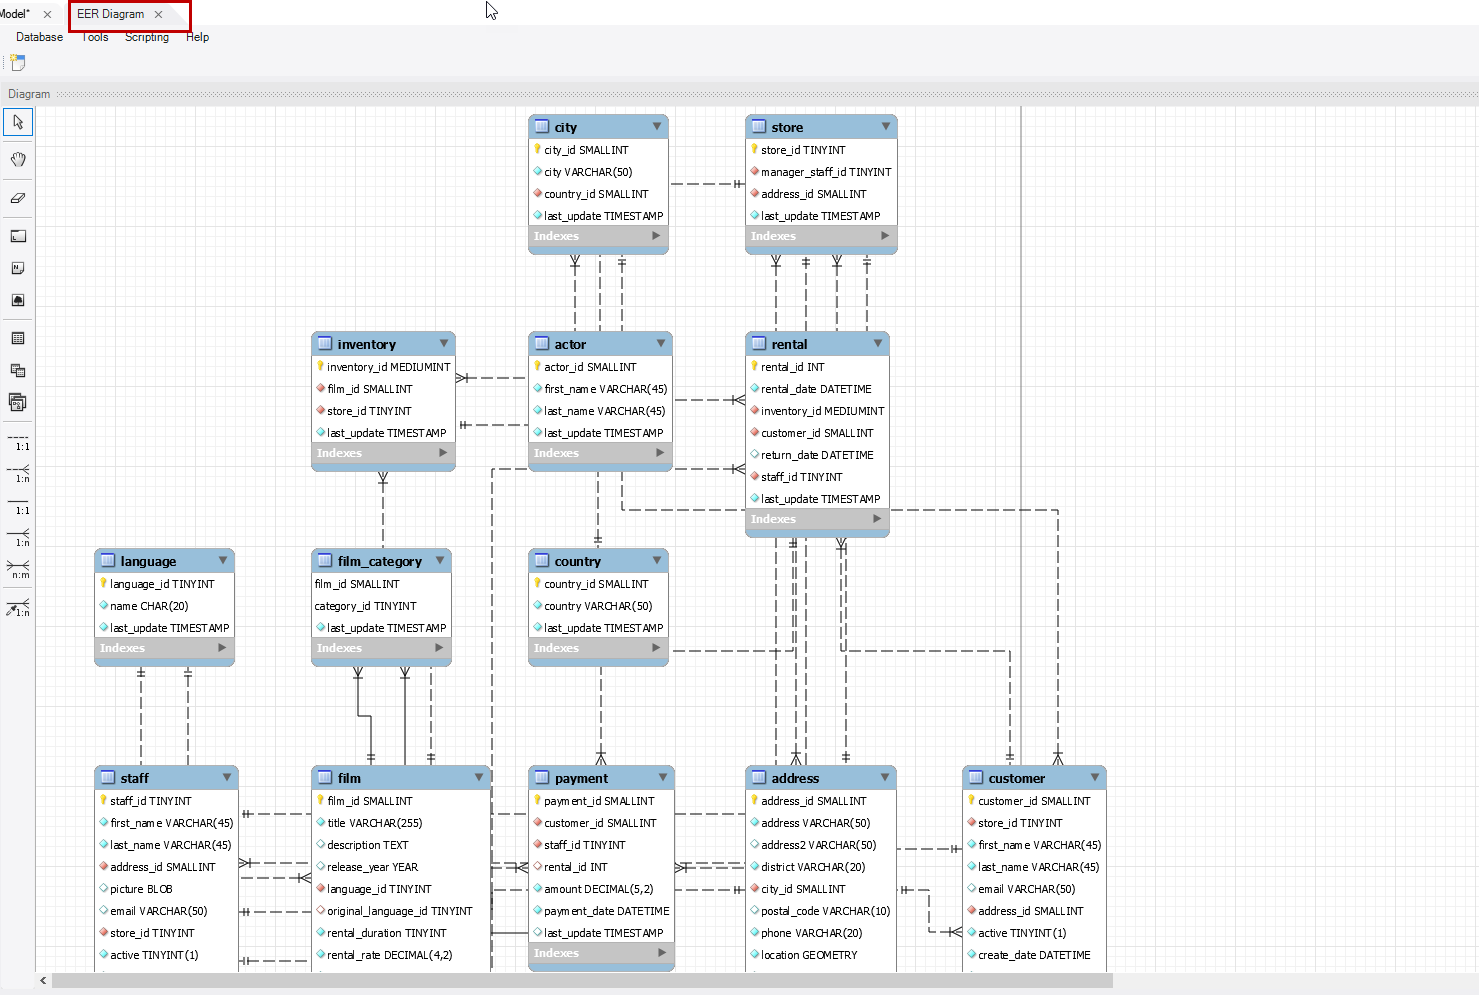
Once the process completes, you can see the schema diagram of the sakila database that has been created. The diagram is in the EER tab of MySQL workbench. If you want to use it later, you can save this diagram. See the following image:
Now, as the diagram has been prepared, we can use it to understand the schema structure of the database and use the tables to understand the concept of MySQL database programming. First, let me explain about the SELECT statement.
Introduction to the SELECT statement
The SELECT statement is used to populate data from any table of the MySQL database server. It is neither a DML (Data modification language) or DDL (Data definition language). It is a limited form of DML statement that is used only to populate the data from the database. The basic syntax of the SELECT statement is following
|
1 2 3 4 |
Select <column_1>, <column_2>,.. From Table; |
In the syntax, the keyword SELECT keyword is to instruct the database to retrieve the data. The second segment is the list of columns or the expressions which you want to retrieve in the result set. Here you can specify the list of columns or the expressions, or you can specify the star(*). Now, when we specify the star(*), then the query populates all the columns.
Finally, in the FROM keyword, you can specify the name of the table or the view. If you want to filter the data or sort the data, the keywords will be placed after the name of the table or view.
In the syntax, the semicolon is used as a statement delimiter. The semicolon is considered as an end of the query. If you want to get the result of multiple queries, then you must specify semicolon at the end of an individual query. When we specify it at the end of multiple queries, MySQL executes them individually and generates separate resultsets for them.
Note: Many users ask how we can run multiple SELECT statements in MySQL Workbench. When we want to use multiple SELECT statements in the query, you must specify semicolon at the end of the query. The result set of the queries will be displayed in multiple tabs of the output window.
Using the SELECT statement to retrieve specific columns data of the table
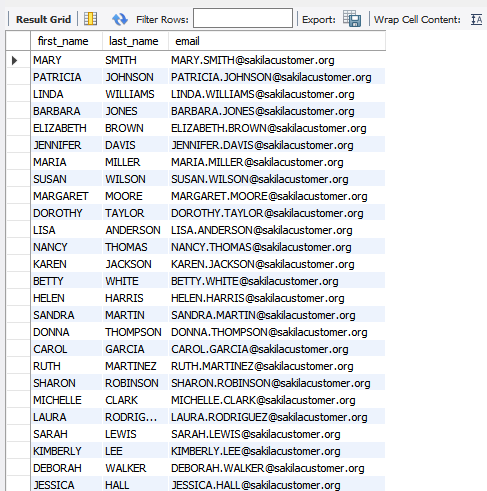
For example, I want to populate only the first_name, last_name, and email column of the customer table of the sakila database. The query should be written as follows:
|
1 2 |
use sakila; select first_name, last_name, email from customer; |
The output is below
Using the SELECT statement to retrieve all the columns of the table
For example, I want to populate all columns of the customer table of the sakila database. The query should be written as follows:
|
1 2 |
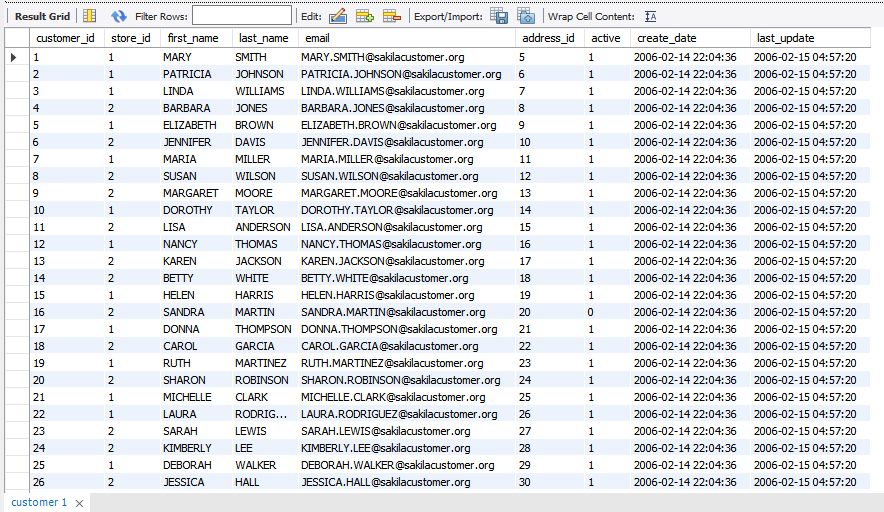
use sakila; select * from customer; |
The output is shown below:
Few notes about using start (*) in Select statement
- Always remember, never use SELECT * FROM table unless it is necessary. SELECT * FROM always generates an unnecessary IO on the database. For example, you have a table that has a column that stores BLOB data, and when you use SELECT * FROM for that table, query populates the BLOB column as well, which generates a tremendous amount of IO
- Suppose, you have developed an application, and within the application, you store the output of the query in a dataset, and you are using the index of columns. Now due to business requirements, you have to add more columns in the table. In such cases, the index of the columns will be changed, so in the dataset, you will get the unexpected resultset
- Sometimes, it shows the sensitive information to the users. For example, the index of the user_id column is 0, an index of the first_name column is 2. Now someone adds the password column at index location 1. Now, based on the index of columns defined in the dataset, the application displays the data in textboxes. Now, when the web pages load, in the textbox, which displays the first name of the user, it will show the password of the user. It is one of the rare mistakes, but might happens for the people who are developing the application for the first time
- Another example is an ad-hoc query. If you use SELECT * FROM in the query, it will show the password column as well. It is a common mistake, but nowadays, the MySQL database server is smart enough to hide the sensitive information by using the data masking feature. You can read more about it from this article, Enterprise Data Masking in MySQL
Summary
In this article, I have explained how we can generate the schema of an existing MySQL database using MySQL Workbench. Moreover, I have also explained the SELECT statement in the MySQL database server. In the next article, I am going to cover how we can filter and sort the data from the table. Stay tuned..!!
Table of contents

He has expertise in database design, performance tuning, backup and recovery, HA and DR setup, database migrations and upgrades. He has completed the B.Tech from Ganpat University. He can be reached on nisargupadhyay87@outlook.com
- Copy SQL Databases between Windows 10 and CentOS using SQL Server data tools - October 19, 2022
- Changing the location of FILESTREAM data files in SQL Database - October 14, 2022
- Manage SQL Databases in CentOS: Manage filegroups of user databases - October 5, 2022