
SQL Server Management Studio is a software application that helps users to easily access the SQL Server database engine and manipulate objects and data stored on SQL Server databases. The first version was released with Microsoft SQL Server 2005, replacing Enterprise Manager as the primary interface for Microsoft SQL Server.
There are several major improvements in SQL Server Management Studio 2008 compared to SQL Server Management Studio 2005 including:
- Activity Monitor
- Object Explorer Details
- Object Search
- Multi-Server Queries
- SQL Intellisense
- T-SQL Debugger
For each of these features you can find more information on this link.
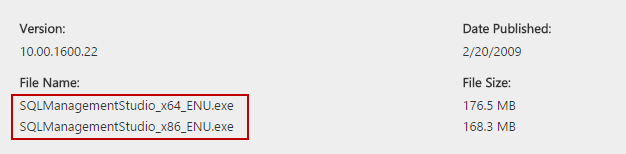
SQL Server Management Studio 2008 Express version can be freely downloaded from this link.
Depending on your operating system, choose either x64 version or x86 version. If you are in doubt which version of the operating system is installed on your machine you can look here.
If you have a question about the difference between the 32-bit and 64-bit versions of the operating system, see this link:
Let’s start with the installation process:
Run the SQL Server Management Studio installer from your download folder location.
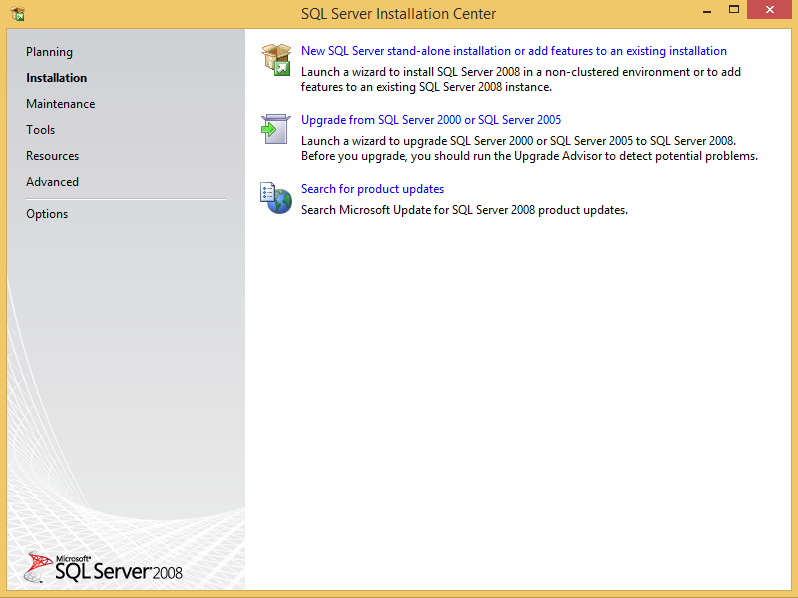
In the SQL Server Installation Center window, select the Installation tab.
Choosing New SQL Server stand-alone installation or add features to an existing installation option will start the installation wizard:

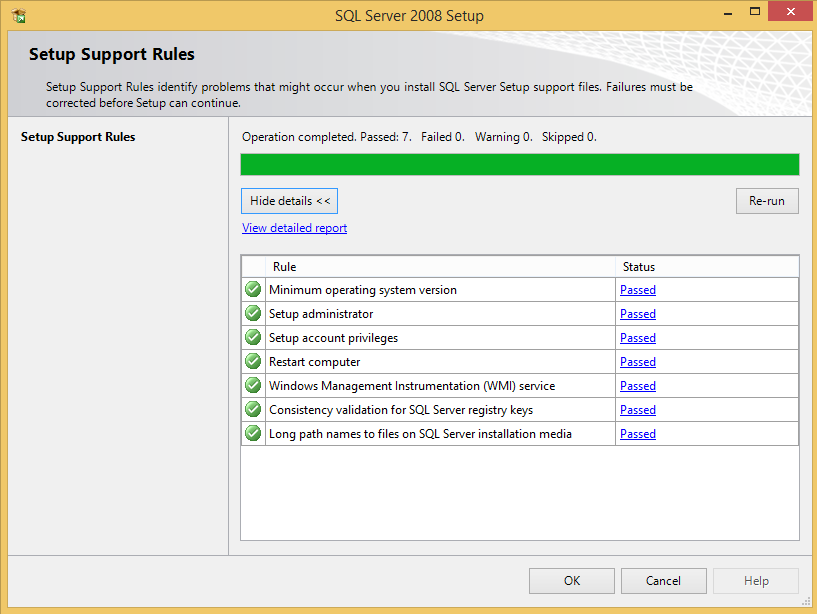
The Setup Support Rules step will automatically check to make sure your machine has the minimum requirements. If any problems occur, you will see a red cross next to the check that has failed.
All problems must be corrected before the installation process continues.
If there are no errors, press the OK button to proceed:
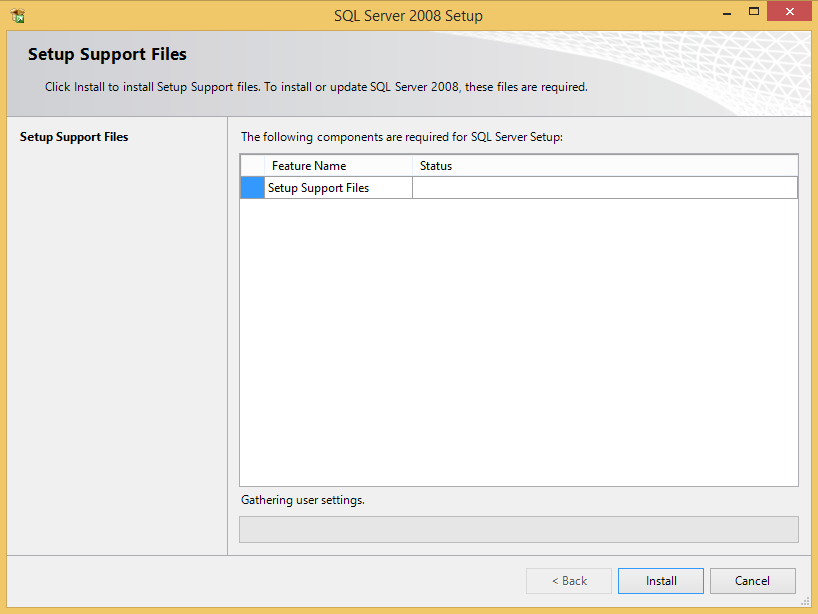
The Setup Support Files window gathers the information about user settings in order to provide a list of components that need to be updated/installed in the SQL Server Management Studio. This action will take some time because those components need to be downloaded.
To install/update required components for SQL server setup, press the Install button:
In this step you will get a diagnostic dialog which has been finished identifying problems that might have occurred during the installation in the previous step. Any problems need to be fixed before continuing with the installation process. One of the most common warning that appears during installation is a Windows Firewall warning.
If you want to avoid this warning, then you can disable Windows Firewall before starting the installation process, and enable it once the installation process is completed.
The ways to turn off Windows Firewall you can find on this link.
If you plan to run SQL Server Management Studio only on your local machine, you can ignore this warning, and later if you want to remotely access SQL Server you’ll need to configure the firewall.
Depending on the operation results and the component status, you can re-run the Setup Support Rules check or to proceed with the installation process clicking the Next button:
-
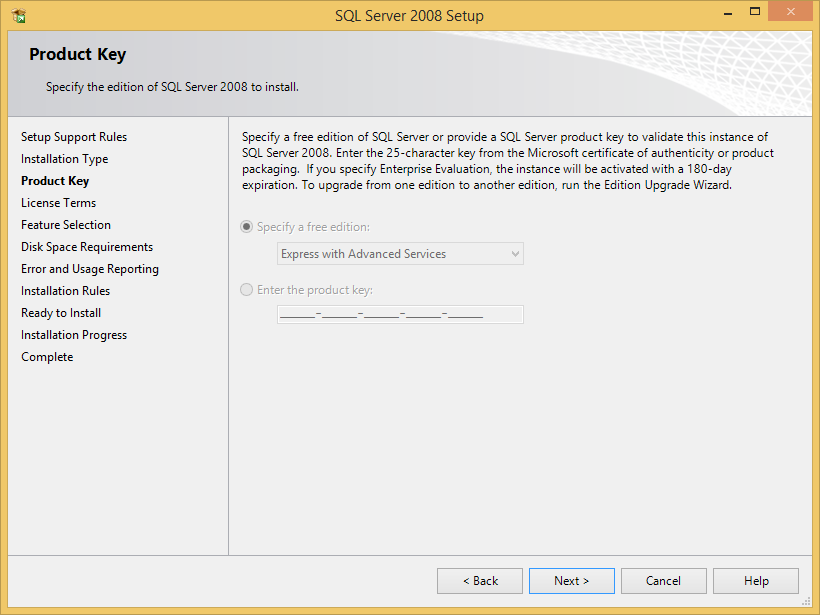
The Product key installation step window shows the activation info.
Because this is a free version of SQL Server Management Studio, just select “Specify a free edition” radio button and click the Next button to continue with the installation:
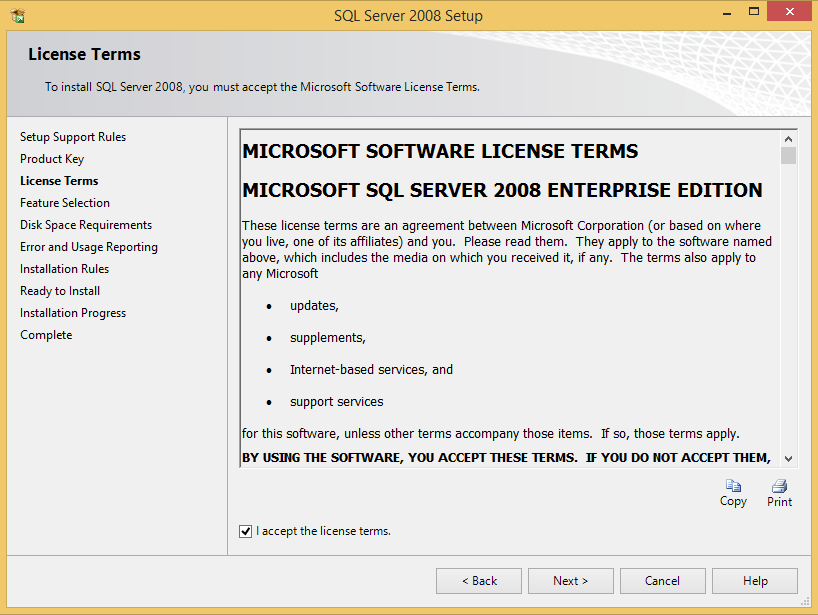
In the License Terms window, read the license agreement and if you agree with it, select the I accept the license terms check box and click the Next to continue with the installation:
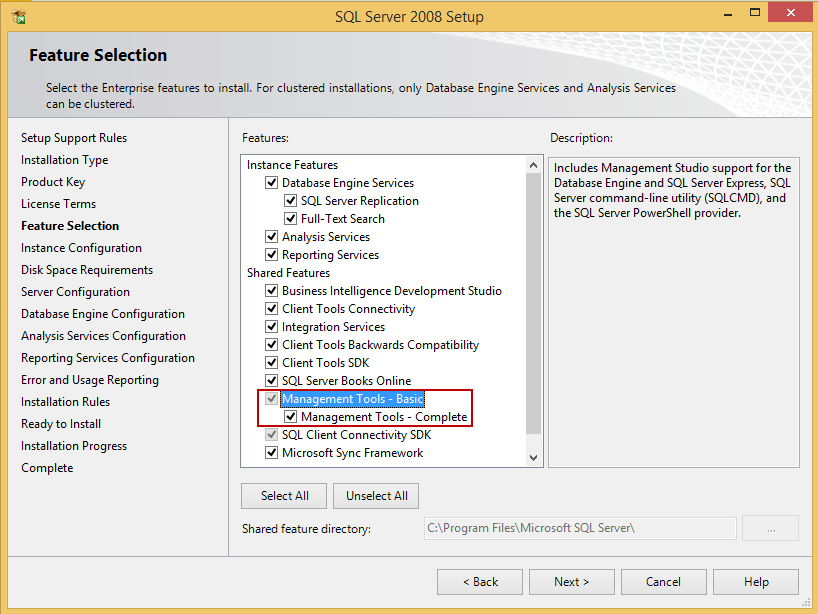
In the Feature Selection check the Management Tools – Basic install option that includes Management Studio support for the Database Engine, SQL Server Express, SQL Server command-line utility (SQLCMD) and SQL Server PowerShell provider.
Client Tools SDK provides wrappers classes for DTS Runtime and similar components that you can use to execute a .dtsx SQL Server integration service (SSIS) package on demand.
Most of the people are installing Integration Service (IS) to perform a similar task.
Checking the Client Tools SDK feature is optional.
Click the Next button to continue:
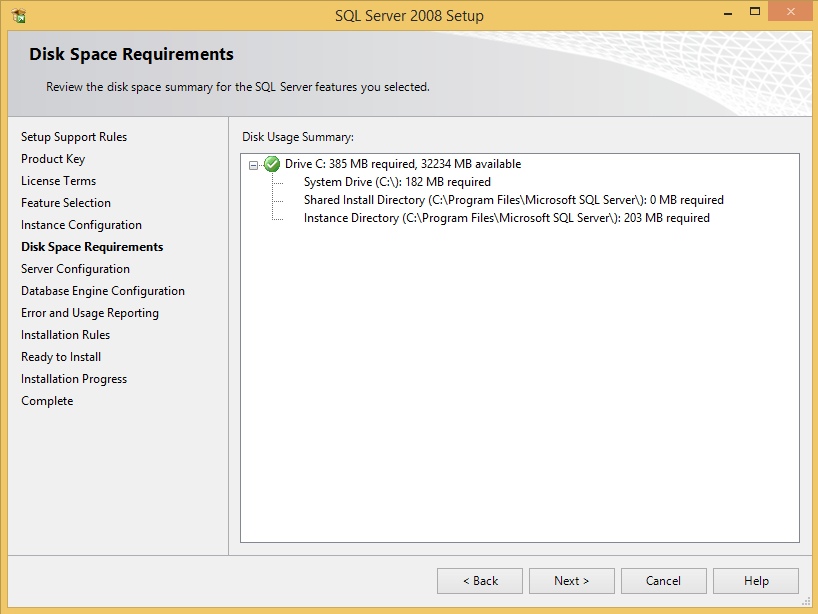
Review your disk space requirements using this installation step.
Disk Space requirements is showing required space for installation, system drive location and shared installation directory.
Make sure to have enough disk space in order to complete the installation. Not having enough disk space will cause the installation to fail.
All the changes you have made along the way to this step can be undone.
To proceed with installation, click the Next button:
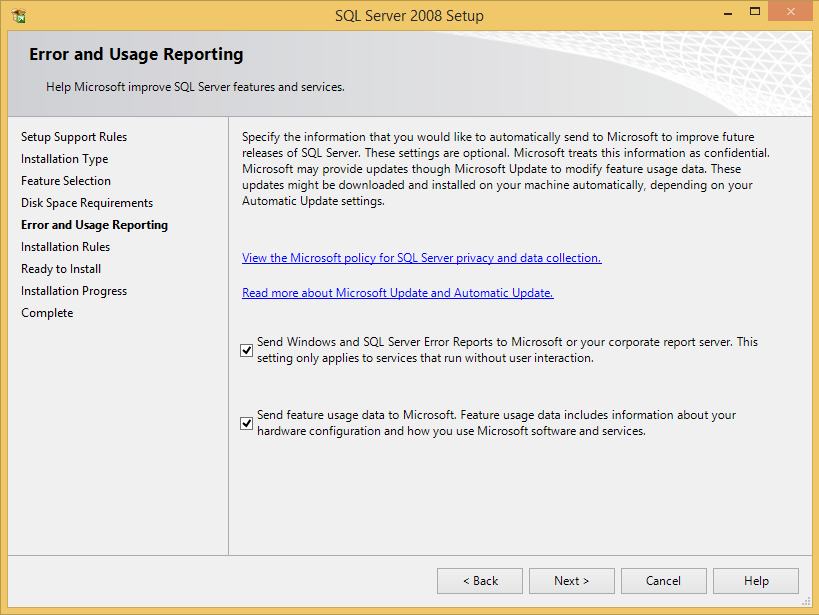
On the Error and Usage Reporting page, you can help Microsoft by selecting the SQL Server Error Reporting features and services.
In addition, you can send feature usage to Microsoft that includes information about your hardware configuration and how to use Microsoft software and services.
Both of these are optional.
By default, these two options are disabled in SQL Server 2008. For more information, see Error and Usage Report Settings.
Click the Next button:
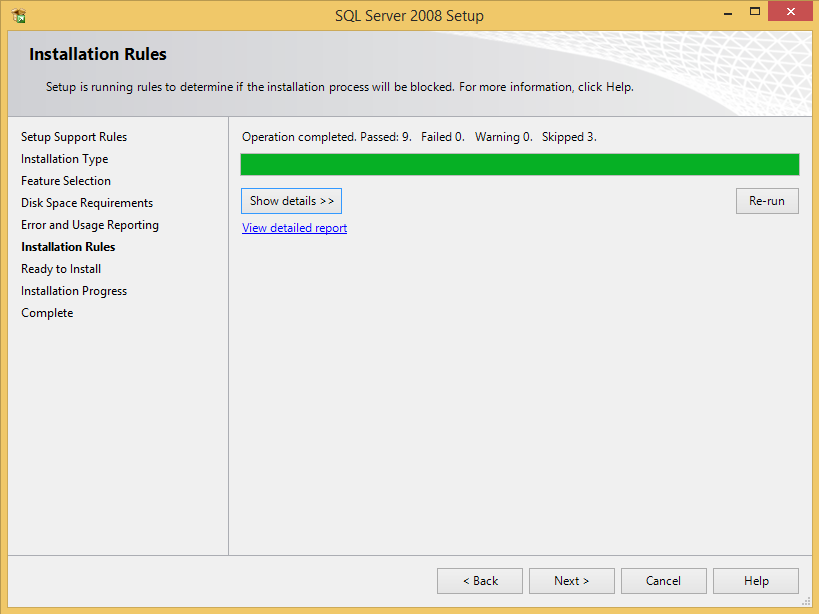
Installation Rules check if there are any processes or other installation already running, which will interfere with the SQL Server Management Studio 2008 installation. If everything is ok, you can proceed with the installation by clicking the Next button:
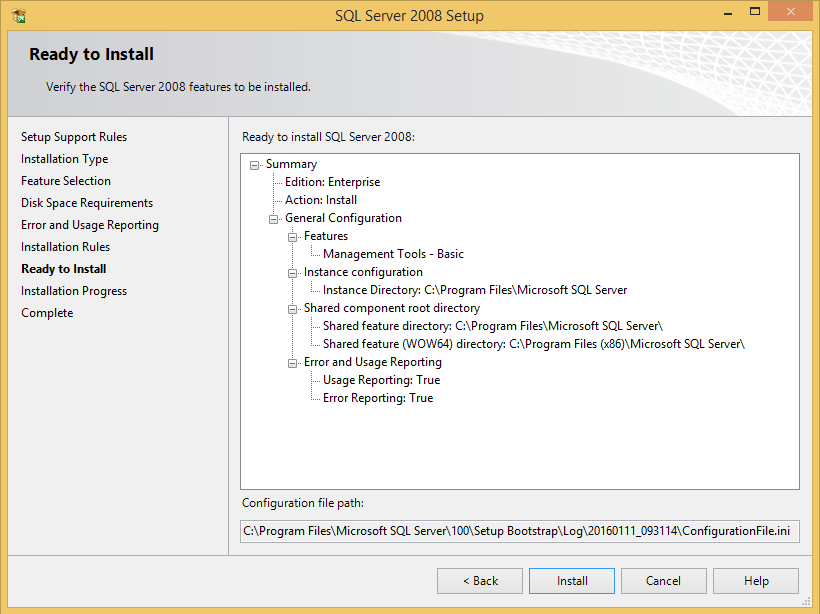
The Ready to install step shows a summary of a general configuration for the installation process selected in earlier installation steps.
Check the installation process summary to make sure that everything is set properly and that you have chosen the right components to be installed.
Click the Install button:
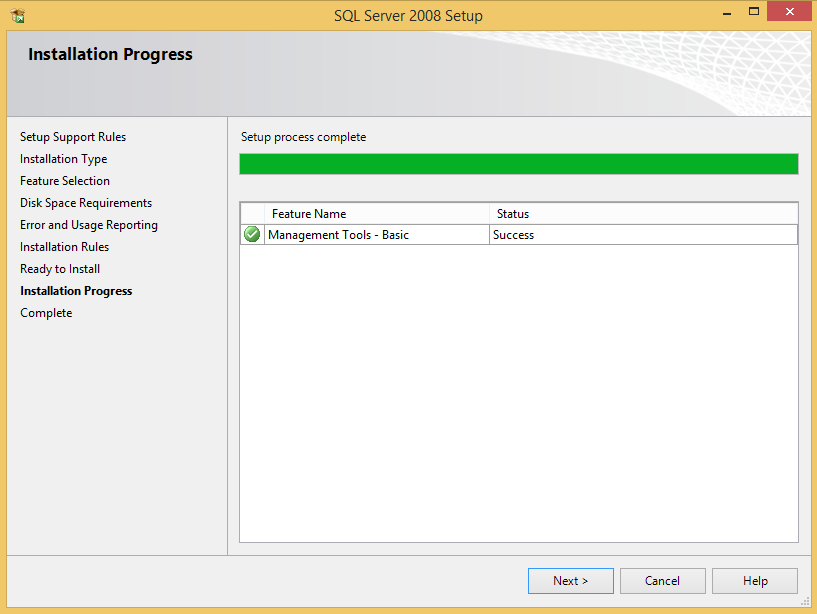
The install process should take up to 8 minutes, depending on your machine configuration. When the installation process is completed, it will show installed features and their status.
Click the Next button:
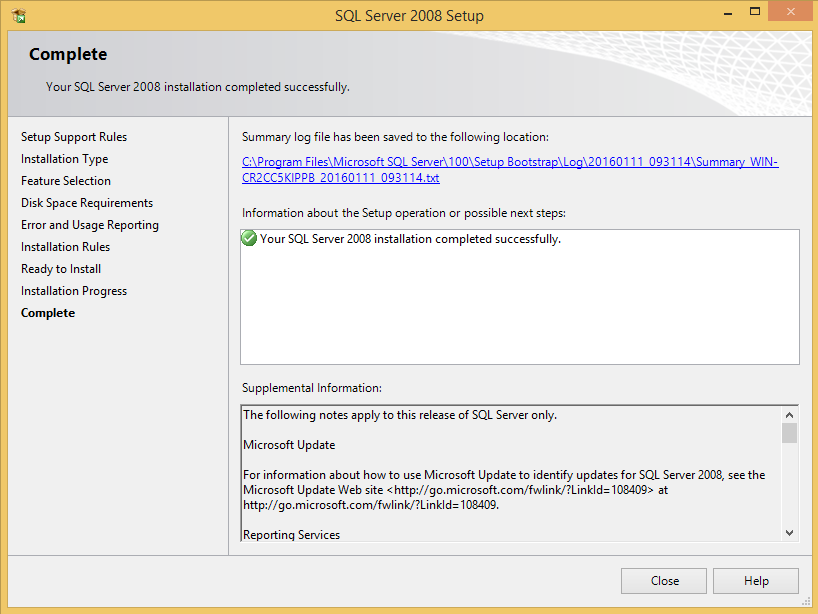
Installation is complete! Summary log window will show the installation path and the information about successful installation of SQL Server Management Studio 2008.
Click the Close button:
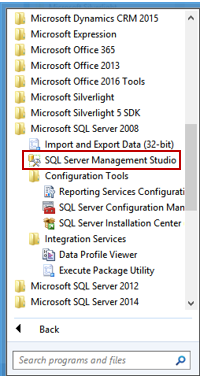
Start your SQL Server Management Studio.
Go to Start menu and select All Programs. In the Microsoft SQL Server 2008 folder among other things, should appear SQL Server Management Studio 2008 as an option.
When starting SQL Server Management Studio 2008, make sure you run it as an administrator in order to have access to all features:
The only difference between the stand-alone installations and installations when already installed SQL Server is in a single step.


Between the fourth (4) and fifth (5) steps appears one additional step Installation Type.
In this step, you can choose the “Perform a new installation of SQL Server 2008” or “Add features to an existing instance of SQL Server 2008” options.
Press the Next button:

Also you can install SQL Server Management Studio 2008 along with installation SQL Server 2008.
In the Feature Selection window just select Management Tools option as shown below:
Now that you have SQL Server Management Studio 2008 installed, you are ready to upgrade it with some free productivity add-ins, which helps you to speed up coding, formatting SQL code, safe rename SQL objects, add surrogate keys, change procedure parameters, search for SQL object, quickly find data in SQL tables, visualize relationships between objects and much more.
Click the link here to find out how to install these free add-ins.

He is a prolific author of authoritative content related to SQL Server including a number of “platinum” articles (top 1% in terms of popularity and engagement). His writing covers a range of topics on MySQL and SQL Server including remote/linked servers, import/export, LocalDB, SSMS, and more.
In his part-time, Zivko likes basketball, foosball (table-soccer), and rock music.
See more about Marko at LinkedIn
View all posts by Marko Zivkovic
- How to connect to a remote MySQL server using SSL on Ubuntu - April 28, 2020
- How to install MySQL on Ubuntu - March 10, 2020
- Using SSH keys to connect to a remote MySQL Server - November 28, 2019