

In this article, we will explain how to use the Business Intelligence Markup Language (Biml) to build SSAS OLAP cubes, noting that this article is the ninth article in the Learn Biml series.
Introduction
As we mentioned previously, Biml scripts are not only used for building Integration Services packages. They can also define and deploy database objects or SSAS OLAP cubes and tabular models.
Biml SSAS projects are only available in BimlStudio (commercial product and the only Biml development IDE). To create SSAS projects using BimlExpress, we should use the SSIS task and components to execute SQL, MDX, and XMLA commands to build relational or analytical databases.
In this series’s previously published articles, we explained how to use Biml scripts to create and manage SSIS packages and build and deploy database objects. This article is the first SSAS article in this series to explain how we build SSAS OLAP cubes using Biml.
For BimlExpress users, if interested to learn more about processing SSAS OLAP cubes using Biml, you can refer to the following article: Biml XIII – The Biml Script for the Entire SSAS Database. It explains how to build MDX queries dynamically using Biml extended C# scripts.
This article explains how to use BimlStudio to automate building OLAP cubes. It doesn’t explain the BimlStudio graphical interface since this article series teaches Biml as a language and not the related commercial products. You can refer to the official website to learn more about BimlStudio or other products provided by Varigence. Besides, this article doesn’t explain the OLAP cube concept. It assumes that the reader has previous knowledge of the OLAP cube and the SQL Server Analysis Services (SSAS).
When I started writing this series, I was not sure if I will include how to manage SSAS cubes and tabular models using Biml. Recently, while searching for this topic, I didn’t find many helpful and clear articles. I found an article published on the Solisyon website where it lacks illustrations and many details. So I decided to write this article starting from the link mentioned to provide a more clear guide.
BimlStudio download and installation
First of all, we should download the BimlStudio installation file from Varigence Website.
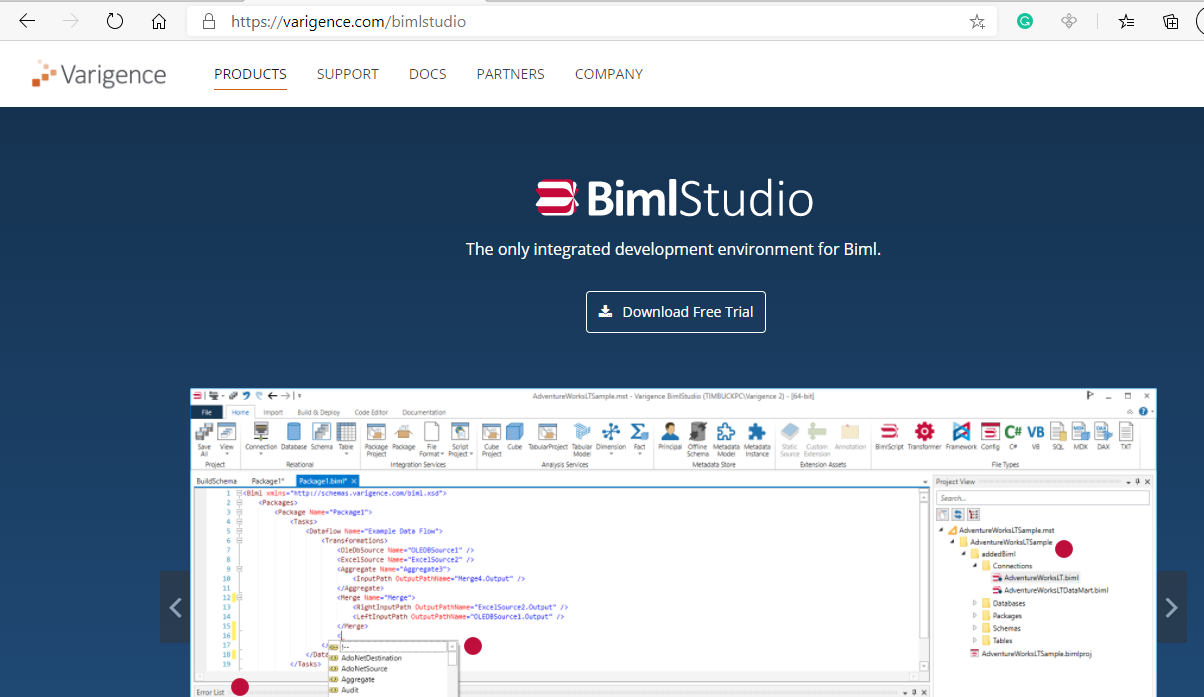
Figure 1 – BimlStudio homepage
When the Bimlstudiosetup.exe file is downloaded, open it to start the installation. First of all, the end-user license agreement (EULA) is shown up.
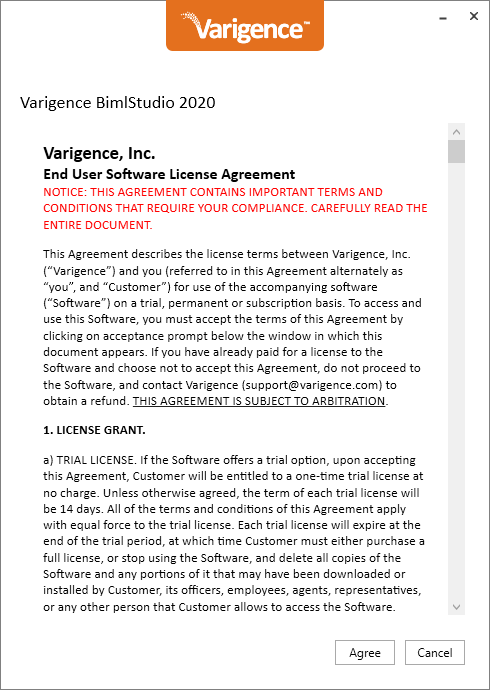
Figure 2 – BimlStudio EULA
Then, the registration form is shown. Suppose you are looking for a trial product key. In that case, you can enter your name and email and click on the “Get Product Key” button, so the trial key is sent to you via email. Or you can click on “I already have a product key” if already registered.
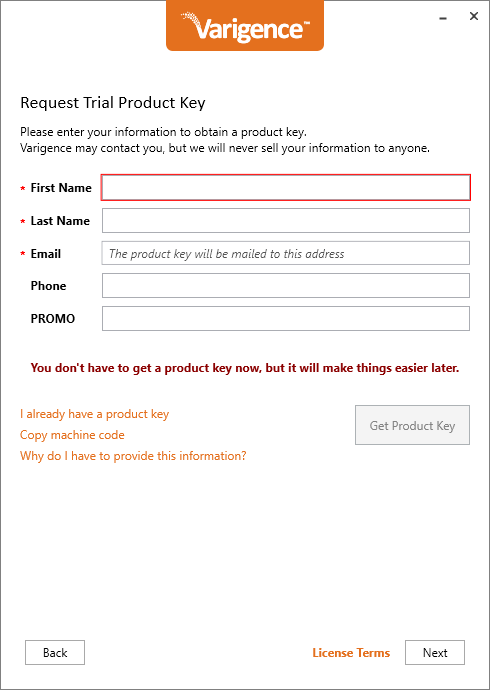
Figure 3 – Requesting a trial product key
As shown in the figure below, the trial period is 13 days.
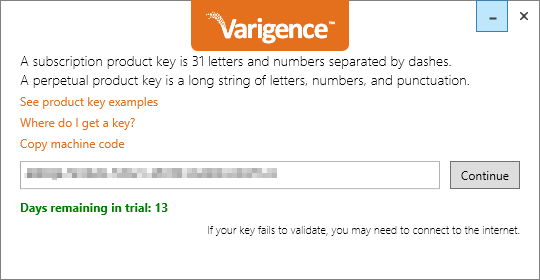
Figure 4 – Validating trial
The next step is to select the features to install.
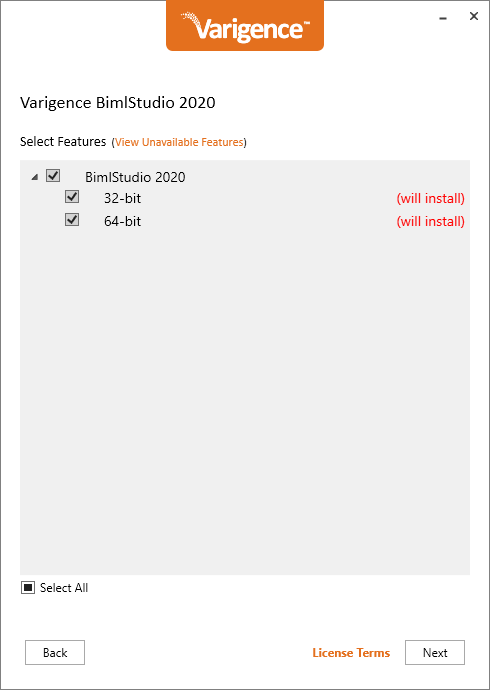
Figure 5 – Selecting features
Once selected, you need to approve this product’s license terms by clicking on the Update button, which also starts the installation.
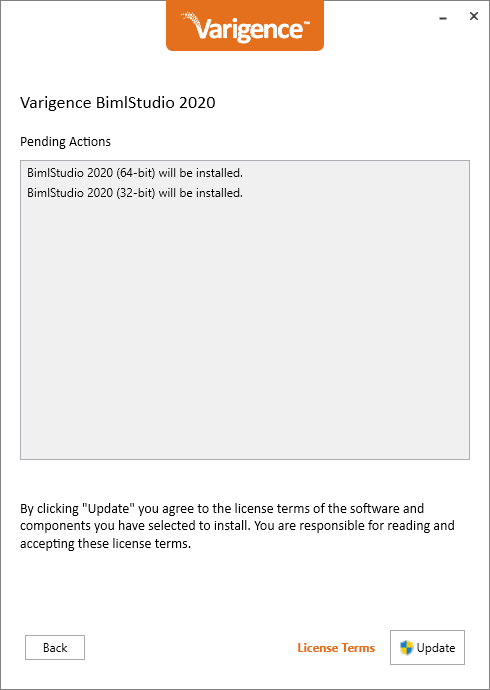
Figure 6 – Accepting license terms
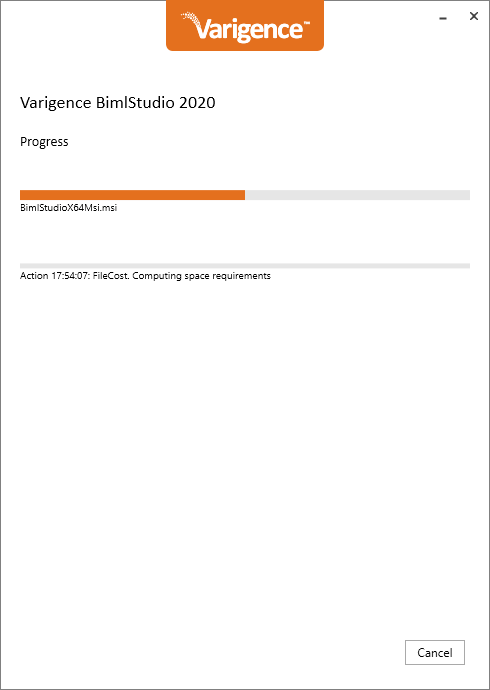
Figure 7 – Installation in progress
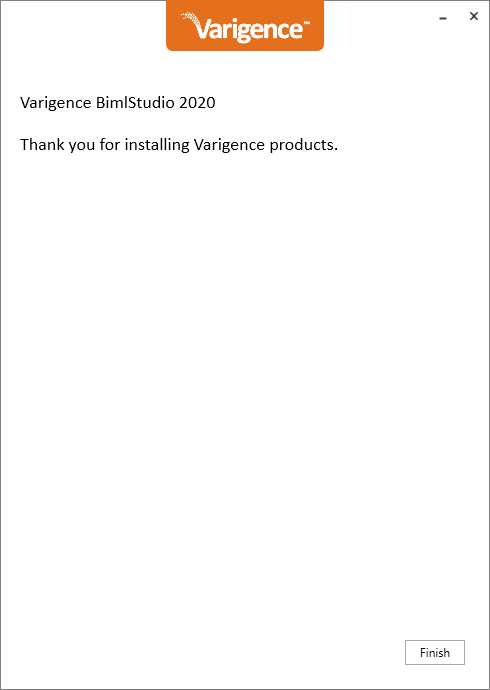
Figure 8 – Installation completed successfully
Once the installation is complete, open BimlStudio to get started.
Figure 9 – BimlStudio splash screen
Creating a Biml project
After opening BimStudio, let’s create a new blank project by clicking on the “Empty Project” icon.
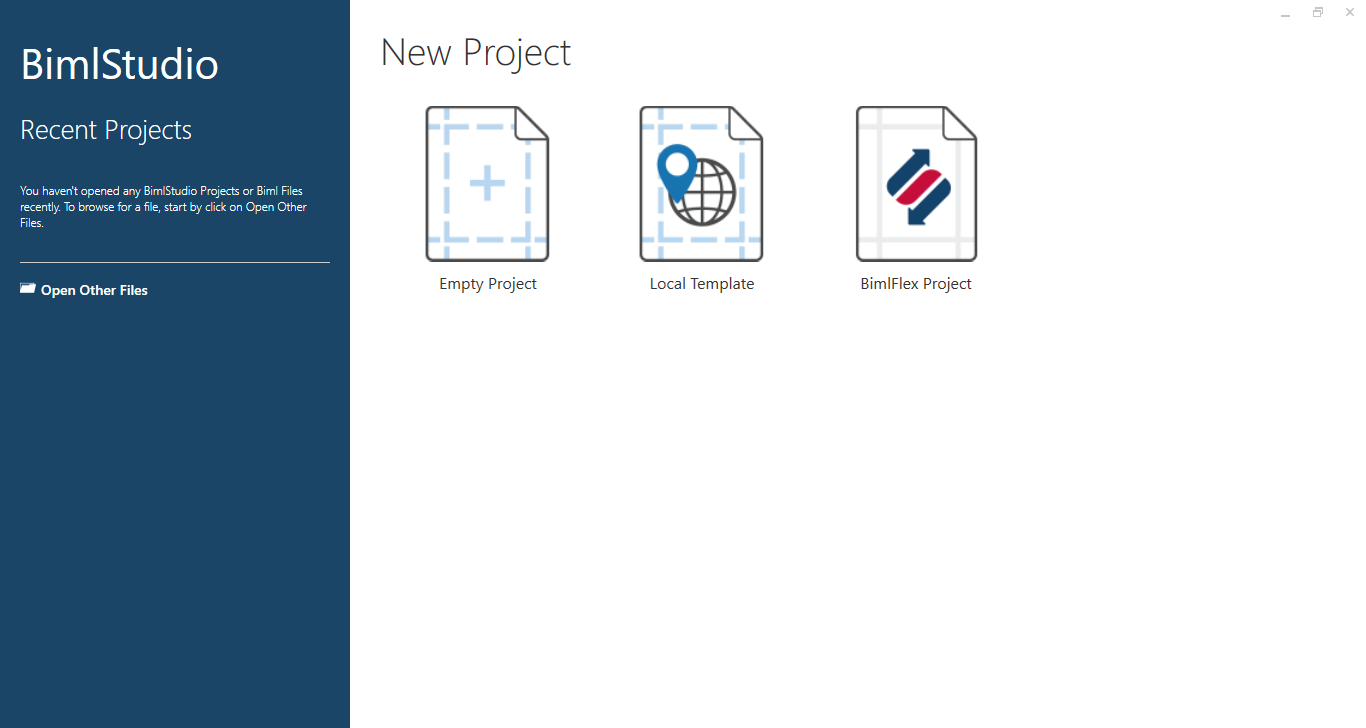
Figure 10 – BimlStudio welcome screen
To create a new project, you should first enter a project name and the directory where the project files are saved.
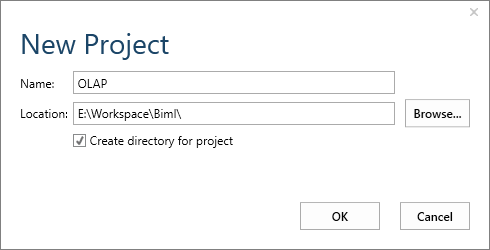
Figure 11 – Creating a blank project
The following image shows the main BimStudio form. If you want to learn more about BimlStudio, you can refer to the official documentation.
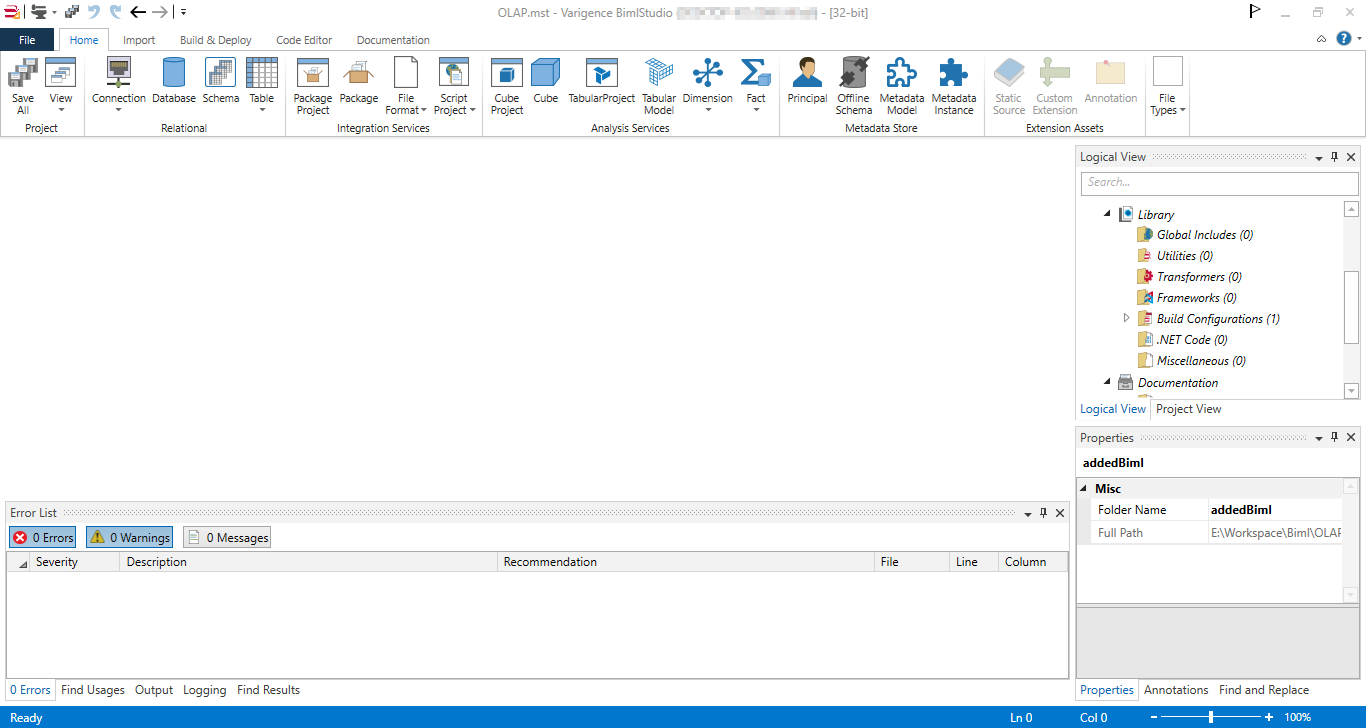
Figure 12 – BimlStudio user interface
- Note: In the previous article in this series (Building databases using Biml), we built the database objects using Execute SQL Tasks in SSIS. In BimlStudio, there is no need to use SSIS. A Biml script that defines the database object can be executed directly, or we can convert them to DDL SQL statements as we will see in this article
Adding Biml Scripts
To add a Biml script, switch the solution explorer from the logical view to the project view as shown in the image below.
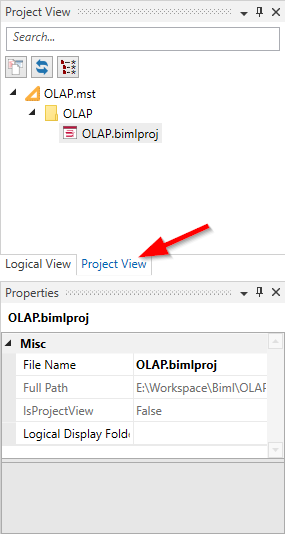
Figure 13 – Switch to the project view
Right-click on the project folder and click on “Add > New item…”.
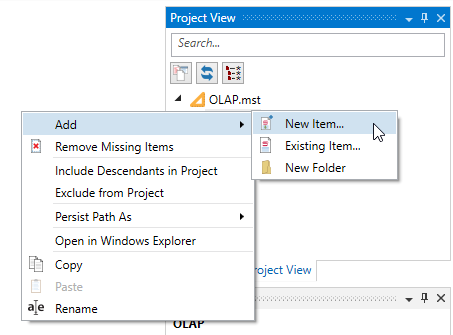
Figure 14 – Adding a new item
On the New Item dialog, select the “Biml File (.biml)” and click on the Add button.

Figure 15 – Adding a Biml file
Once the Biml file is added, the Biml script editor is opened within the main form.
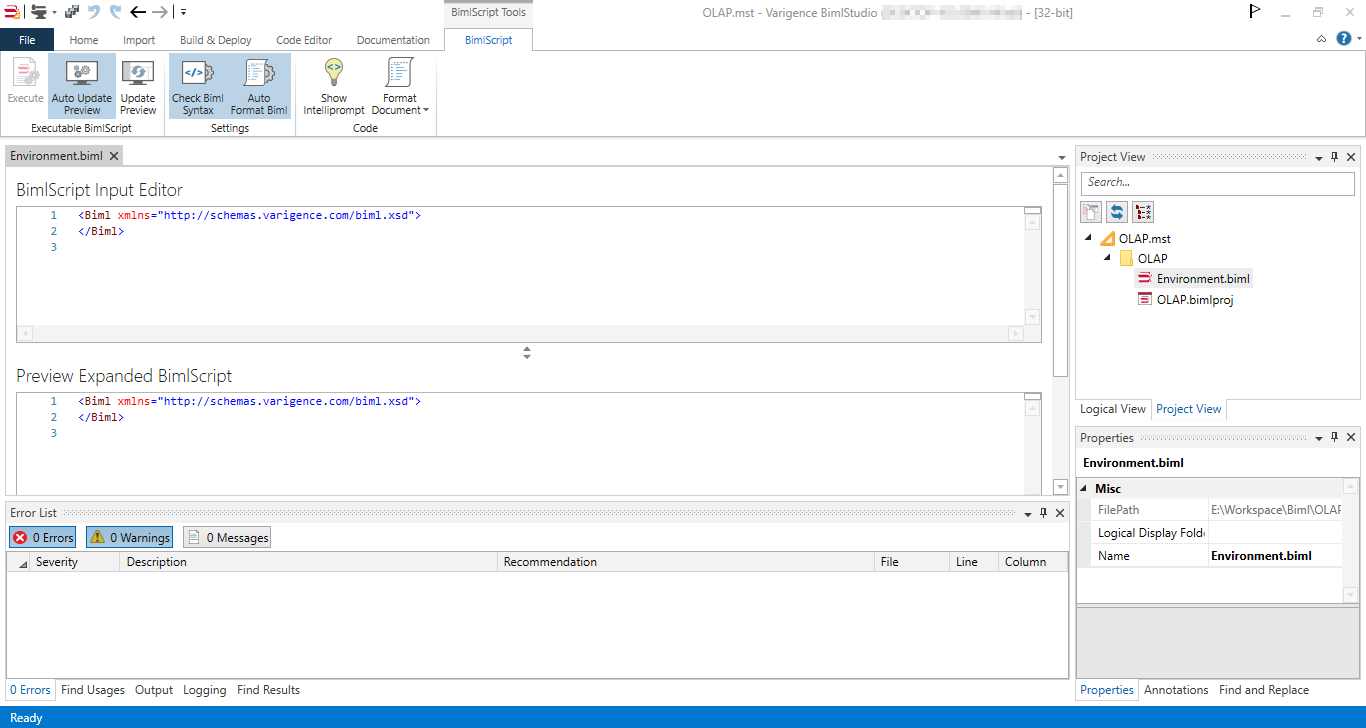
Figure 16 – Biml script editor
Defining the environment
Before defining the SSAS OLAP cubes objects, we should first define the working environment.
We should add a Biml script named “Environment.biml” where we define the connections, database objects needed to build the SSAS OLAP cube.
Connections
Connections should be defined within the “Connections” Biml element. To create an SSAS OLAP cube, we must define two connections:
- The data source connection: In this tutorial, the data source is the AdventureWorksDW2017 database, which can be downloaded from AdventureWorks sample databases – SQL Server | Microsoft Docs
- The SQL Server analysis server connection: we created an SSAS database also named AdventureWorksDW2017
|
1 2 3 4 |
<Connections> <OleDbConnection Name="AdventureWorks2017_DW" ConnectionString="provider=SQLNCLI11;data source=.;integrated security=SSPI;Initial Catalog=AdventureWorksDW2017" /> <AnalysisServicesConnection Name="AdventureWorks_Cube" Server=localhost ConnectionString="provider=MSOLAP;Server=localhost;Database=AdventureWorksDW2017;Integrated Security=SSPI" /> </Connections> |
Database
Another thing we should define is the database object. Even if the database is mentioned in the connection string, we should define them separately since the database object define is needed while defining dimensions. Databases are defined within the “Databases” Biml element.
|
1 2 3 |
<Databases> <Database Name="AdventureWorksDW2017" ConnectionName="AdventureWorks_DW" /> </Databases> |
Schema
The last object we need to define is the schema. A schema should be linked with the database object defined previously. Schemas are defined within the “Schemas” Biml element.
|
1 2 3 |
<Schemas> <Schema Name="dbo" DatabaseName="AdventureWorksDW2017" /> </Schemas> |
Putting all parts together
Our first Biml script (Environment.biml) should look like the following:
|
1 2 3 4 5 6 7 8 9 10 11 12 |
<Biml xmlns="http://schemas.varigence.com/biml.xsd"> <Connections> <AnalysisServicesConnection Name="AdventureWorks_Cube" Server="localhost" ConnectionString="provider=MSOLAP;Server=DESKTOP- localhost;Database=AdventureWorksDW2017;Integrated Security=SSPI" /> <OleDbConnection Name="AdventureWorks_DW" ConnectionString="provider=SQLNCLI11;data source=.;integrated security=SSPI;Initial Catalog=AdventureWorksDW2017" /> </Connections> <Databases> <Database Name="AdventureWorksDW2017" ConnectionName="AdventureWorks_DW" /> </Databases> <Schemas> <Schema Name="dbo" DatabaseName="AdventureWorksDW2017" /> </Schemas> </Biml> |
Defining Dimension tables
Now we should provide the metadata needed to built dimensions. We should provide the metadata of the dimension tables in the source database.
The Biml script should contain the following information:
-
Table metadata:
- Table name
- Schema name
- Friendly name
-
Columns metadata:
- Name
- Data type
- length
-
Identity information:
- Name
- Columns
-
OLAP dimension configuration (Not all properties are always needed):
- Dimension name
- Attributes
- Hierarchies
- Relationships
If you are not familiar with those properties, you can refer to the following articles published on SQL Shack:
As we mentioned in the introduction, we will define the same OLAP objects mentioned in the article published on the Solisyon website
Currency dimension
The following is the Biml script to define the source currency dimension table and the currency dimension object:
|
1 2 3 4 5 6 7 8 9 10 11 12 13 14 15 16 17 18 19 20 21 22 23 24 25 26 27 28 29 |
<Biml xmlns="http://schemas.varigence.com/biml.xsd"> <Tables> <Table Name="DimCurrency" SchemaName="AdventureWorksDW2017.dbo" FriendlyName="Source Currency"> <Columns> <Column Name="CurrencyKey" /> <Column Name="CurrencyName" DataType="String" Length="50" /> </Columns> <Keys> <Identity Name="PK_DimCurrency_CurrencyKey"> <Columns> <Column ColumnName="CurrencyKey" /> </Columns> </Identity> </Keys> <AnalysisMetadata> <Dimension Name="Currency" DimensionType="Currency"> <Attributes> <Attribute Name="Currency" Usage="Key" AttributeType="CurrencyIsoCode" OrderBy="Name"> <KeyColumns> <KeyColumn ColumnName="CurrencyKey" /> </KeyColumns> <NameColumn ColumnName="CurrencyName" /> </Attribute> </Attributes> </Dimension> </AnalysisMetadata> </Table> </Tables> </Biml> |
Sales Territory dimension
The following is the Biml script to define the source currency dimension table and the currency dimension object:
|
1 2 3 4 5 6 7 8 9 10 11 12 13 14 15 16 17 18 19 20 21 22 23 24 25 26 27 28 29 30 31 32 33 34 35 36 37 38 39 40 41 42 43 44 45 46 47 48 49 50 51 52 53 54 55 56 |
<Biml xmlns="http://schemas.varigence.com/biml.xsd"> <Tables> <Table Name="DimSalesTerritory" SchemaName="AdventureWorksDW2017.dbo" FriendlyName="Sales Territory" > <Columns> <Column Name="SalesTerritoryKey" /> <Column Name="SalesTerritoryRegion" DataType="String" Length="50" /> <Column Name="SalesTerritoryCountry" DataType="String" Length="50" /> <Column Name="SalesTerritoryGroup" DataType="String" Length="50" IsNullable="true" /> </Columns> <Keys> <Identity Name="PK_DimSalesTerritory_SalesTerritoryKey"> <Columns> <Column ColumnName="SalesTerritoryKey" /> </Columns> </Identity> </Keys> <AnalysisMetadata> <Dimension Name="Sales Territory" AttributeAllMemberName="All Sales Territories"> <Attributes> <Attribute Name="Sales Territory Region" OrderBy="Name" Usage="Key"> <KeyColumns> <KeyColumn ColumnName="SalesTerritoryKey" /> </KeyColumns> <NameColumn ColumnName="SalesTerritoryRegion" /> </Attribute> <Attribute Name="Sales Territory Group" OrderBy="Name"> <KeyColumns> <KeyColumn ColumnName="SalesTerritoryGroup" /> </KeyColumns> <NameColumn ColumnName="SalesTerritoryGroup" /> </Attribute> <Attribute Name="Sales Territory Country" OrderBy="Name"> <KeyColumns> <KeyColumn ColumnName="SalesTerritoryCountry" /> </KeyColumns> <NameColumn ColumnName="SalesTerritoryCountry" /> </Attribute> </Attributes> <AttributeHierarchies> <Hierarchy Name="Sales Territory"> <Levels> <Level Name="Group" AttributeName="Sales Territory Group" /> <Level Name="Country" AttributeName="Sales Territory Country" /> <Level Name="Region" AttributeName="Sales Territory Region" /> </Levels> </Hierarchy> </AttributeHierarchies> <Relationships> <Relationship Name="Sales Territory Country" ParentAttributeName="Sales Territory Region" ChildAttributeName="Sales Territory Country" /> <Relationship Name="Sales Territory Group" ParentAttributeName="Sales Territory Country" ChildAttributeName="Sales Territory Group" /> </Relationships> </Dimension> </AnalysisMetadata> </Table> </Tables> </Biml> |
Date dimension
The following is the Biml script to define the source currency dimension table and the currency dimension object:
|
1 2 3 4 5 6 7 8 9 10 11 12 13 14 15 16 17 18 19 20 21 22 23 24 25 26 27 28 29 30 31 32 33 34 35 36 37 38 39 40 41 42 43 44 45 46 47 48 49 50 51 52 53 54 55 56 57 58 |
<Biml xmlns="http://schemas.varigence.com/biml.xsd"> <Tables> <Table Name="DimDate" SchemaName="AdventureWorksDW2017.dbo" FriendlyName="Date"> <Columns> <Column Name="DateKey" /> <Column Name="FullDateAlternateKey" DataType="Date" /> <Column Name="CalendarYear" DataType="Int16" /> <Column Name="EnglishMonthName" DataType="String" Length="10" /> <Column Name="MonthNumberOfYear" DataType="Byte" /> </Columns> <Keys> <PrimaryKey Name="PK_DimDate_DateKey"> <Columns> <Column ColumnName="DateKey" /> </Columns> </PrimaryKey> </Keys> <AnalysisMetadata> <Dimension Name="Date" DimensionType="Time"> <Attributes> <Attribute Usage="Key" Name="Date" AttributeType="Date"> <KeyColumns> <KeyColumn ColumnName="DateKey" /> </KeyColumns> <NameColumn ColumnName="FullDateAlternateKey" /> </Attribute> <Attribute Name="Month Name" AttributeType="Months"> <KeyColumns> <KeyColumn ColumnName="CalendarYear" /> <KeyColumn ColumnName="MonthNumberOfYear" /> </KeyColumns> <NameColumn ColumnName="EnglishMonthName" /> </Attribute> <Attribute Name="Calendar Year" AttributeType="Years"> <KeyColumns> <KeyColumn ColumnName="CalendarYear" /> </KeyColumns> <NameColumn ColumnName="CalendarYear" /> </Attribute> </Attributes> <Relationships> <Relationship Name="Month Name" ParentAttributeName="Date" ChildAttributeName="Month Name" /> <Relationship Name="Calendar Year" ParentAttributeName="Month Name" ChildAttributeName="Calendar Year" /> </Relationships> <AttributeHierarchies> <Hierarchy Name="Calendar"> <Levels> <Level Name="Year" AttributeName="Calendar Year" /> <Level Name="Month" AttributeName="Month Name" /> <Level Name="Date" AttributeName="Date" /> </Levels> </Hierarchy> </AttributeHierarchies> </Dimension> </AnalysisMetadata> </Table> </Tables> </Biml> |
Defining Fact tables
After defining the environment and dimensions, we should define the fact table (measure group). Same as dimensions, we should provide the metadata of the source table and the OLAP measure group object as mentioned in the code below:
|
1 2 3 4 5 6 7 8 9 10 11 12 13 14 15 16 17 18 19 20 21 22 |
<Biml xmlns="http://schemas.varigence.com/biml.xsd"> <Tables> <Table Name="FactInternetSales" SchemaName="AdventureWorksDW2017.dbo"> <Columns> <TableReference Name="OrderDateKey" TableName="AdventureWorksDW2017.dbo.DimDate" /> <TableReference Name="ShipDateKey" TableName="AdventureWorksDW2017.dbo.DimDate" /> <TableReference Name="CurrencyKey" TableName="AdventureWorksDW2017.dbo.DimCurrency" /> <TableReference Name="SalesTerritoryKey" TableName="AdventureWorksDW2017.dbo.DimSalesTerritory" /> <Column Name="OrderQuantity" DataType="Int16" /> <Column Name="SalesAmount" DataType="Currency" /> </Columns> <AnalysisMetadata> <MeasureGroup Name="Internet Sales"> <Measures> <Measure AggregateColumnName="OrderQuantity" Name="Order Quantity" /> <Measure AggregateColumnName="SalesAmount" Name="Sales Amount" /> </Measures> </MeasureGroup> </AnalysisMetadata> </Table> </Tables> </Biml> |
Defining Cubes
The last file we will create is to define the SSAS OLAP cube. This Biml script contains information from all files created above. We should map each object in the cube with the object definition created previously.
|
1 2 3 4 5 6 7 8 9 10 11 12 13 14 15 16 17 18 19 20 21 22 23 24 25 26 27 |
<Biml xmlns="http://schemas.varigence.com/biml.xsd"> <Cubes> <Cube Name="AdventureWorksCube" ConnectionName="AdventureWorks_Cube"> <CubeMeasureGroups> <CubeMeasureGroup Name="Internet Sales" FactName="AdventureWorksDW2017.dbo.FactInternetSales.Internet Sales"> <CubeDimensionBindings> <CubeDimensionBinding CubeDimensionName="Order Date" FactColumnName="AdventureWorksDW2017.dbo.FactInternetSales.OrderDateKey" /> <CubeDimensionBinding CubeDimensionName="Ship Date" FactColumnName="AdventureWorksDW2017.dbo.FactInternetSales.ShipDateKey" /> <CubeDimensionBinding CubeDimensionName="Currency" FactColumnName="AdventureWorksDW2017.dbo.FactInternetSales.CurrencyKey" /> <CubeDimensionBinding CubeDimensionName="Sales Territory" FactColumnName="AdventureWorksDW2017.dbo.FactInternetSales.SalesTerritoryKey" /> </CubeDimensionBindings> <Partitions> <Partition Name="Internet Sales Partition"> <DsvTableSource ConnectionName="AdventureWorks_DW" TableName="AdventureWorksDW2017.dbo.FactInternetSales" /> </Partition> </Partitions> </CubeMeasureGroup> </CubeMeasureGroups> <CubeDimensions> <CubeDimension Name="Currency" DimensionName="AdventureWorksDW2017.dbo.DimCurrency.Currency" /> <CubeDimension Name="Order Date" DimensionName="AdventureWorksDW2017.dbo.DimDate.Date" /> <CubeDimension Name="Ship Date" DimensionName="AdventureWorksDW2017.dbo.DimDate.Date" /> <CubeDimension Name="Sales Territory" DimensionName="AdventureWorksDW2017.dbo.DimSalesTerritory.Sales Territory" /> </CubeDimensions> </Cube> </Cubes> </Biml> |
Bringing Biml script live
After defining the SSAS OLAP cube object, our solution tree should look like the following:
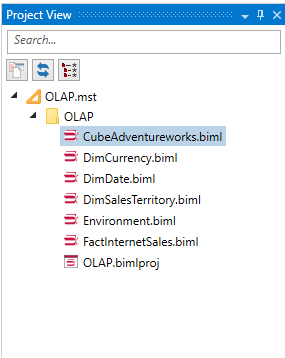
Figure 17 – Solution tree
Let’s switch to the logical view to check how objects are organized in the Biml project:
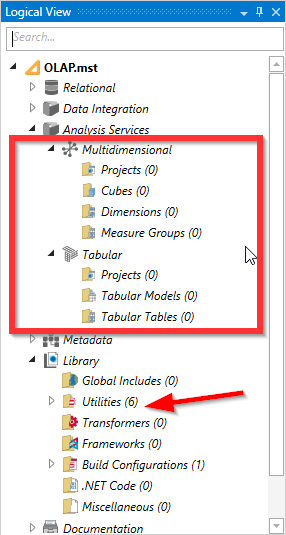
Figure 18 – Logical view
From the image above, we can see that BimlStudio doesn’t recognize the object defined within the Biml scripts, and all scripts are organized within the “Utilities” folder.
This means that the Biml scripts added are used as a reference, and they must be switched to the live mode. To do so, switch back to the project view, select all Biml scripts, right-click, click on “BimlStudio action > Live”.
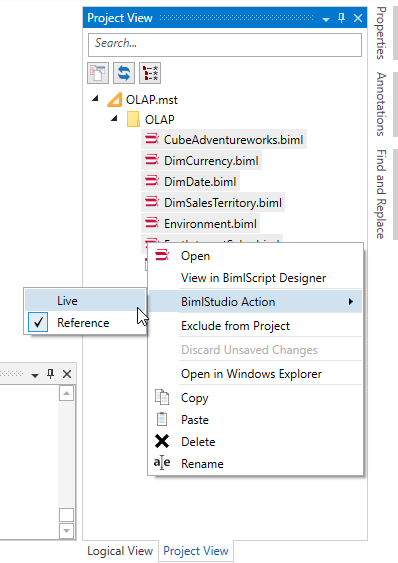
Figure 19 – Switching Biml script to live mode
You will note that a blue circle will appear over the selected scripts.
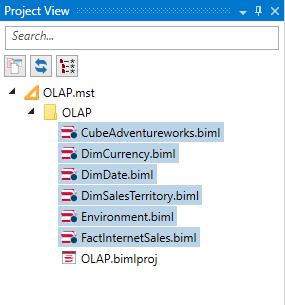
Figure 20 – Scripts converted to live mode
If we switch to the logical view, we can see that the BimlStudio recognized all objects defined within the scripts added, and the “Utilities” folder is empty.
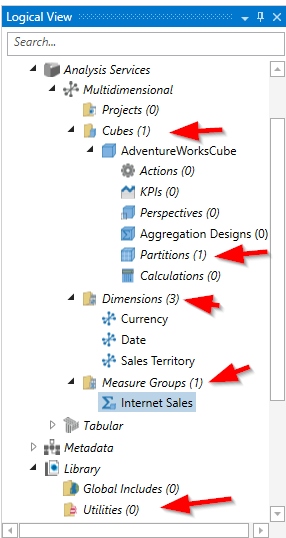
Figure 21 – SSAS OLAP cube objects recognized by BimlStudio
Building project
To build the project, first, we should precompile the scripts to check that they don’t contain errors. In the top menu, go to the “Build and Deploy” menu and click on “Precompile BimlScripts”.
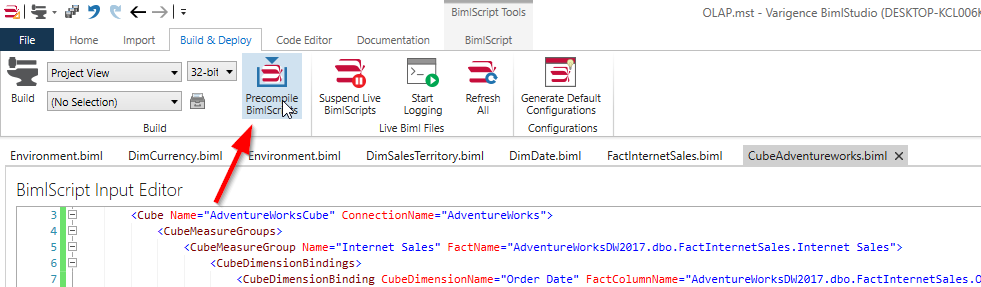
Figure 22 -Precompiling scripts
If no errors are found, click on the “Build” button to generate the SSAS OLAP cube objects and needed DDL SQL Statements.
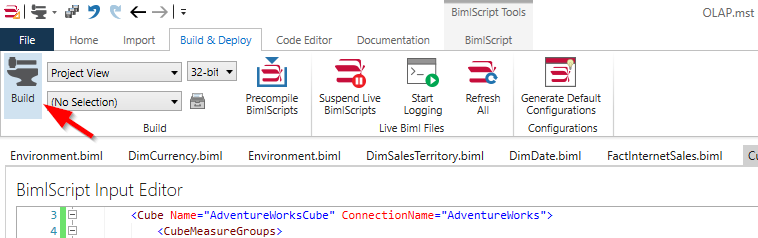
Figure 23 – Building project
Now, if we go to the project output directory, two folders were created:
- DDL: contains the SQL Statement to build the data source objects defined
- SSAS: contains the SSAS database objects generated
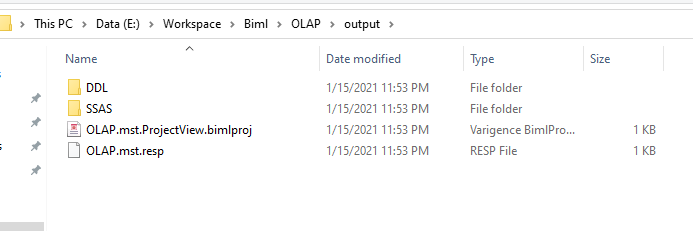
Figure 24 – Project output directory
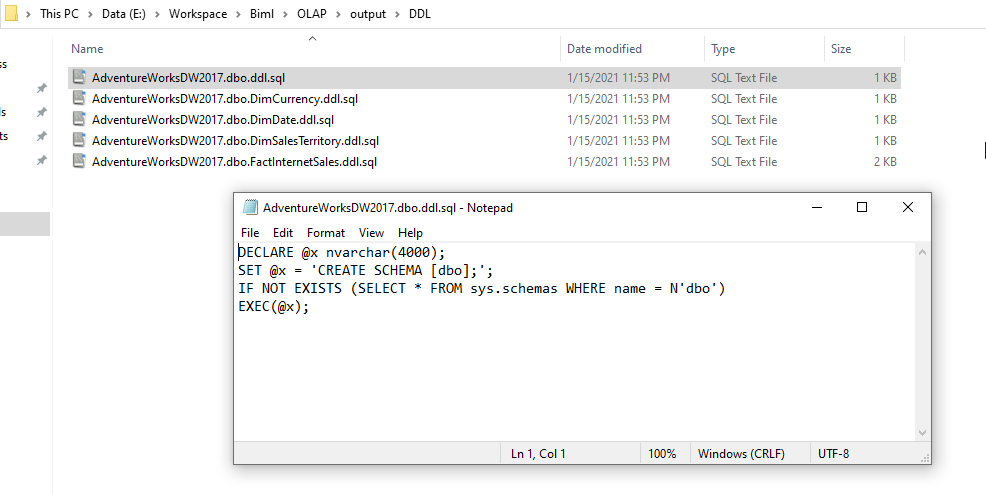
Figure 25 – DDL Statement generated
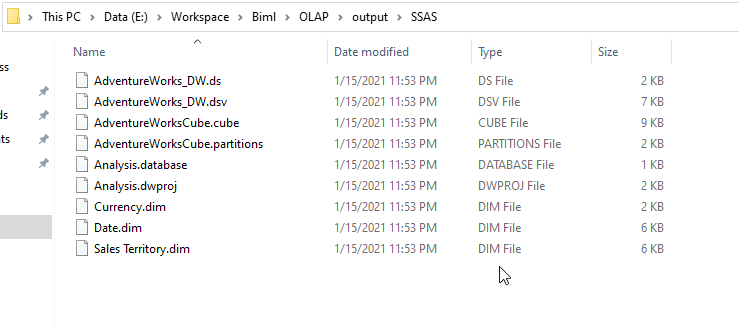
Figure 26 – SSAS databases created
To learn more on attaching the SSAS database, you can refer to the following official documentation: Attach and Detach Analysis Services Databases | Microsoft Docs.
Conclusion
This article explained how to install BimlStudio and how to use it to create an SSAS OLAP cube and the related database object in the data source. Using Visual Studio to create and deploy an SSAS database is more comfortable. As mentioned in the previous article in this series, Biml is more potent in automation, noting that there is another way to automate building SSAS database using C# and AMO libraries.
If you are interested in this topic, but you find that writing Biml script is hard, you can add the SSAS objects using the BimlStudio interface and check the Biml code generated.
Table of contents

Besides working with SQL Server, he worked with different data technologies such as NoSQL databases, Hadoop, Apache Spark. He is a MongoDB, Neo4j, and ArangoDB certified professional.
On the academic level, Hadi holds two master's degrees in computer science and business computing. Currently, he is a Ph.D. candidate in data science focusing on Big Data quality assessment techniques.
Hadi really enjoys learning new things everyday and sharing his knowledge. You can reach him on his personal website.
View all posts by Hadi Fadlallah
- An overview of SQL Server monitoring tools - December 12, 2023
- Different methods for monitoring MongoDB databases - June 14, 2023
- Learn SQL: Insert multiple rows commands - March 6, 2023