
Introduction
Working as a DBA, the simplest task requested from you is installing SQL Server. As a start you will check the server’s hardware and software specs to make sure that you can start the installation, checking which services will be installed and the security authentication type required. After this pre-installation plan, you will start the normal installation process.
After completing the installation, you need to apply specific configurations on the server to make sure that the server can host production databases and the users can connect to it successfully.
In this article, I will describe the common configurations that you should apply after the SQL Server installation.
Patch the SQL Server with the latest Service Pack and Updates
Once you finish the SQL Server installation successfully, you need to look for the latest Service Pack and Cumulative Update, which are available on the Microsoft Download website. In this way you can make sure that your server is patched with the latest version of Microsoft SQL Server and most of the old bugs are fixed. Reboot your SQL Server after each Service Pack or Cumulative Update installation.
Disable Unneeded Services
Deciding the SQL components to be installed is part of the pre-installation plan. But the requirements could be changed with time. So, it is better to check the SQL Server services installed on your server, and disable any installed service that will not be used. If you install a default SQL instance and will not install another named instance on your server, disable the Browser service. In order to apply these changes to the SQL Services, it is better to use the SQL Server Configuration Manager.

Disable SQL Server VSS Writer service if you are not using an application that backup SQL databases with the Windows Volume Shadow Copy mechanism. This can be done from the Services within the Control Panel.
Change the Service Start Mode
If you are using SQL Server Maintenance Plans, SQL Server Replication or any SQL Agent jobs, it is recommended to change the start mode of the SQL Agent and the SSIS services to Automatic, so on each server restart the service will start automatically. You can configure the start-up property of these services from the SQL Configuration Manager.
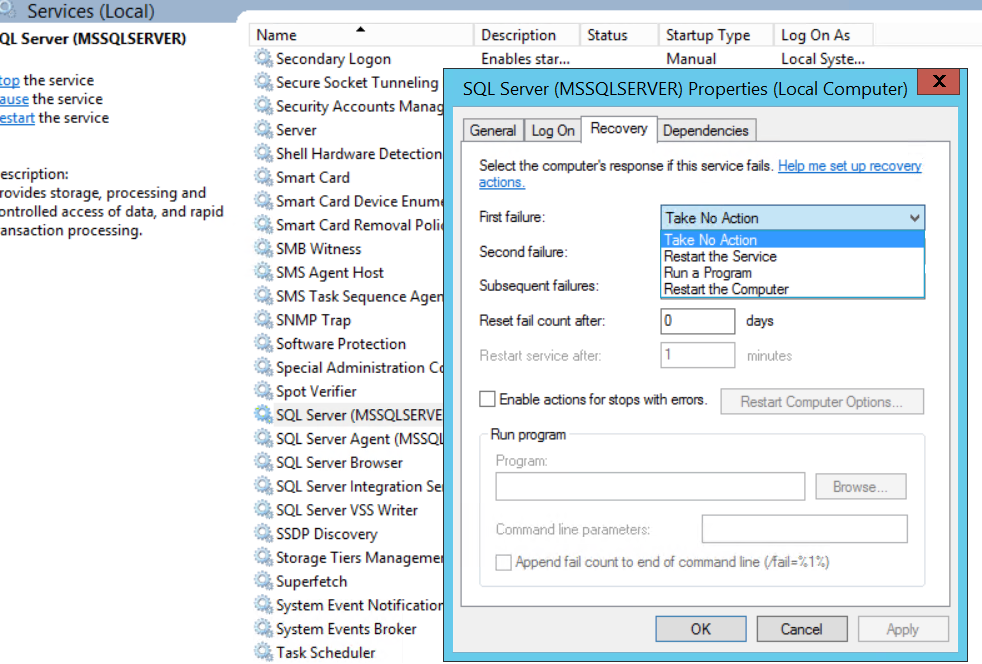
Specify the Service Recovery
The “Recovery” tab of the service property allows you to define how the services should behave if they fail. From the service property in the Services within the Control Panel, you can decide what action the service will take a specific action after the first, second or subsequent failure as below:
Also from the SQL Server Agent’s property page. You can ensure that SQL Service or SQL Server Agent service will restart automatically “if they stop unexpectedly”.
Change the SQL Default Directories
The location of SQL Server files is set during the SQL Server installation process, that can be provided or the SQL engine will use the default locations. After completing the installation, you still have the ability to change these default locations.
Following the best practice, it is better to isolate the user database’s data files (.mdf) from the transaction log files (.ldf) in a separate physical drives and folders. The same should be applied for the backup files and the TempDB files location.
You can configure the locations of the Data, Log and Backup from the Database Settings in the SQL Server Properties:
To make sure that the changes take effect, restart the SQL Service.
Set the Database Properties
The model system database can be defined as “template” for all newly created user databases. In order to set common properties across all new databases, set them in the model database.
Depending on the business needs of your company, you can decide the Recovery Model of your databases, such as using the SQL Mirroring, TRN backup or Always ON Availability groups. So, to make all new databases with Full or Simple Recovery Model, just change the model database with that Recovery Model. The same applied if you want to configure these databases with a specific Auto Growth configuration, which is, by default, 1 MB growth of the data files and ten percent of the log file size.
If you have an expectation about how big the data and log files will be and grow, disable the Auto Growth and fix the data and log files size of the model database. It is better to set the increments of the growth to be in megabytes rather than percentage.
TempDB Database Best Practices
The TempDB database is used to store the user objects, internal objects, and version stores.
As a best practice, place the TempDB database files in a separate disk drive in order to isolate its heavy workload from the other physical storages.
To change the path of the TempDB use the below T-SQL code, then restart the SQL service, so the files will be created on that new path:
|
1 2 3 4 5 6 7 8 9 10 |
USE master; GO ALTER DATABASE tempdb MODIFY FILE (NAME = tempdev, FILENAME = 'D:\MSSQLData\tempdb.mdf'); GO ALTER DATABASE tempdb MODIFY FILE (NAME = templog, FILENAME = 'D:\MSSQLData\templog.ldf'); GO |
The number of allocated data files in the TempDB database depends on the logical or physical CPUs number on your server, which can be viewed from Windows Task Manager’s Performance tab. Having four CPUs in your physical server, you should allocate four data files for your TempDB.
Also, the TempDB data files should have the same size and growth as it used in a proportional fill mechanism. Having two data files in your database, one 2 GB and the other one is 4 GB, Each set of data written to the first 2 GB file, two sets will be written in the 4GB file.
Applying these best practices, you can make sure that the CPU load is distributed across all TempDB data files.
Restart the SQL Server service to make sure that these changes will take effect.
Set the Minimum and Maximum Server Memory
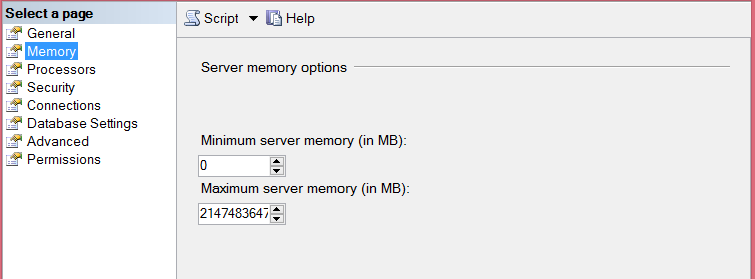
The minimum and maximum server memory is used to configure the amount of memory, in megabytes to establish upper and lower limits of memory used by the buffer pool on the Microsoft SQL Server. SQL Server Engine starts with only the memory required to initialize. As the workload increases, it keeps acquiring the memory required to support the workload, and never acquires more than the level specified in max server memory. The default setting for min server memory is 0, and the default setting for max server memory is 2147483647 MB.
Before you set the maximum server memory for SQL Server, subtract the memory required for the OS and any other instances of SQL Server from the total physical memory.
You can configure these values from the Memory tab of the Server Properties dialog box below:
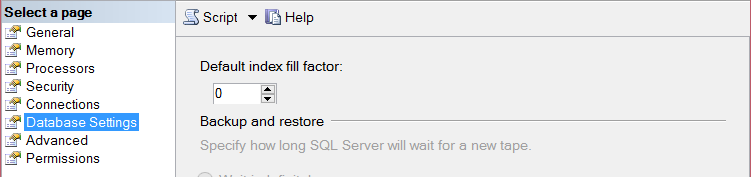
Set the Default Index Fill Factor
The fill-factor value determines the percentage of space on each leaf-level 8K data page to be filled with data when an index is created or rebuilt, reserving the rest on each page as free space for future growth.
In other words, if you set the fill-factor value to 90, this means that 10 percent of each leaf-level page will be left empty, providing space for index expansion as data is added to the underlying table in order to save page splitting in indexes in the future.
The fill-factor value is a percentage from 1 to 100, and the default is 0, same as 100, which means that the leaf-level pages are totally filled. If your system has lots of OLTP transactions, then a Fill Factor between 70 and 90 provides better results.
To configure fill factor value, browse the Database Settings of the Server Properties dialog box below:
Configure Processor Max Degree of parallelism
The max degree of parallelism specifies the number of processors used in parallel plan execution.
To enable the maximum degree of parallelism, set this option to 0, which is the default value. To disable the parallel plan generation, set max degree of parallelism to 1. Set the value to a number greater than 1 to restrict the maximum number of processors used by a single query execution.
You can configure the maximum degree of parallelism value from the Advanced tab of the Server Properties dialog box below:
Configure Remote Query Timeout
The SQL Server remote query is an outgoing connection initiated by the Database Engine. The remote query timeout is used to decide how long a remote query will take before SQL Server times out. The default value is 600 seconds, allowing a 10-minute wait. Setting the value to 0 will disable the time-out, so the query will wait until it is canceled. This is not recommended for production servers.
This value can be modified from the Connections tab of the Server Properties dialog box below:
Configure the Authentication Mode and C2 Audit Trace
There are two possible authentication modes in SQL Server: Windows Authentication mode and Mixed mode.
The Windows Authentication mode allows a user to connect through a Microsoft Windows account only. Mixed Mode allows the users to connect to an instance of SQL Server using either Windows Authentication or SQL Server Authentication.
The C2 audit is used to capture all the user activities such as SQL commands, failed and successful attempts of logins, logouts and the server events such as shutdown or restart. C2 audit data are saved in a file in the default data directory of the SQL instance.
The changes can be done from the Connections tab of the Server Properties dialog box below:
You need to restart the SQL service in order to make sure that the changes will take effect.
Configure SQL Server Network
SQL Server Network Configuration defines the communication between the SQL Server and the other servers and machines.
SQL Server Network Configuration node of the SQL Server Configuration Manager is used to enable or disable the network protocols used by SQL Server after installation. These protocols are used for the client’s applications incoming traffic.
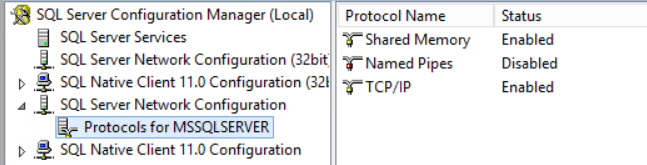
The default SQL Server instance listens on TCP port 1433. Named SQL instances are configured for dynamic ports by selecting an available port when the SQL Server service is started. This means that the port will be changed each time SQL Server started. The SQL Server Browser service helps the clients in identifying the port when they connect.
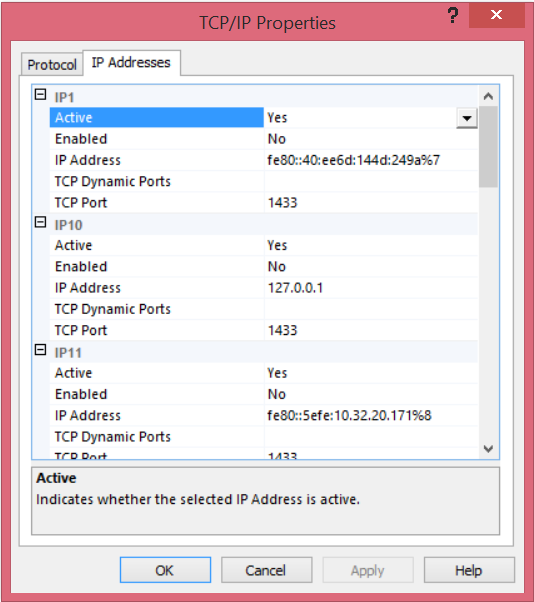
Having the windows firewall enabled, you should open the port used by SQL Server. So it is recommended to configure the SQL Server to use a specific port for each SQL instance installed on your server from the TCP/IP Properties dialog box below:
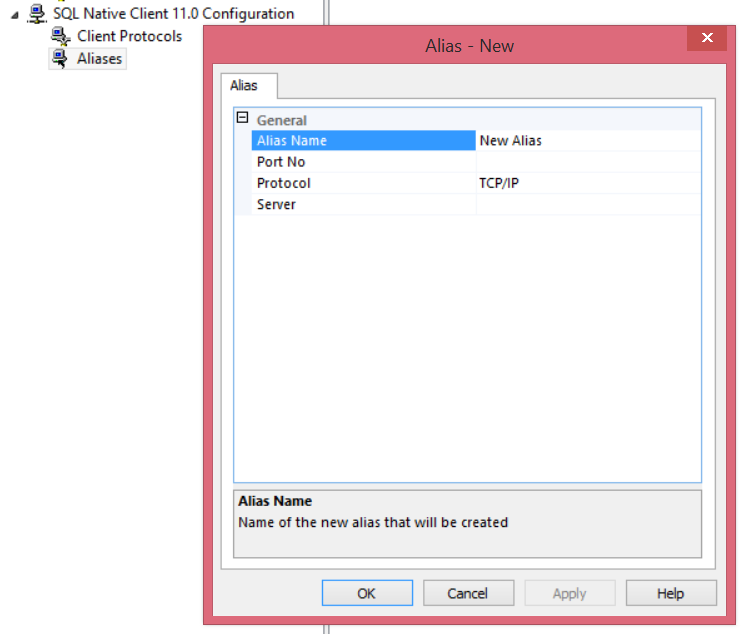
Many older applications require server aliases to connect to a named instance. The alias is just an alternative name of the server with the TCP port that can be used to make a connection. You can create the server alias as below:
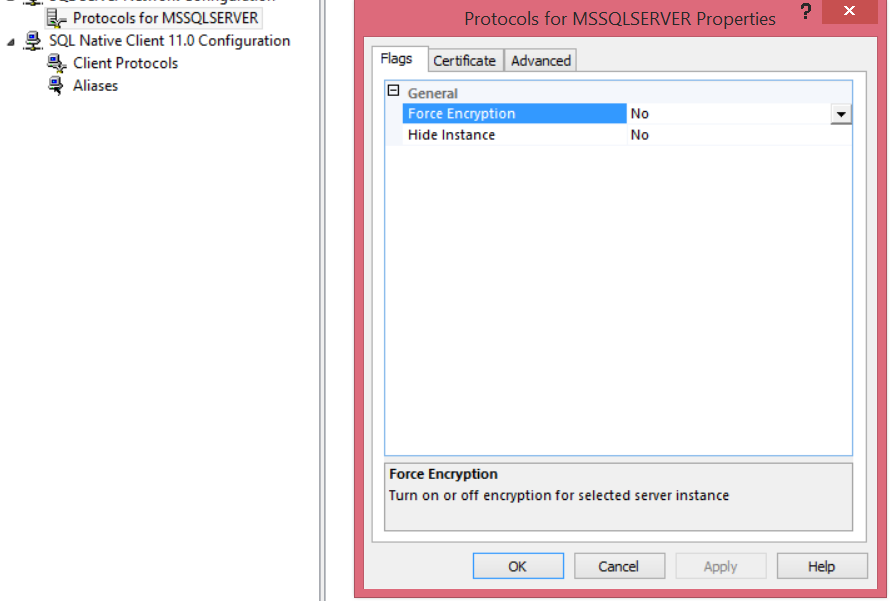
The SQL Server instance can be configured to force encryption when communicating with client applications.
In order to encrypt the connections, a certificate should be provided to the SQL Server, otherwise, SQL Server will generate a self-signed certificate once the instance is started.
You can enable the Force Encryption from the Protocols Properties dialog box below:
Most of the Server Properties changes require restarting the service.
Configure SQL Security
As a first step of the security check, make sure that there are few members in the sysadmin server role as possible.
The SA user is a SQL login administrator account that can be used if Mixed mode Authentication is enabled on SQL Server. The SA login is hardcoded to be a member of the sysadmin server role that you can’t revoke its permissions. The SA password should be chosen to be a strong password. Rename or disable the SA account if your business allows that.
The guest user is a database user that is used to provide anonymous access to any database. It allows any login that is not explicitly mapped in the database to a user, in order to connect to the database as a guest. This kind of access is not recommended and disabled by default.
Remove the BUILTIN\Administrators group from the SQL Server Logins. It is removed in SQL Server 2008 and later.
Configure SQL Error Logs
The SQL Server error log is a great place where you can find information about what is happening on your database server. It contains all the information related to the failures or the errors that has occurred since SQL Server was last restarted or since the last time you have recycled the error logs.
By default, there are 7 error log files, 6 archives and the current one. Every time the SQL service starts, the system begins a new log file with name ERRORLOG, the previous log file before restart becomes archived as ERRORLOG.1, and so on. By default, the error logs are located at "Program Files\Microsoft SQL Server\MSSQL.n\MSSQL\LOG " path.
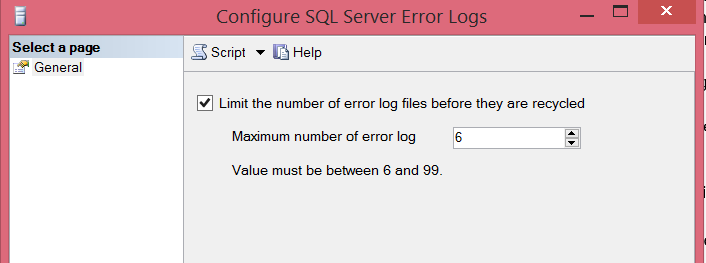
It is a best practice to increase the number of SQL Server Error Logs from the default value, because the error logs may contain critical information about your database server. When a new error log is created the oldest archive gets removed and that data is then lost forever.
You can override the default value up to 99 files from the Configure SQL Server Error Logs dialog box below:
Another type of logs kept in SQL server is the Agent error log. The latest Agent error log is named SQLAGENT.OUT. SQL Server maintains up to nine SQL Server Agent error logs. But here you cannot use a dialogue box to specify the number of archived Agent error logs to keep.
Configure Operating System
OS level changes can be performed on the server to give extra power to SQL.
If the application that will connect to your SQL server is going to participate in distributed transactions through linked servers, make sure that Network DTC is enabled. This could be done from the Computers node of the Component Services in the Administrative Tools.
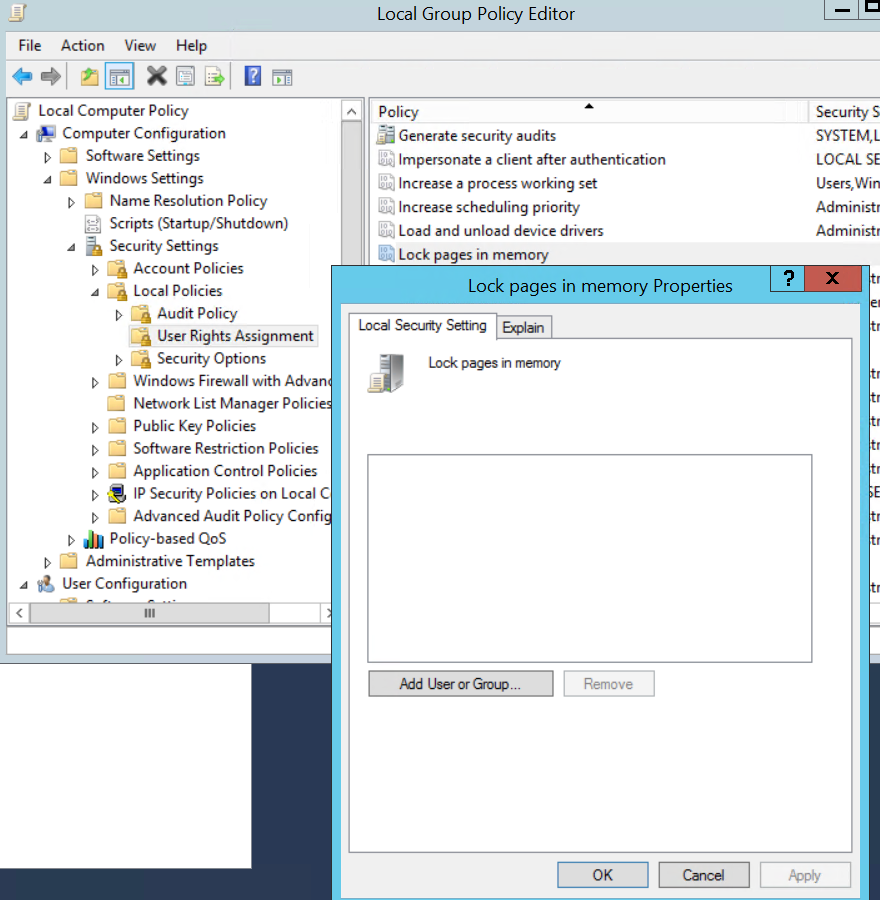
You can also give your SQL Service account the right to “Lock pages in memory”. So that Windows will not swap out SQL pages from the memory on to the paging file on disk.
To do that, open the Local Group Policy Editor by typing gpedit.msc into the Run box, browsing the User Rights Assignment to open the Lock Page in Memory dialog box and add the SQL Service account to it as below:
Set up Maintenance Plans
There are a variety of tasks that can be scheduled as an automated maintenance plan in order to optimize your SQL Server performance and make the life easier for the DBA.
These tasks include Check database integrity, Shrink database, Reorganize index, Rebuild index, Update statistics and Full, Differential and Transaction Log database backup.
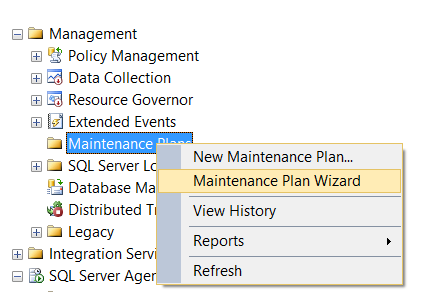
You can create new Maintenance Plans from the SQL Server Management node, using the Maintenance Plan Wizard below, going through simple creation steps.
See more
Consider these free tools for SQL Server that improve database developer productivity.
Useful Links:
Microsoft Download Center
sp_configure


He is a Microsoft Certified Solution Expert in Data Management and Analytics, Microsoft Certified Solution Associate in SQL Database Administration and Development, Azure Developer Associate and Microsoft Certified Trainer.
Also, he is contributing with his SQL tips in many blogs.
View all posts by Ahmad Yaseen
- Azure Data Factory Interview Questions and Answers - February 11, 2021
- How to monitor Azure Data Factory - January 15, 2021
- Using Source Control in Azure Data Factory - January 12, 2021