
Introduction
Sometimes, we need to use the command line to copy tables using the command line. In this new chapter, we will use the BCP command to copy tables from a local machine to the SQL Server in Azure. The BCP is a very fast bulk copy tools used for this purpose.
We will also learn how to create a Linked Server in our local machine to Azure. The Linked Servers are very powerful features of SQL Server to connect SQL Server to different Data Sources like Excel, MS Access, Oracle, MySQL, and several databases. In this example, we will connect to SQL Azure.
Requirements
- An Azure subscription.
- A VM Machine in Azure with SQL Server already installed (check my article about Azure VMs).
- The AdventureWorks database installed in the source and destination columns (you can create your own tables if you prefer).
- A local machine with Windows installed.
- A SQL Server Management Studio (SSMS) connected to Azure (check our article related here).
Getting started
In order to start, in the local machine open the command prompt.

Figure 1. The cmdIn the command prompt, run the following bcp command:
bcp adventureworks2014.humanresources.department out c:\s
cripts\department.dat -S localhost -T -n –q- The command copies the data of the table HumanResources.Department of the Adventureworks2014 database to the file department.dat. The –S parameter is the Server name, the –T means to use a Trusted connection (Windows authentication). The –n parameter is used to perform the bulk copy operation using the native datatypes. This option is very important to increase the copy with a good performance. The –q parameter means to Set Quoter identifiers which means to use a qualified name (database name, owner and table name).
If Everything is fine, the command will display a message similar to this one:
Figure 2. Copying rows to the dat fileNow we need an empty table in the Azure machine. In the Azure machine, go to the SSMS, AdventureWorks database, select the HumanResources.Department table and select the option
Script Table as ➜ Create To ➜ New Query Window:
Figure 3. Generating T-SQL code to create a new table- This option will generate the T-SQL code of the table.
Now modify the code like this (or copy this code to create a new table):
1234567891011121314CREATE TABLE [HumanResources].[Department2]([DepartmentID] [smallint] IDENTITY(1,1) NOT NULL,[Name] [dbo].[Name] NOT NULL,[GroupName] [dbo].[Name] NOT NULL,[ModifiedDate] [datetime] NOT NULL CONSTRAINT [DF_Department_ModifiedDate2] DEFAULT (getdate()),CONSTRAINT [PK_Department_DepartmentID2] PRIMARY KEY CLUSTERED([DepartmentID] ASC)WITH (PAD_INDEX = OFF, STATISTICS_NORECOMPUTE = OFF, IGNORE_DUP_KEY = OFF, ALLOW_ROW_LOCKS = ON, ALLOW_PAGE_LOCKS = ON) ON [PRIMARY]) ON [PRIMARY]GOThe T-SQL code used creates an empty table named department2 which will be used to upload data from the local machine.
Now run the T-SQL code of the step 8 to create the table.
Figure 4. The table createdFinally, run the following command to import data in Azure:
bcp adventureworks2014.humanresources.department2 in c:\ cripts\department.dat -n -U daniel -S tcp:olapsqldan.cloudapp.net -P Myp@wd1
We use the in to import data and we specify the .dat file created in the step 2. The –n is parameter was explanined in step 3. The –U parameter specifies the SQL Azure User Name. The –P parameter is used to set the SQL Azure password. Finally, the –S specifies the Azure Server Name which can be displayed in the Azure Portal.
The message displayed by the command will be similar to this one:
Figure 5. Copying rows to Azure
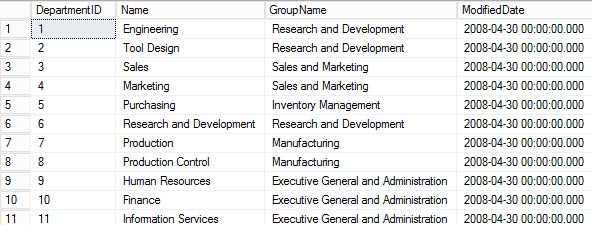
If everything is OK, you will be able to see data in your table in your Azure machine.
Figure 6. The data copied to Azure.In order to start, connect and open the SSMS.
Figure 7. The SSMSGo to Server Objects ➜ Linked Servers and right click on it and select the New Linked Server option.
Figure 8. The linked Server- In the general page, in the Linked server text box, write the DNS name of the SQL Azure. In the Server type, select SQL Server.
Figure 9. The SQL Azure created as a Linked Server. Now we need to specify the Security credentials. Go to the Security page and in the Local Login, select a SQL Server local user. In Remote user specify the user name used to login to SQL Azure. Finally, in Remote Password specify the password of the remote user.
Figure 10. Linked Server Security Settings.
If everything is fine, you will be able to see the Databases and tables that belong to the SQL Azure in the Catalogs folder.
Figure 11. The Linked Server just created.Alternately, you can use the T-SQL commands to create the Linked Server:
123EXEC master.dbo.sp_addlinkedserver @server = N'OLAPSQLDAN.CLOUDAPP.NET', @srvproduct=N'SQL Server'The system Procedure addlinkedserver is used to add the server. The Server name is the name of the Azure SQL Server. The product is SQL Server.
The next part is the security.
1234EXEC master.dbo.sp_addlinkedsrvlogin@rmtsrvname=N'OLAPSQLDAN.CLOUDAPP.NET',@useself=N'False',@locallogin=N'PALADIN\Administrator',@rmtuser=N'daniel',@rmtpassword='########'The system procedure sp_addlinkedsrvlogin is used to add logins to connect to Azure. The @rmtsrvname contains the name of the remote Server. In this case, the Azure machine. The @useself parameter is to use the current account. The @locallogin parameter specifies the local login and @rmtuser and @rmtpasswords are used to specify the Azure user name and azure password respectably.
In order to test the Linked Server, you can query the Linked Server using the OPENQUERY command:
123SELECT * FROM OPENQUERY([OLAPSQLDAN.CLOUDAPP.NET], 'SELECT * FROM Adventureworks2014.[HumanResources].[Department]')You will be able to see the data in your local machine from your SQL Azure table.
Figure 12. The Linked Server query results
You can simple use the full name instead of using the OPENQUERY:
1234SELECT * FROM[OLAPSQLDAN.CLOUDAPP.NET].Adventureworks2014.[HumanResources].[Department]Now, you can insert, delete data using the full name.
- First, we learned how to copy data using the command line and specifically the BCP command from the local SQL Server to Azure.
- Secondly, we learned how to connect our local database to Azure using the Linked Servers.
- PostgreSQL tutorial to create a user - November 12, 2023
- PostgreSQL Tutorial for beginners - April 6, 2023
- PSQL stored procedures overview and examples - February 14, 2023

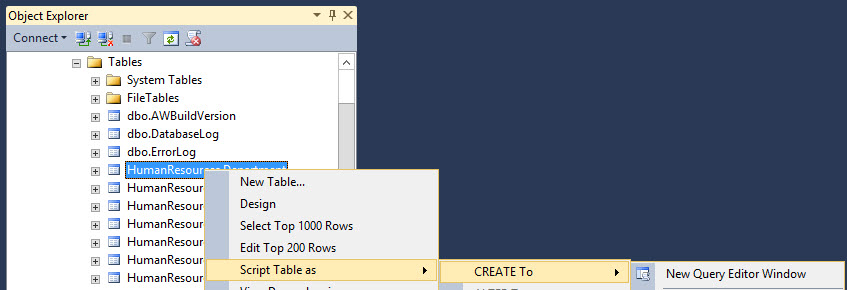
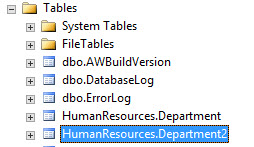
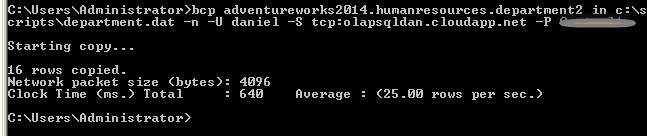 Figure 5. Copying rows to Azure
As you can see, copying data from your local machine to Azure is a straightforward process. Now let’s just to another topic. The Linked Servers.
Linked Server to Azure
Another method to connect and copy data from your local machine to Azure is using Linked Servers.
The Linked Servers in SQL Server let you connect your SQL Database with other Data Bases like Access, Oracle, MySQL, etc.
In this new example, we are going to connect and create a Linked Server to a SQL Azure machine.
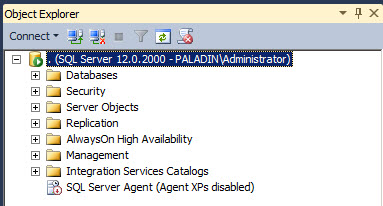


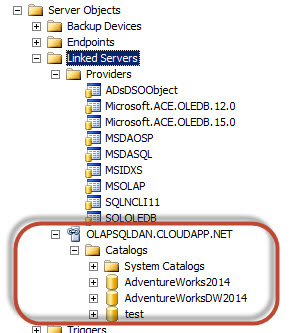
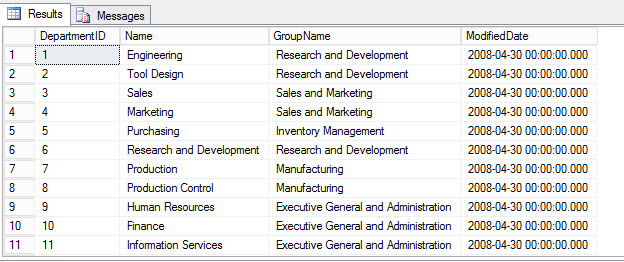 Figure 12. The Linked Server query results
Conclusion
In this chapter, we learned two things:

He has worked for the government, oil companies, web sites, magazines and universities around the world. Daniel also regularly speaks at SQL Servers conferences and blogs. He writes SQL Server training materials for certification exams.
He also helps with translating SQLShack articles to Spanish
View all posts by Daniel Calbimonte